


Pierogi With Cabbage
Course – Lunch, Dinner
Cuisine – Polish
Keyword – Pierogis
Prep Time – 2 hours
Cook Time – 30 minutes
Serving – 6 Servings
Skill level – Moderate
Author – Alina Zeranska, 1968 Let’s Make Pierogis!
Pierogis are more to me than just a tasty dumpling – they’re a time capsule, transporting me to my childhood.
Am I Polish? No, not according to my 23&Me panel, but there is something so magical about creamy mashed potatoes, herbs, onions and cheese inside a freshly made dumpling. They’re truly one of the most craveable foods I can think of!
So, after finding the vintage cookbook The Art of Polish Cooking, by Alina Zeranksa, I knew what my mission was, but I was surprised to find this variation on the Pierogi!
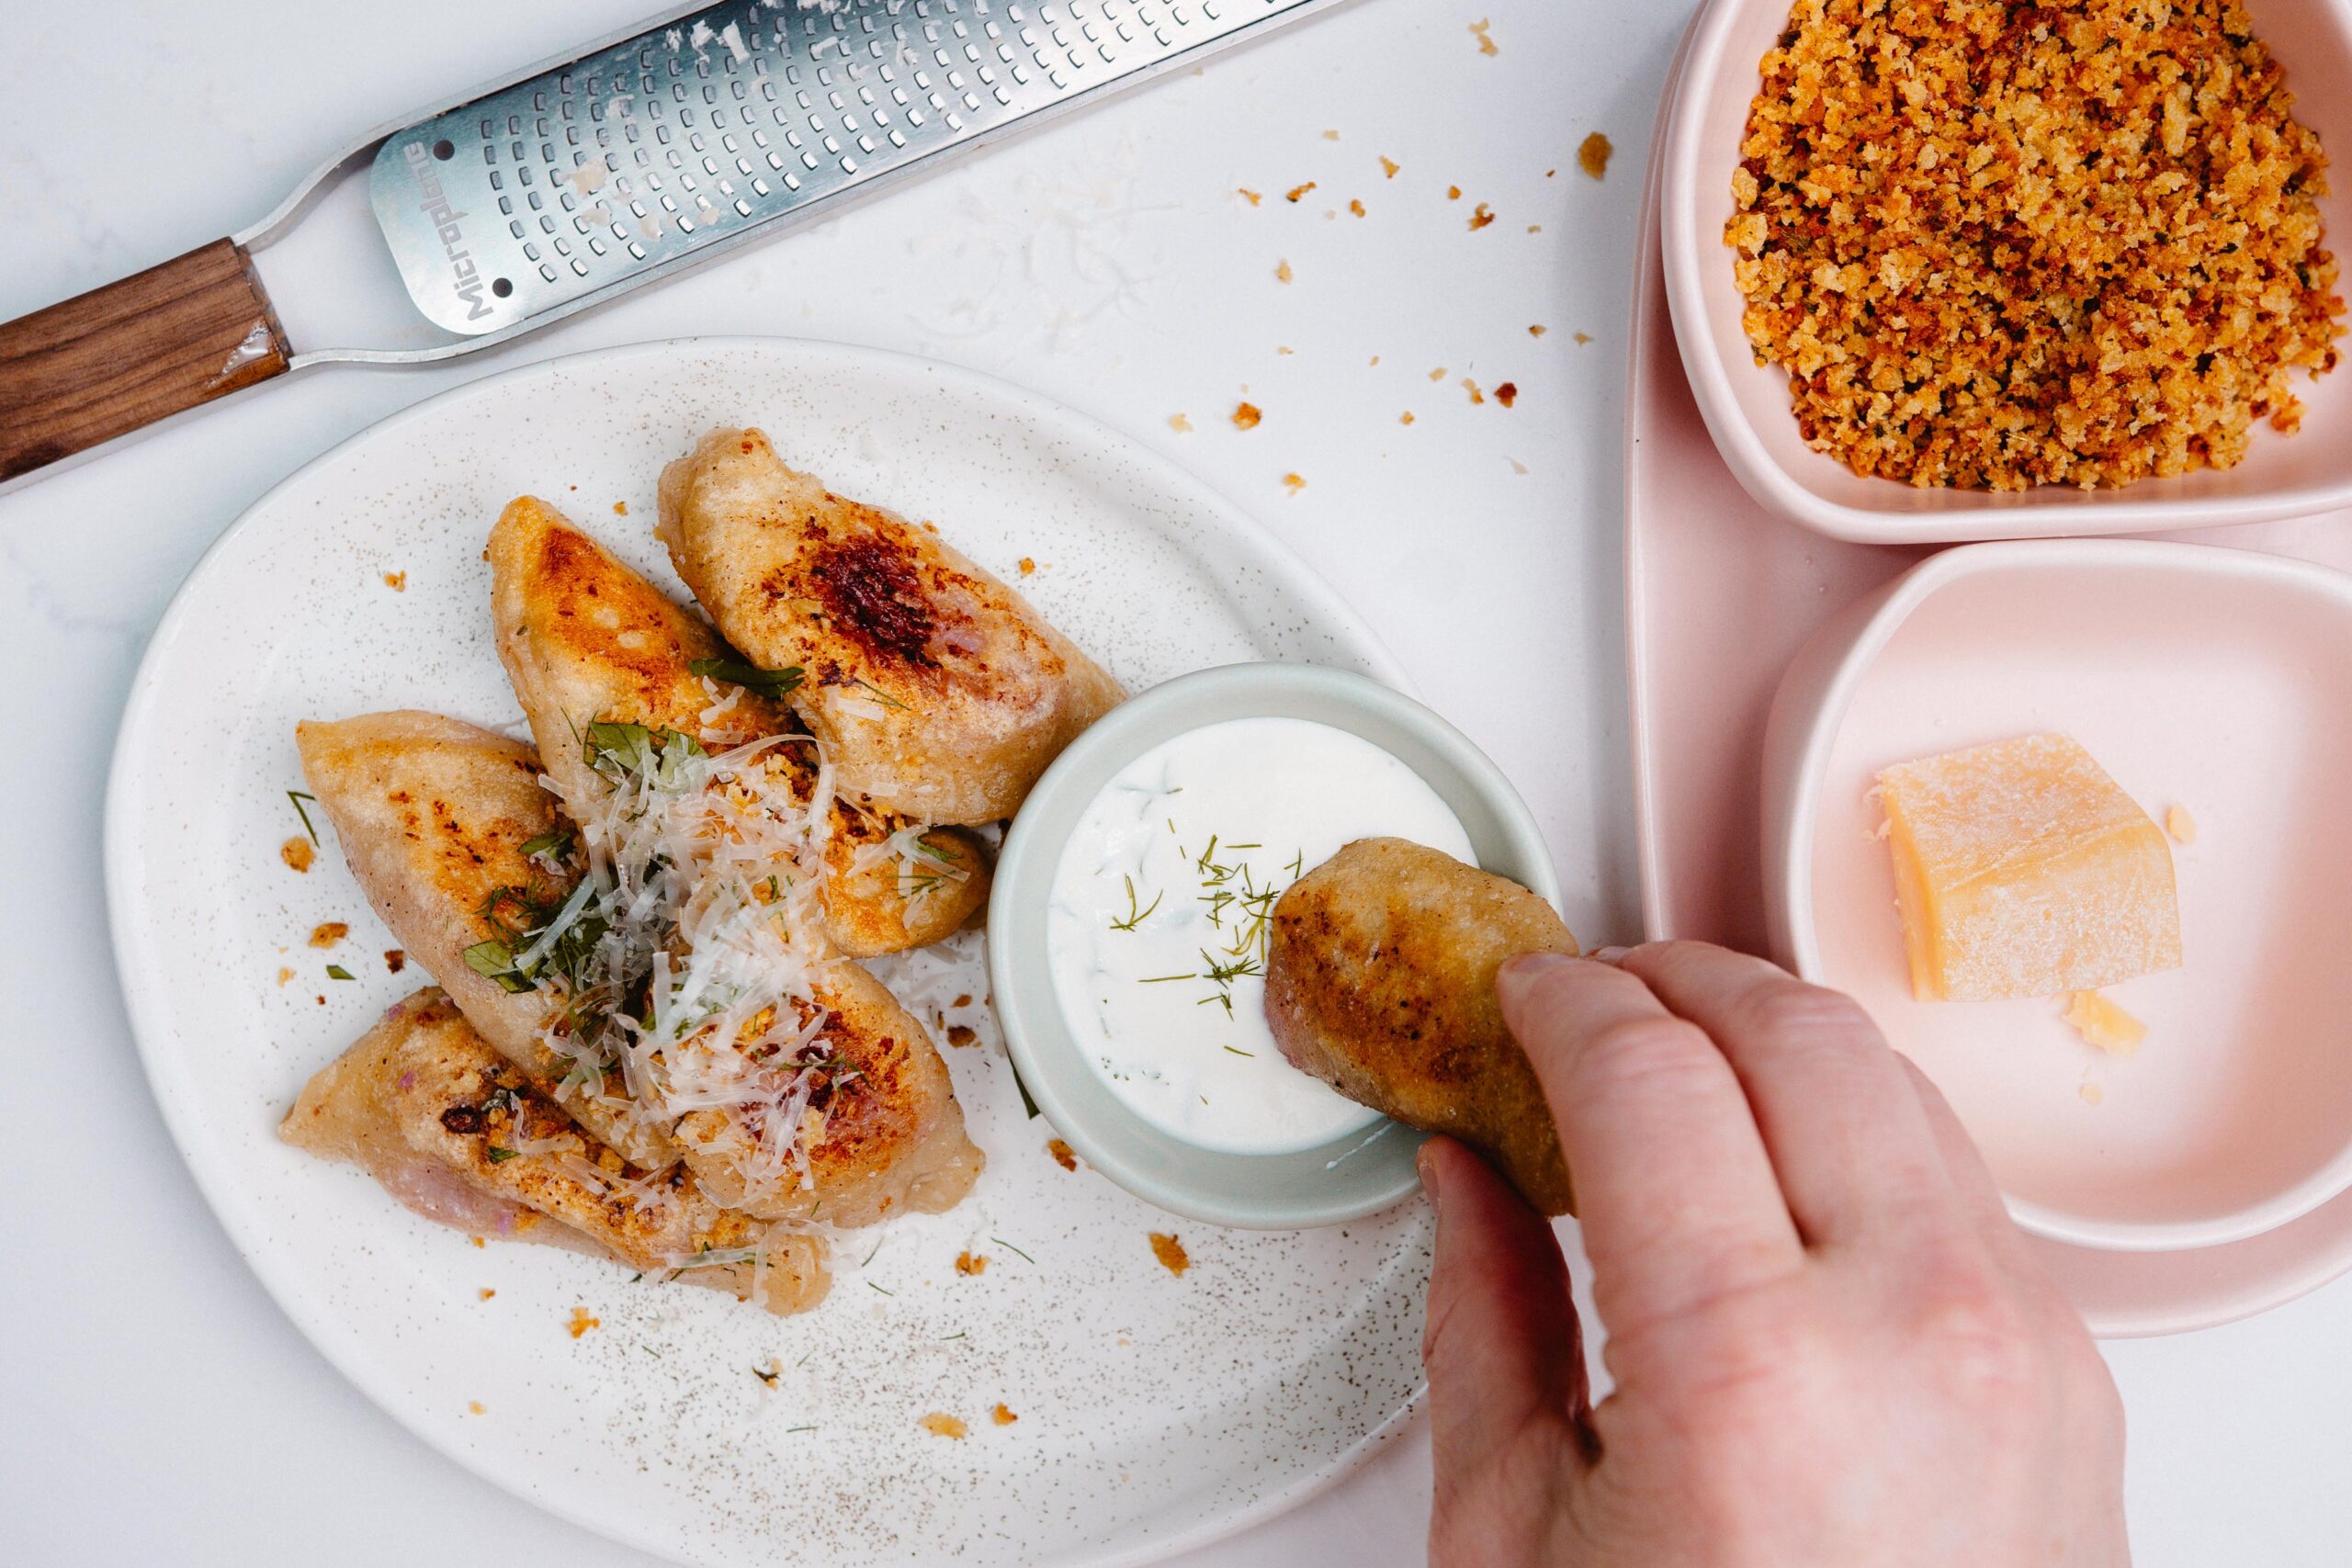
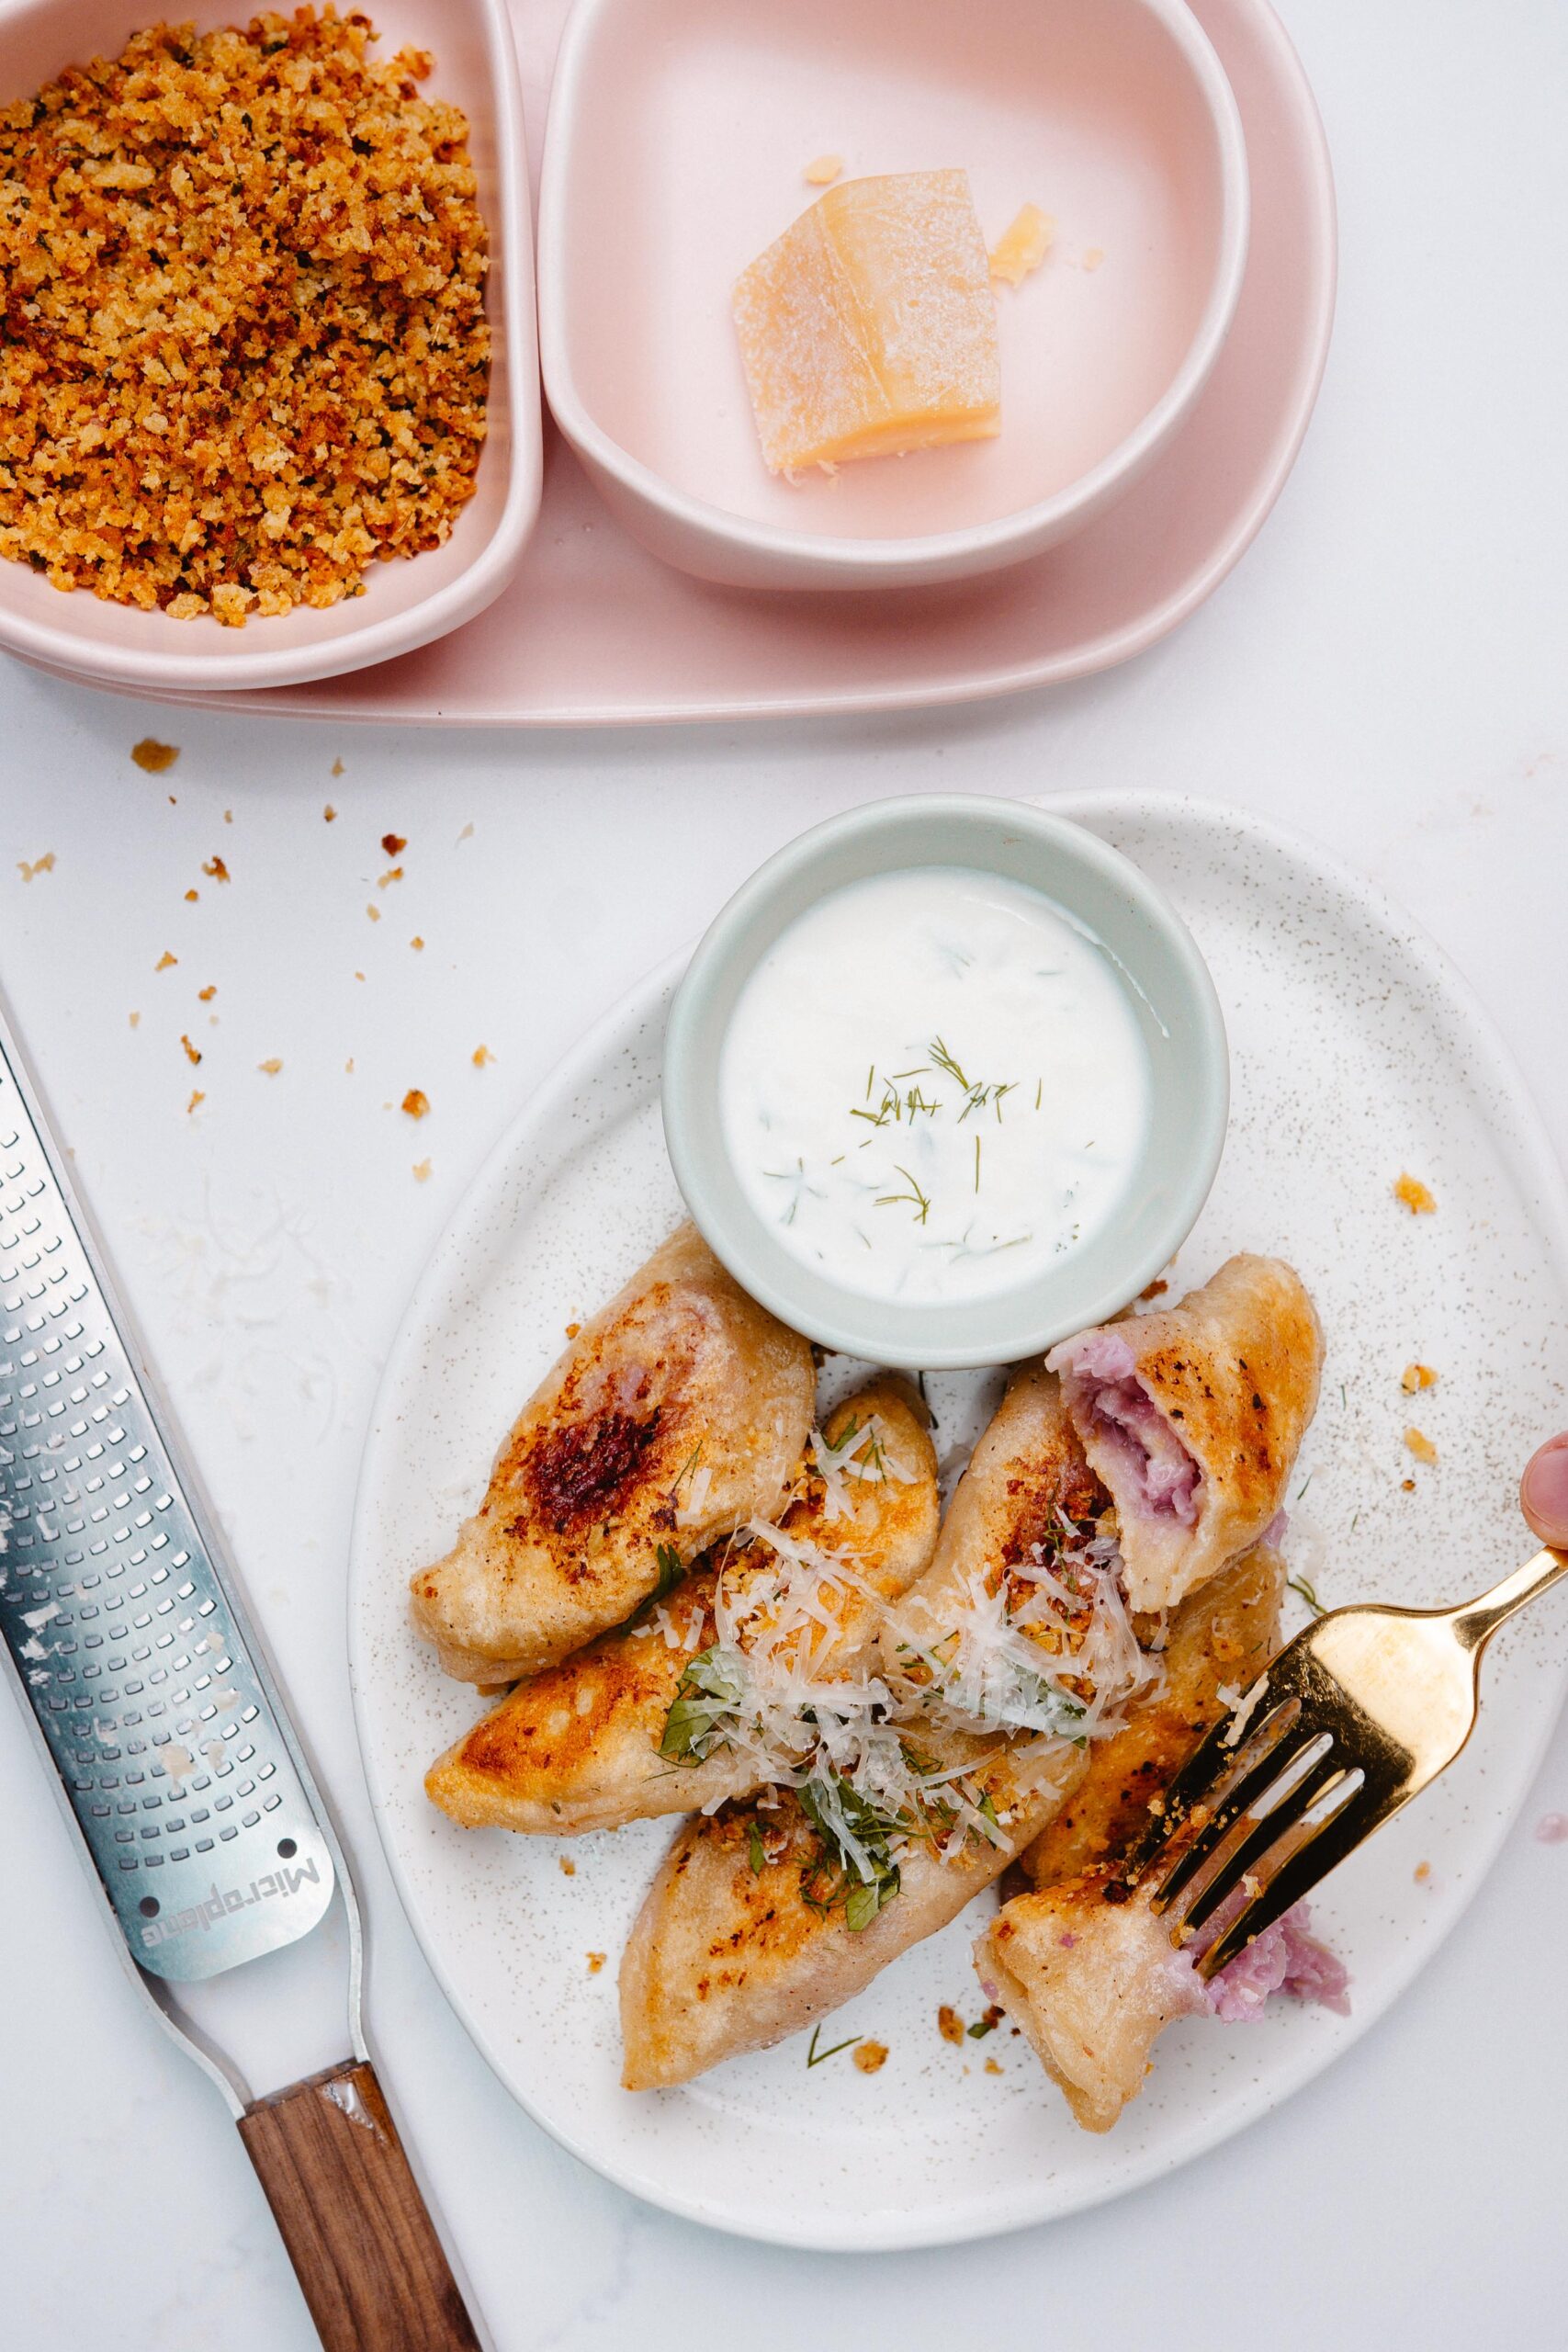
Introducing (to me at least), the Pierogi, stuffed with red cabbage and cottage cheese! This tender, fluffy and incredibly flavorful dumpling might be even better than a potato Pierogi, with the brightness of the cottage cheese and the perfectly cooked and processed head of red cabbage for a texture I loved. It’s served with toasted bread crumbs, which offered this buttery crunch that I was addicted to, and for good measure, I also made a dill sour cream sauce because a Classic never goes out of style.
Let’s get into it!
What are Pierogis?
- Generally, they’re dumplings made from unleavened dough, stuffed with savory mashed potatoes, meats or cheeses. Pierogis are commonly found in Eastern Europe, but the dumpling is a universal food style.
Can I substitute a different cheese for my Pierogis?
- Absolutely! Get creative and swap any ingredients you’d like. A favorite of mine are filled with mashed potatoes, sour cream, chives and cheddar!
What kind of flour do I use for my Pierogis?
- Because you want to roll your dough thinly and also have the strongest gluten network available, I recommend a 50/50 split of All Purpose Flour and Bread Flour. The bread flour has a higher gluten percentage, allowing for the dough to be slightly stronger and less prone to tearing, while assembling the dumplings.
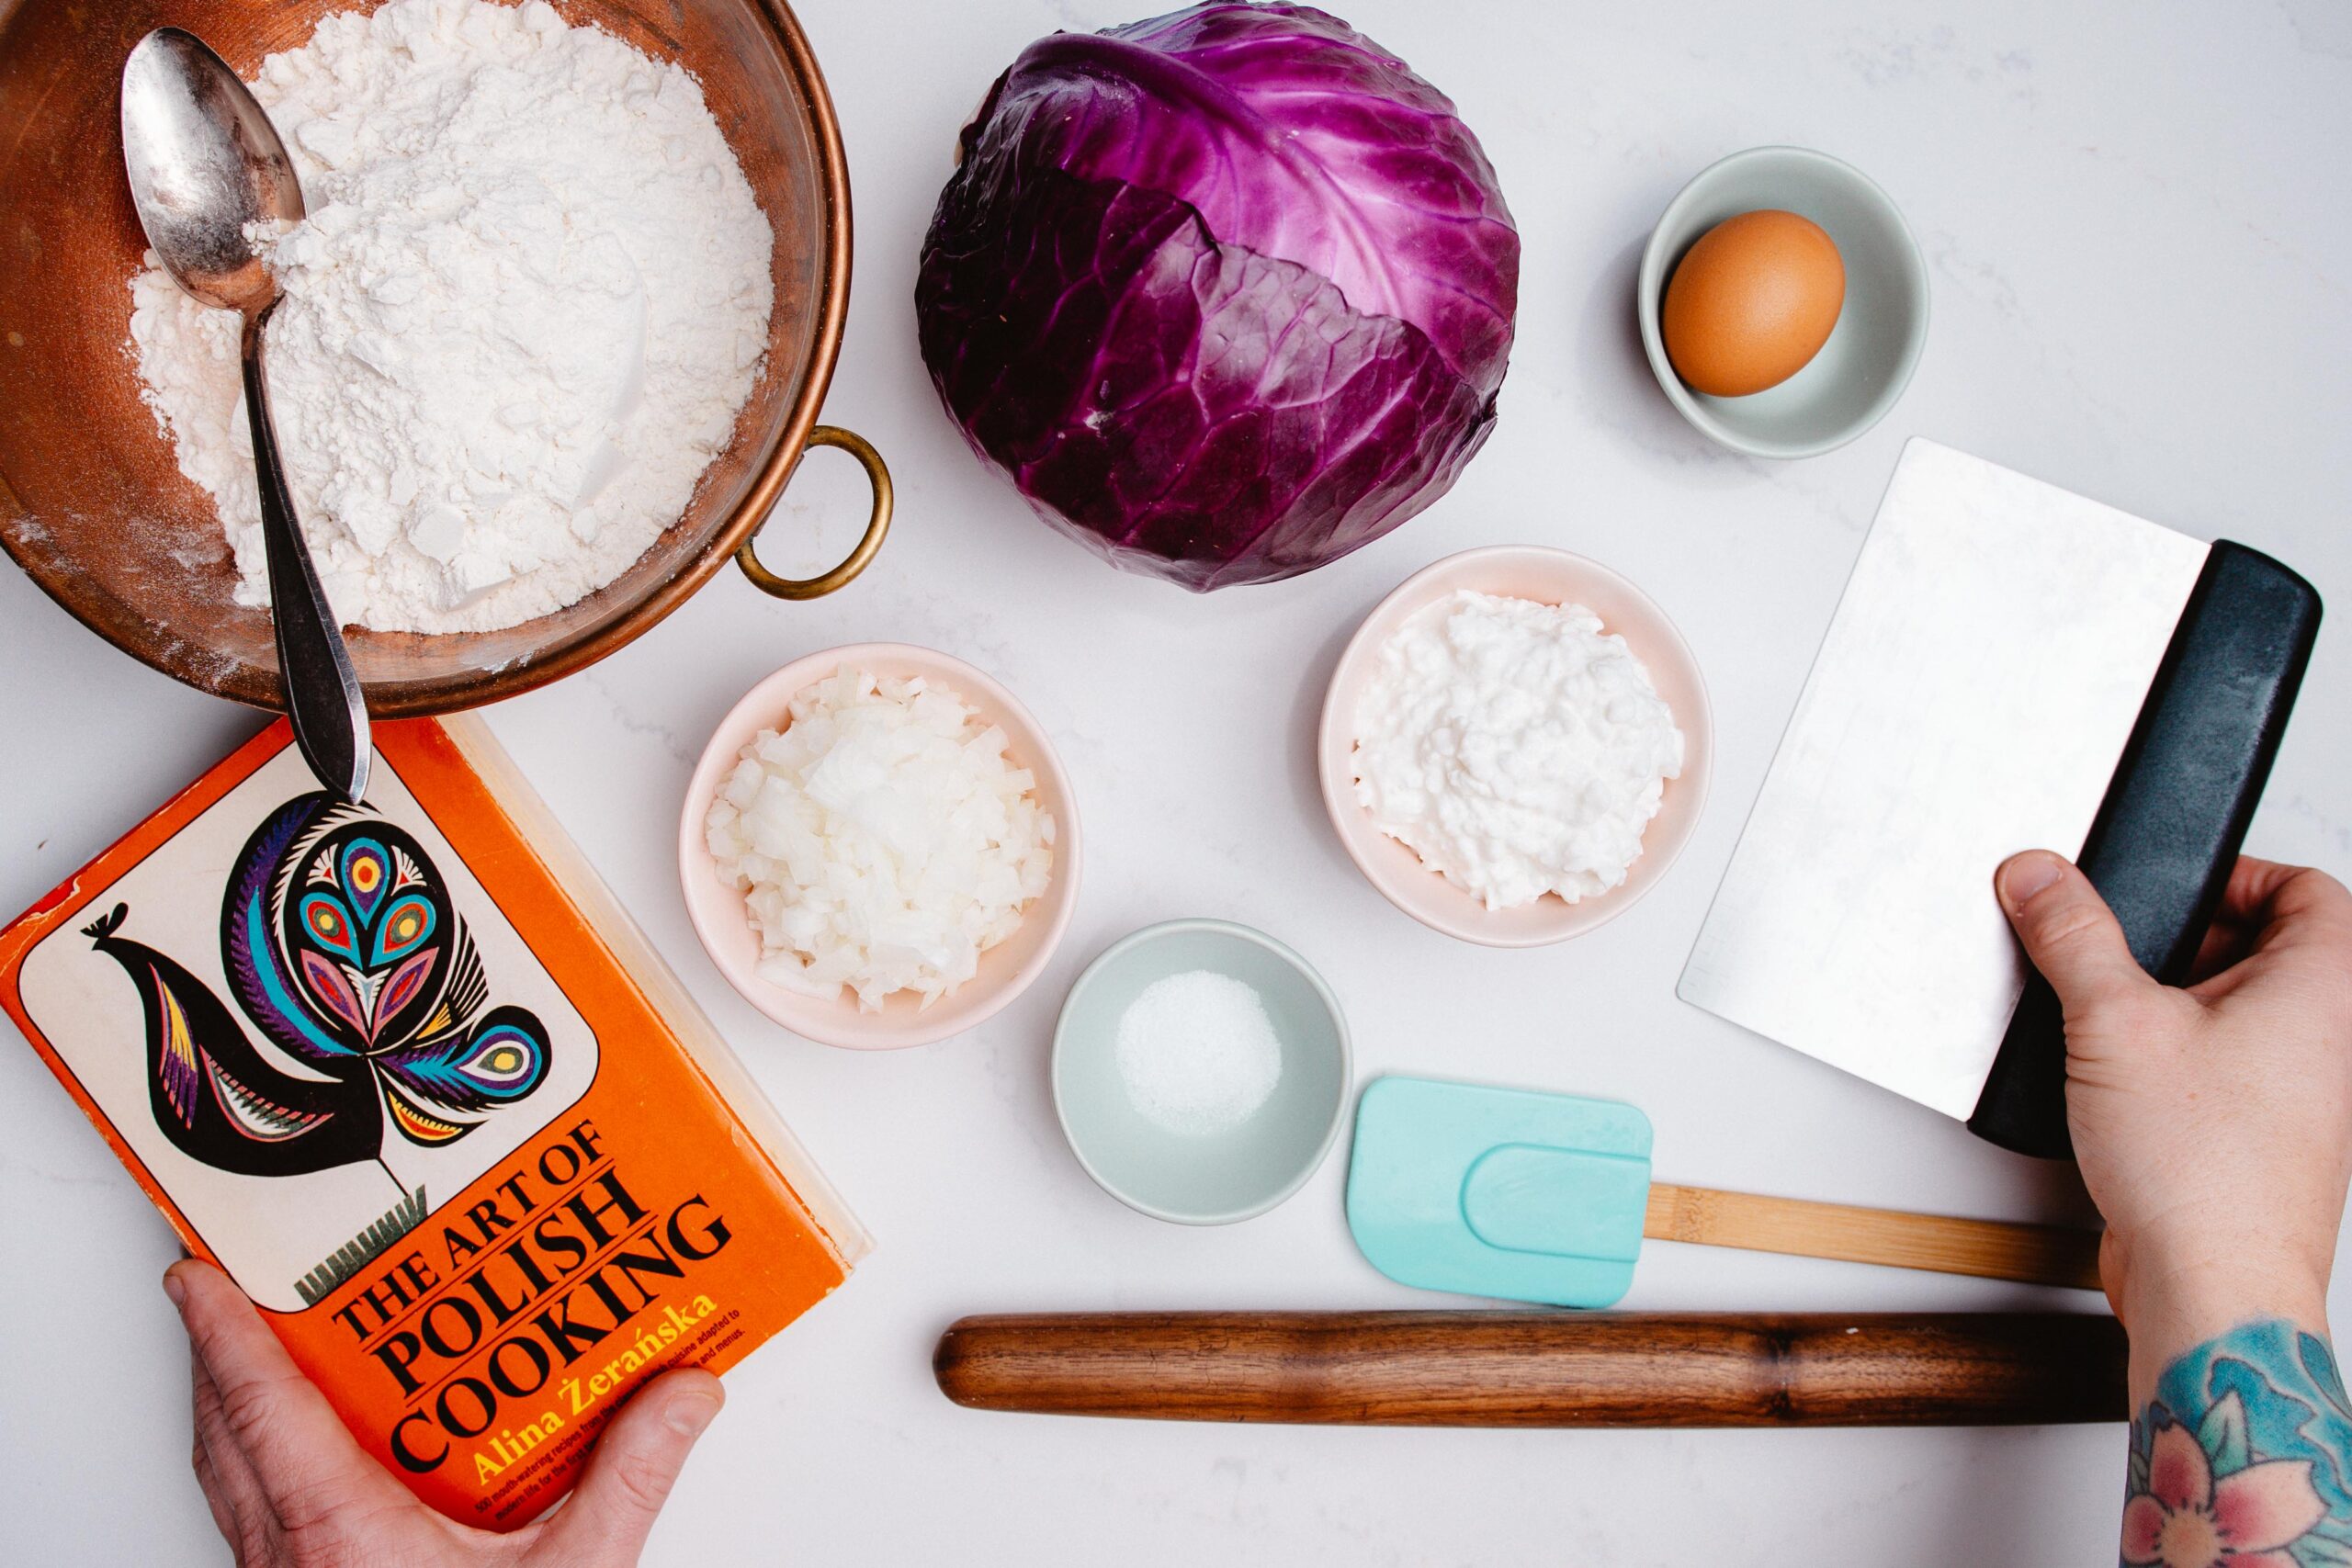
INGREDIENTS
Dough
- 1 Egg
- 1.5C Bread Flour
- 2C All Purpose Flour
- .5C water
- Salt.
Stuffing
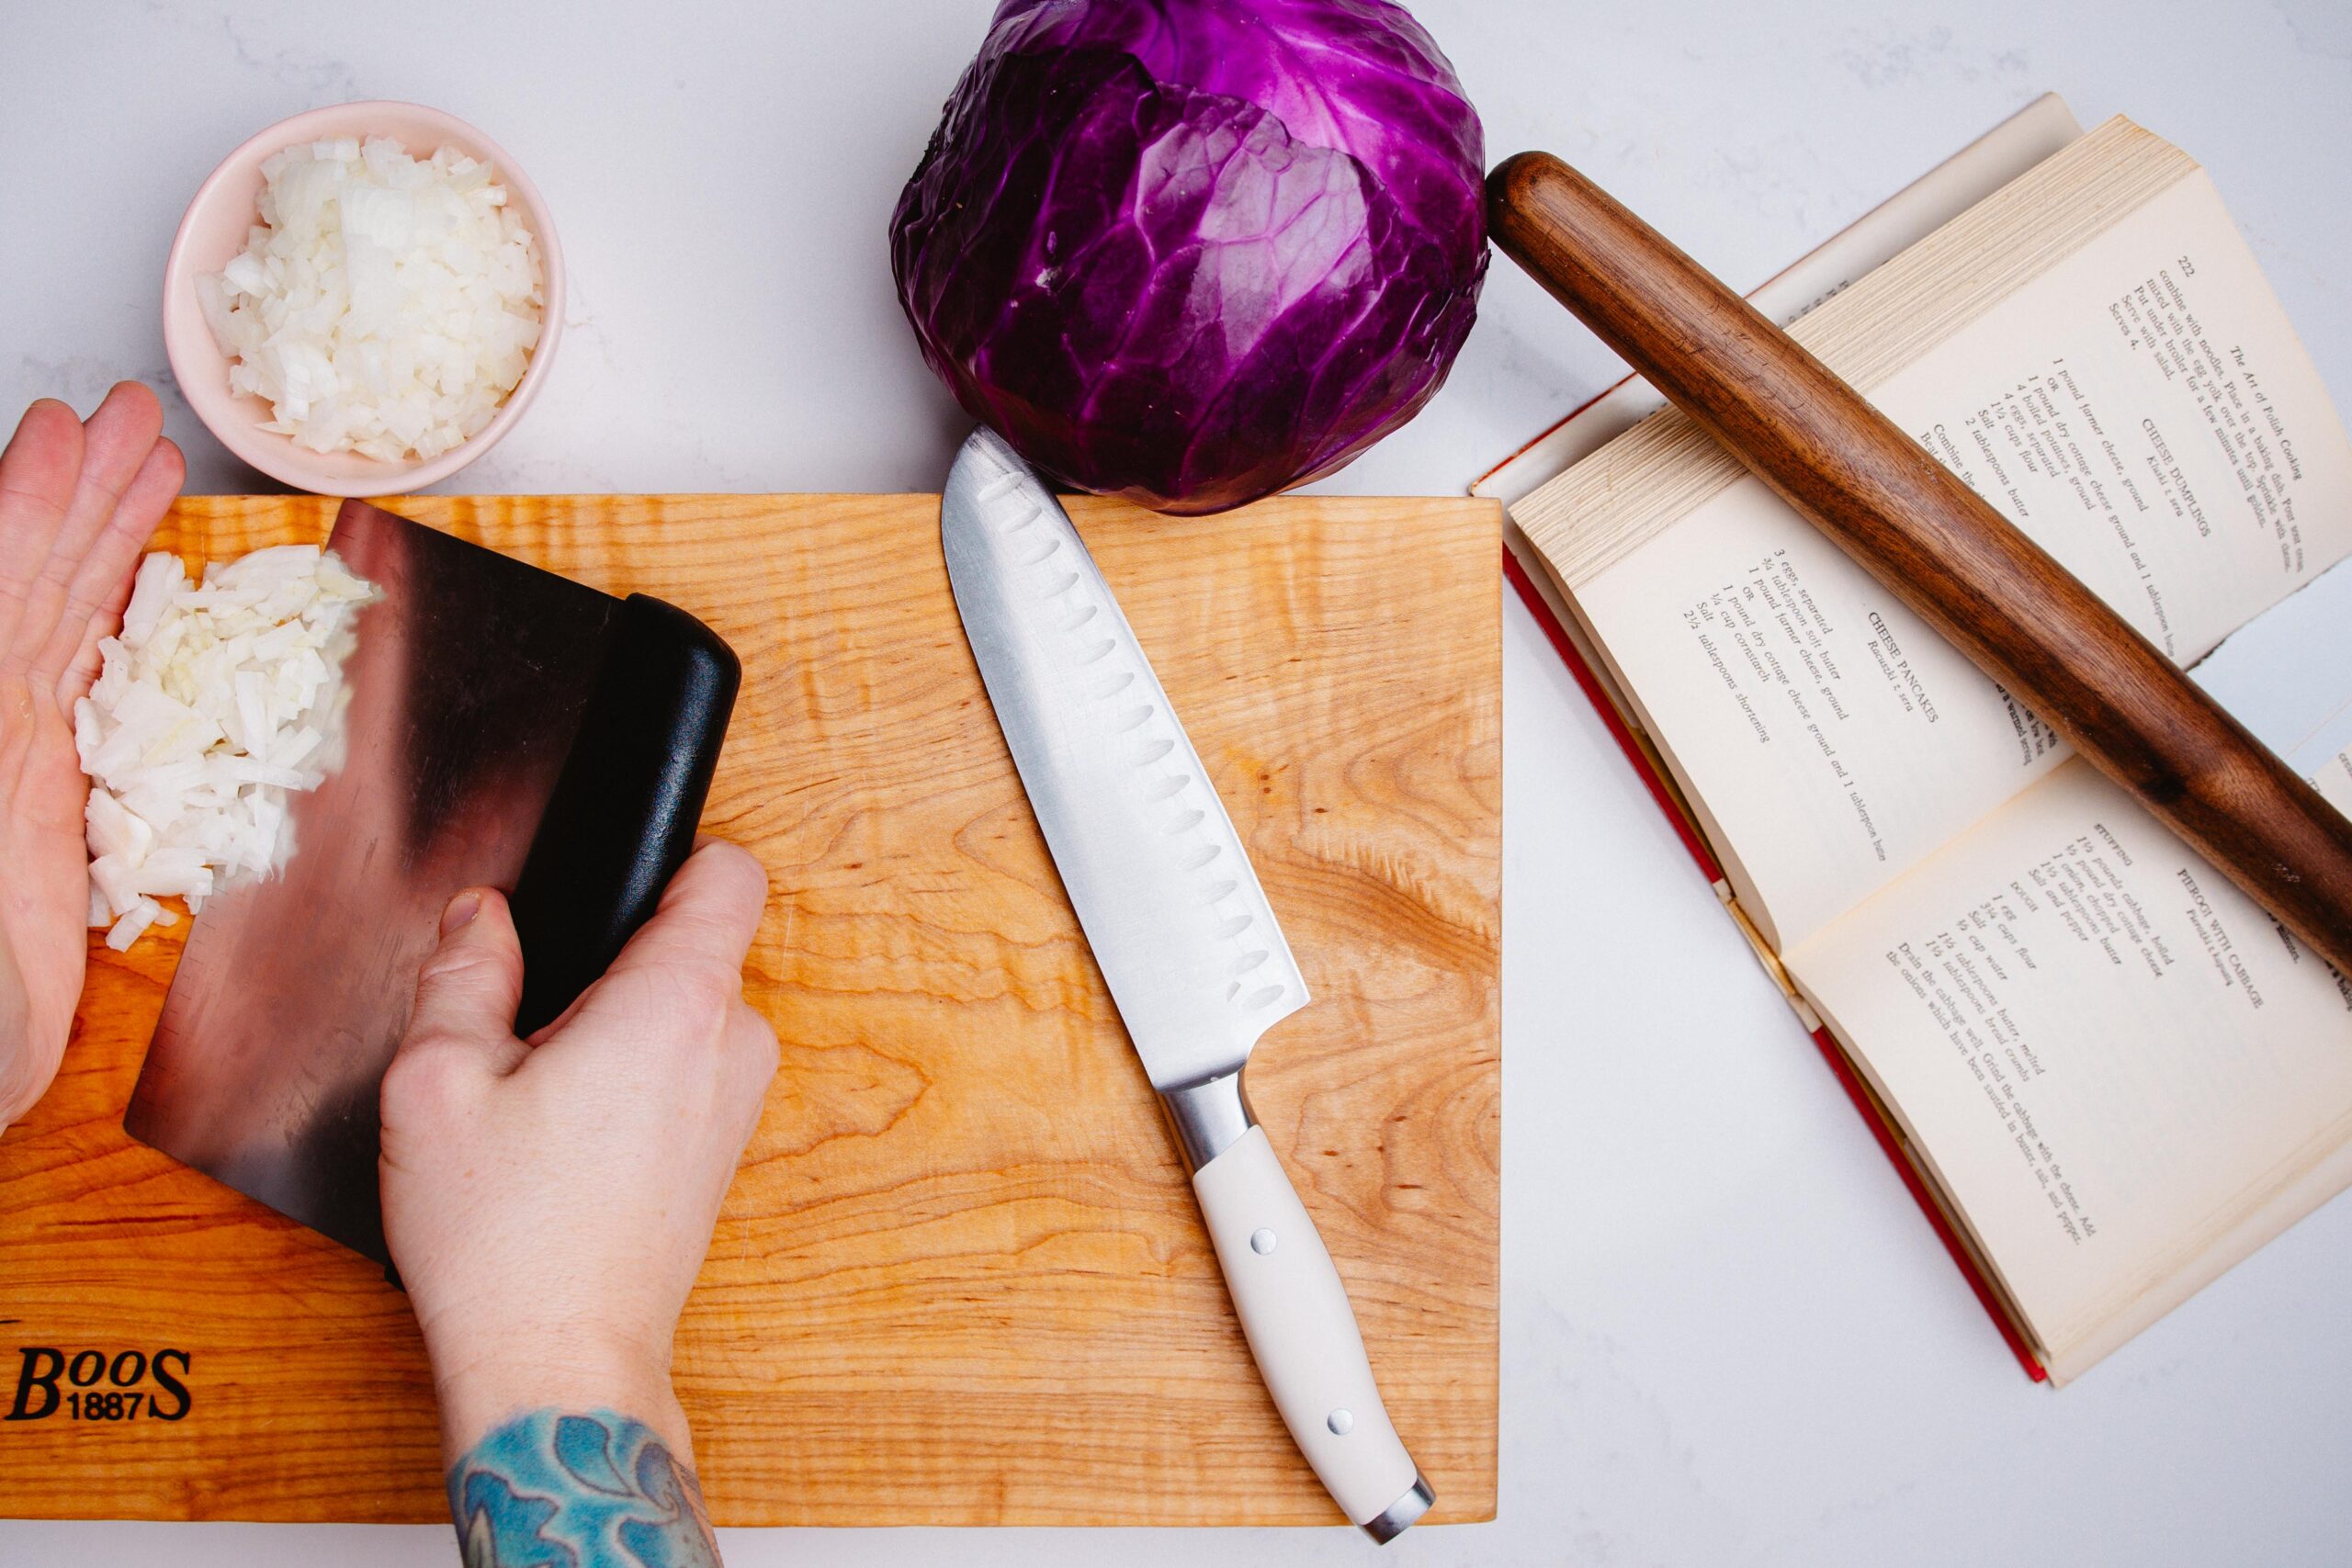
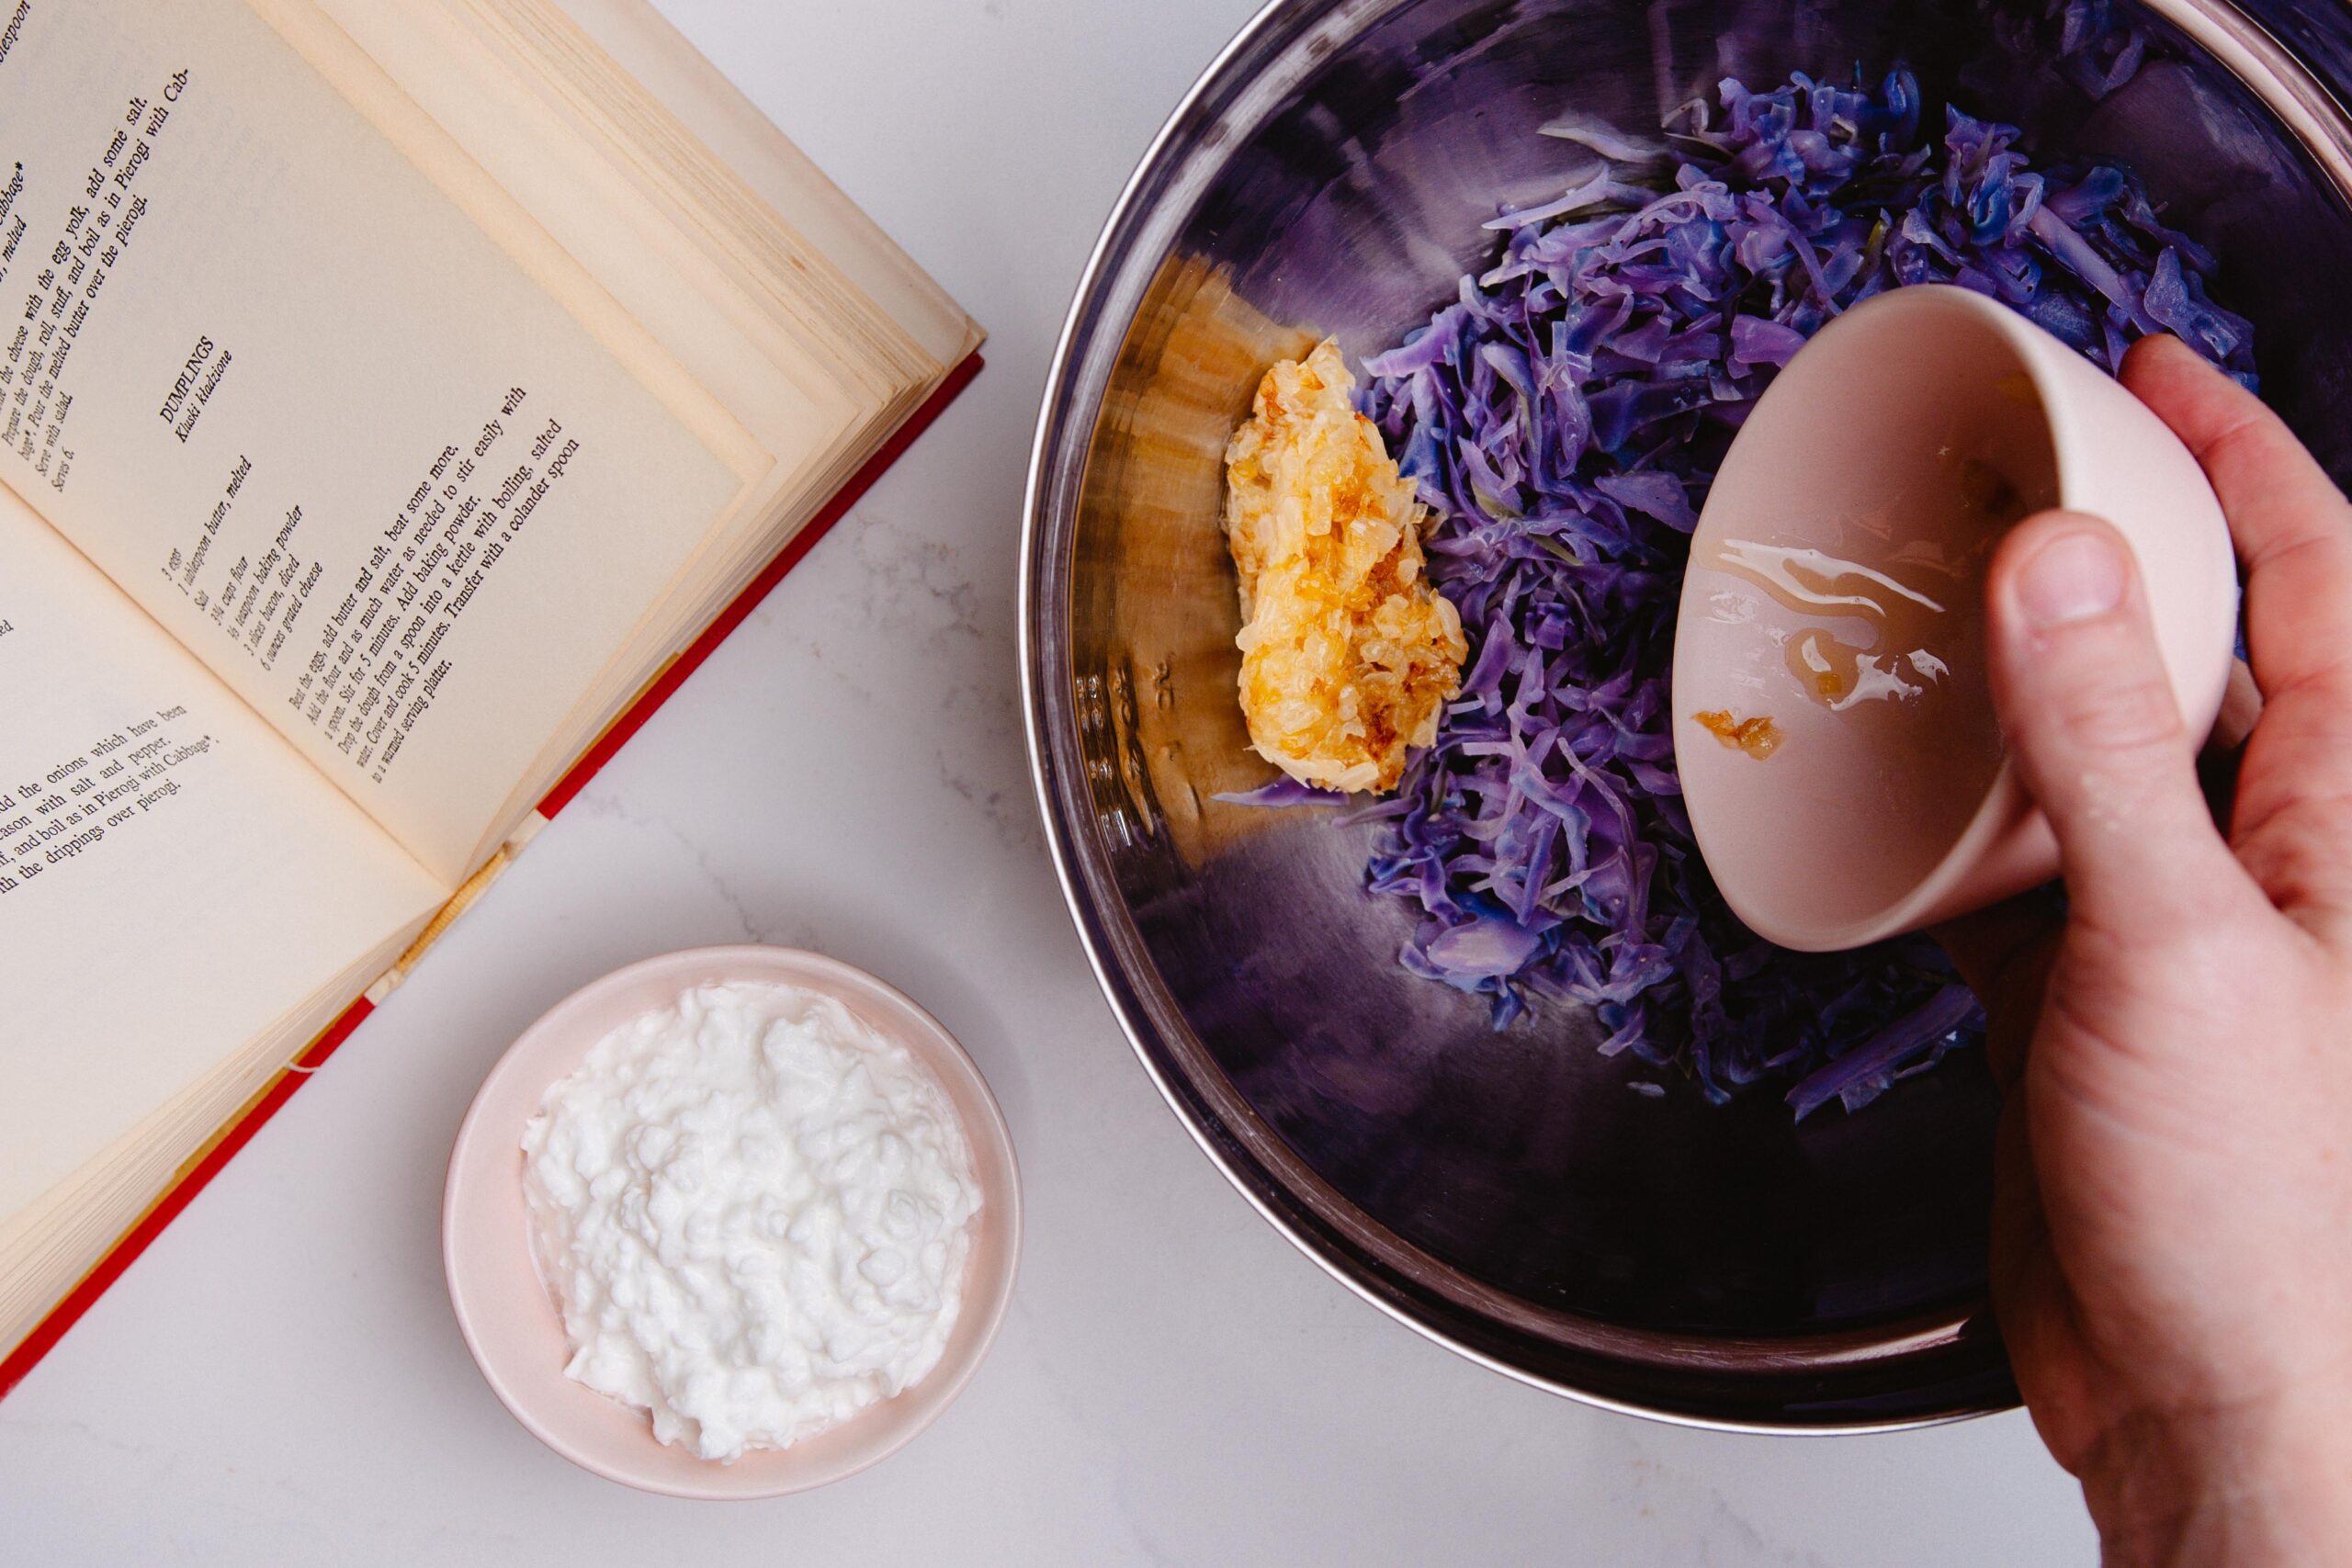
- Half head of Red Cabbage, boiled
- 8oz Cottage Cheese
- 1 Onion, diced.
- 2T Butter
- Salt and Pepper
METHOD
Begin with everything in place (Mise En Place) with this dish. The more organized you are with your Pierogi prep, the faster and easier this will move for you.
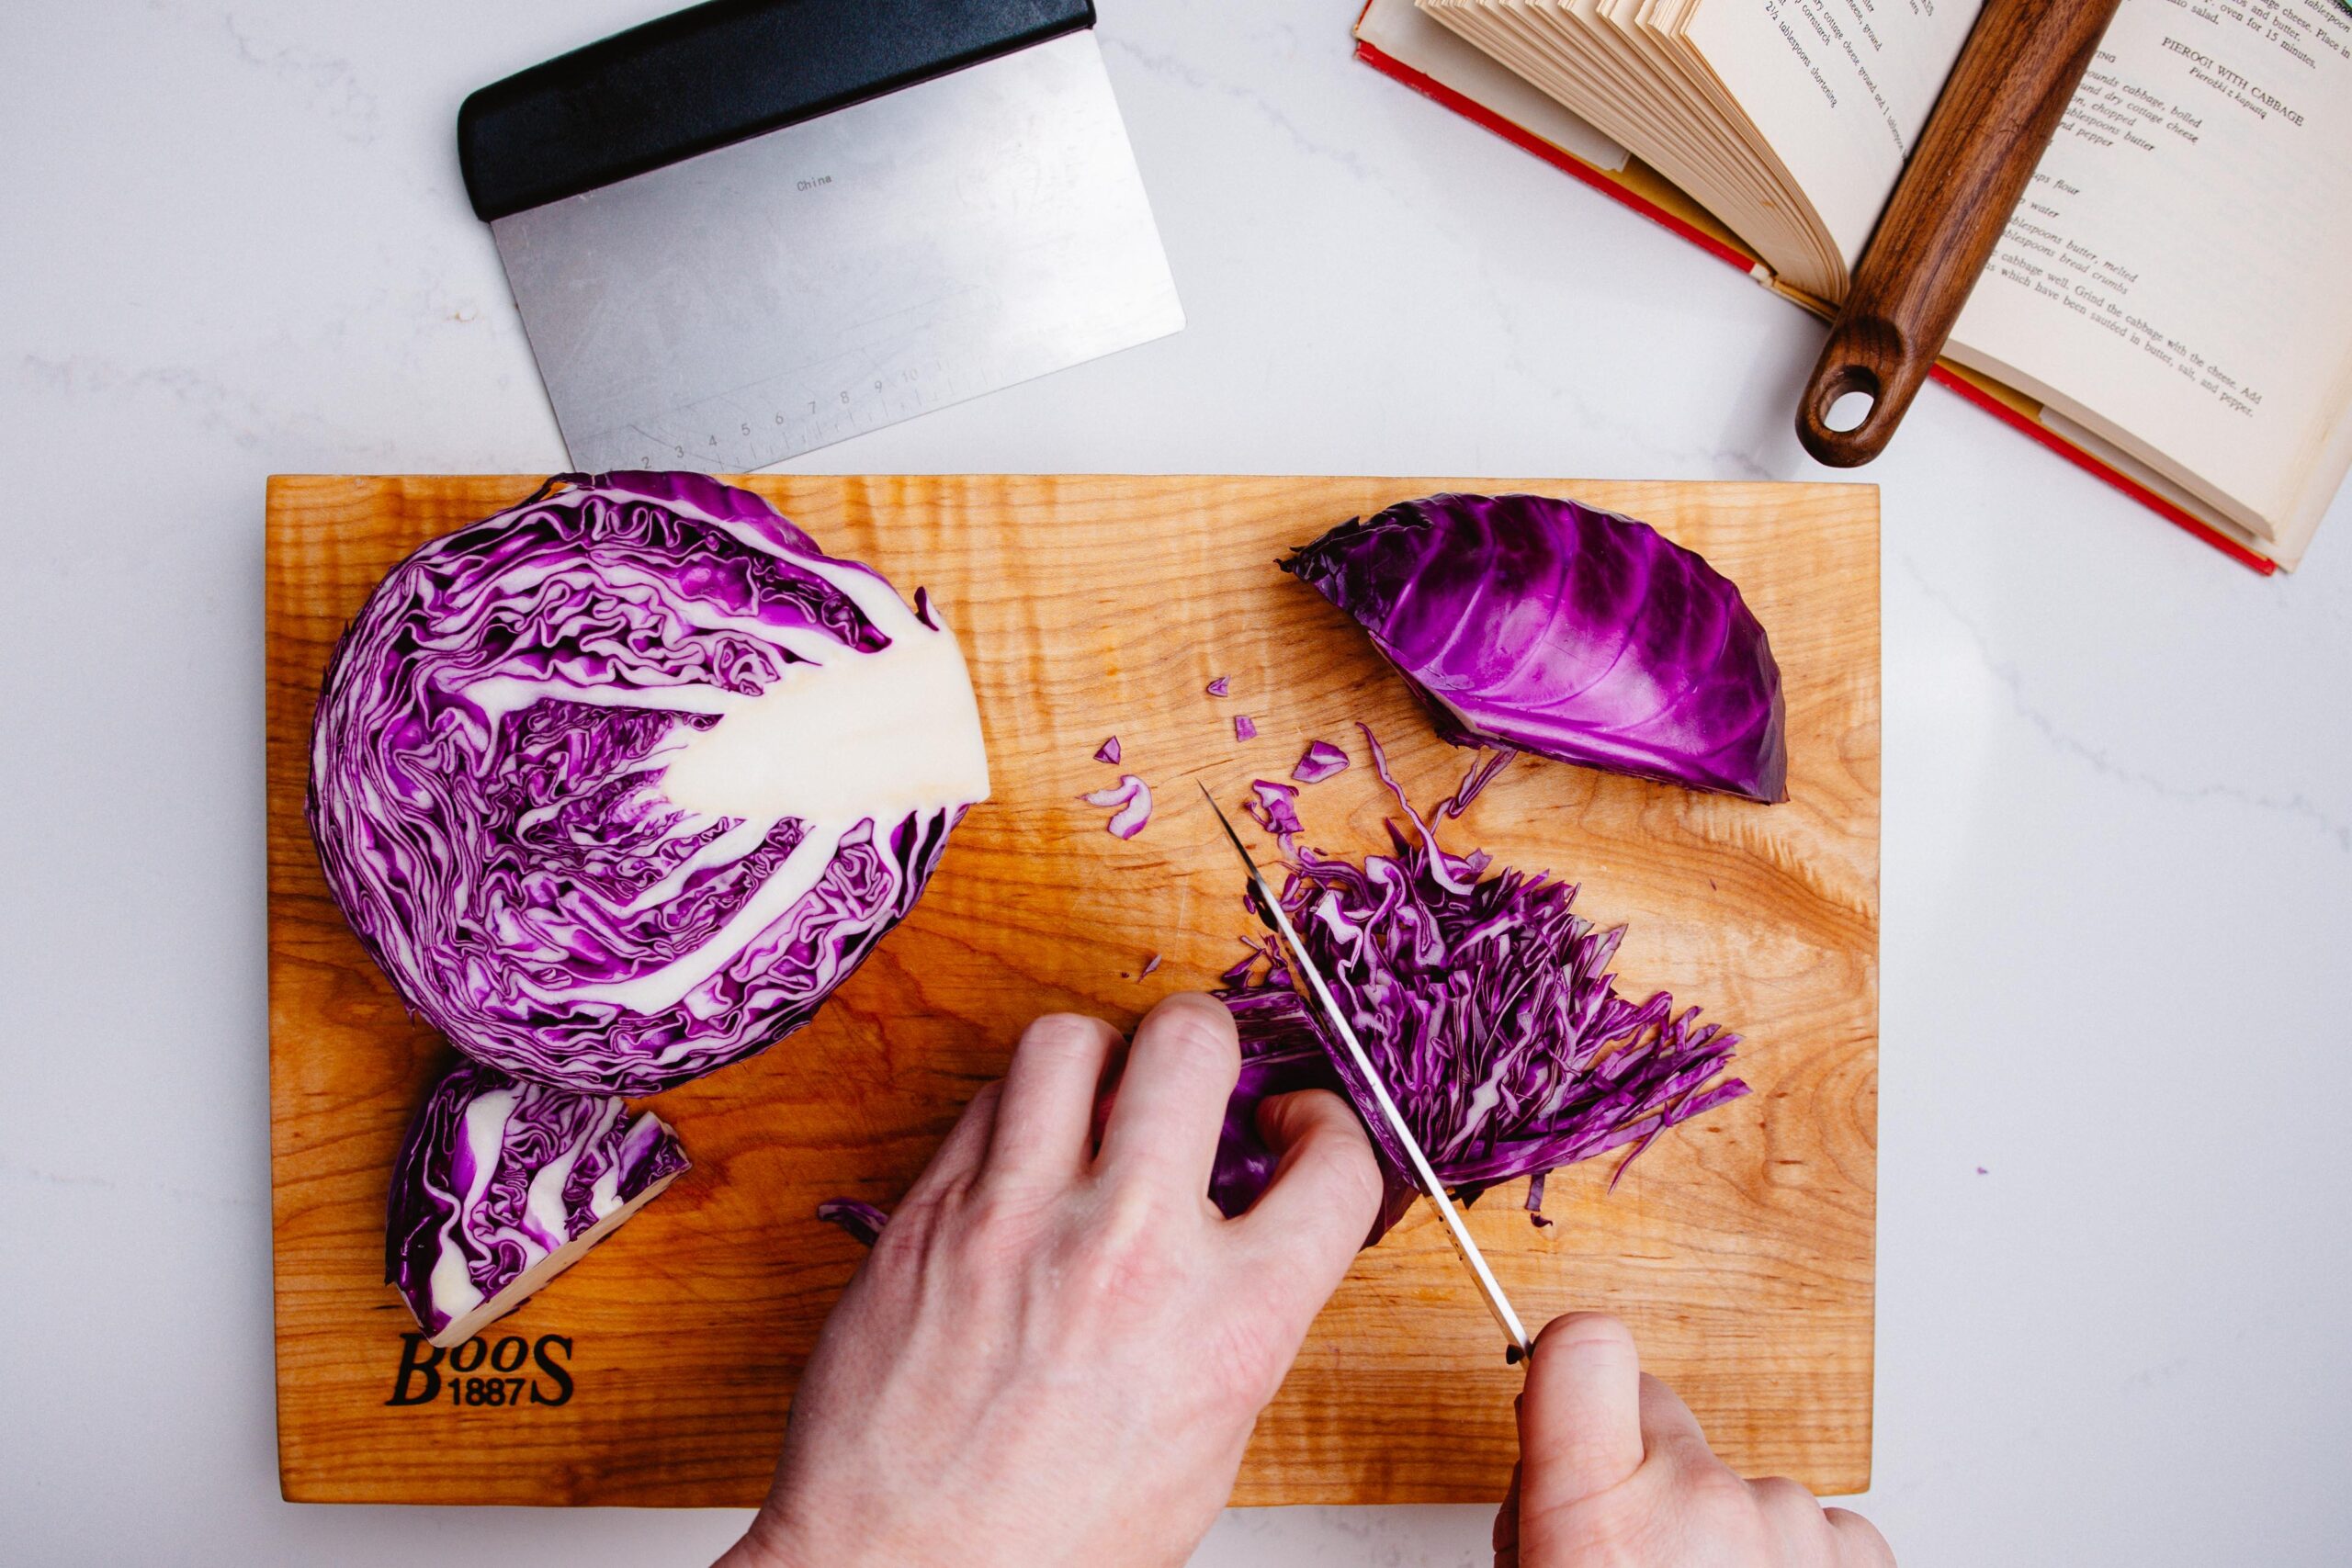
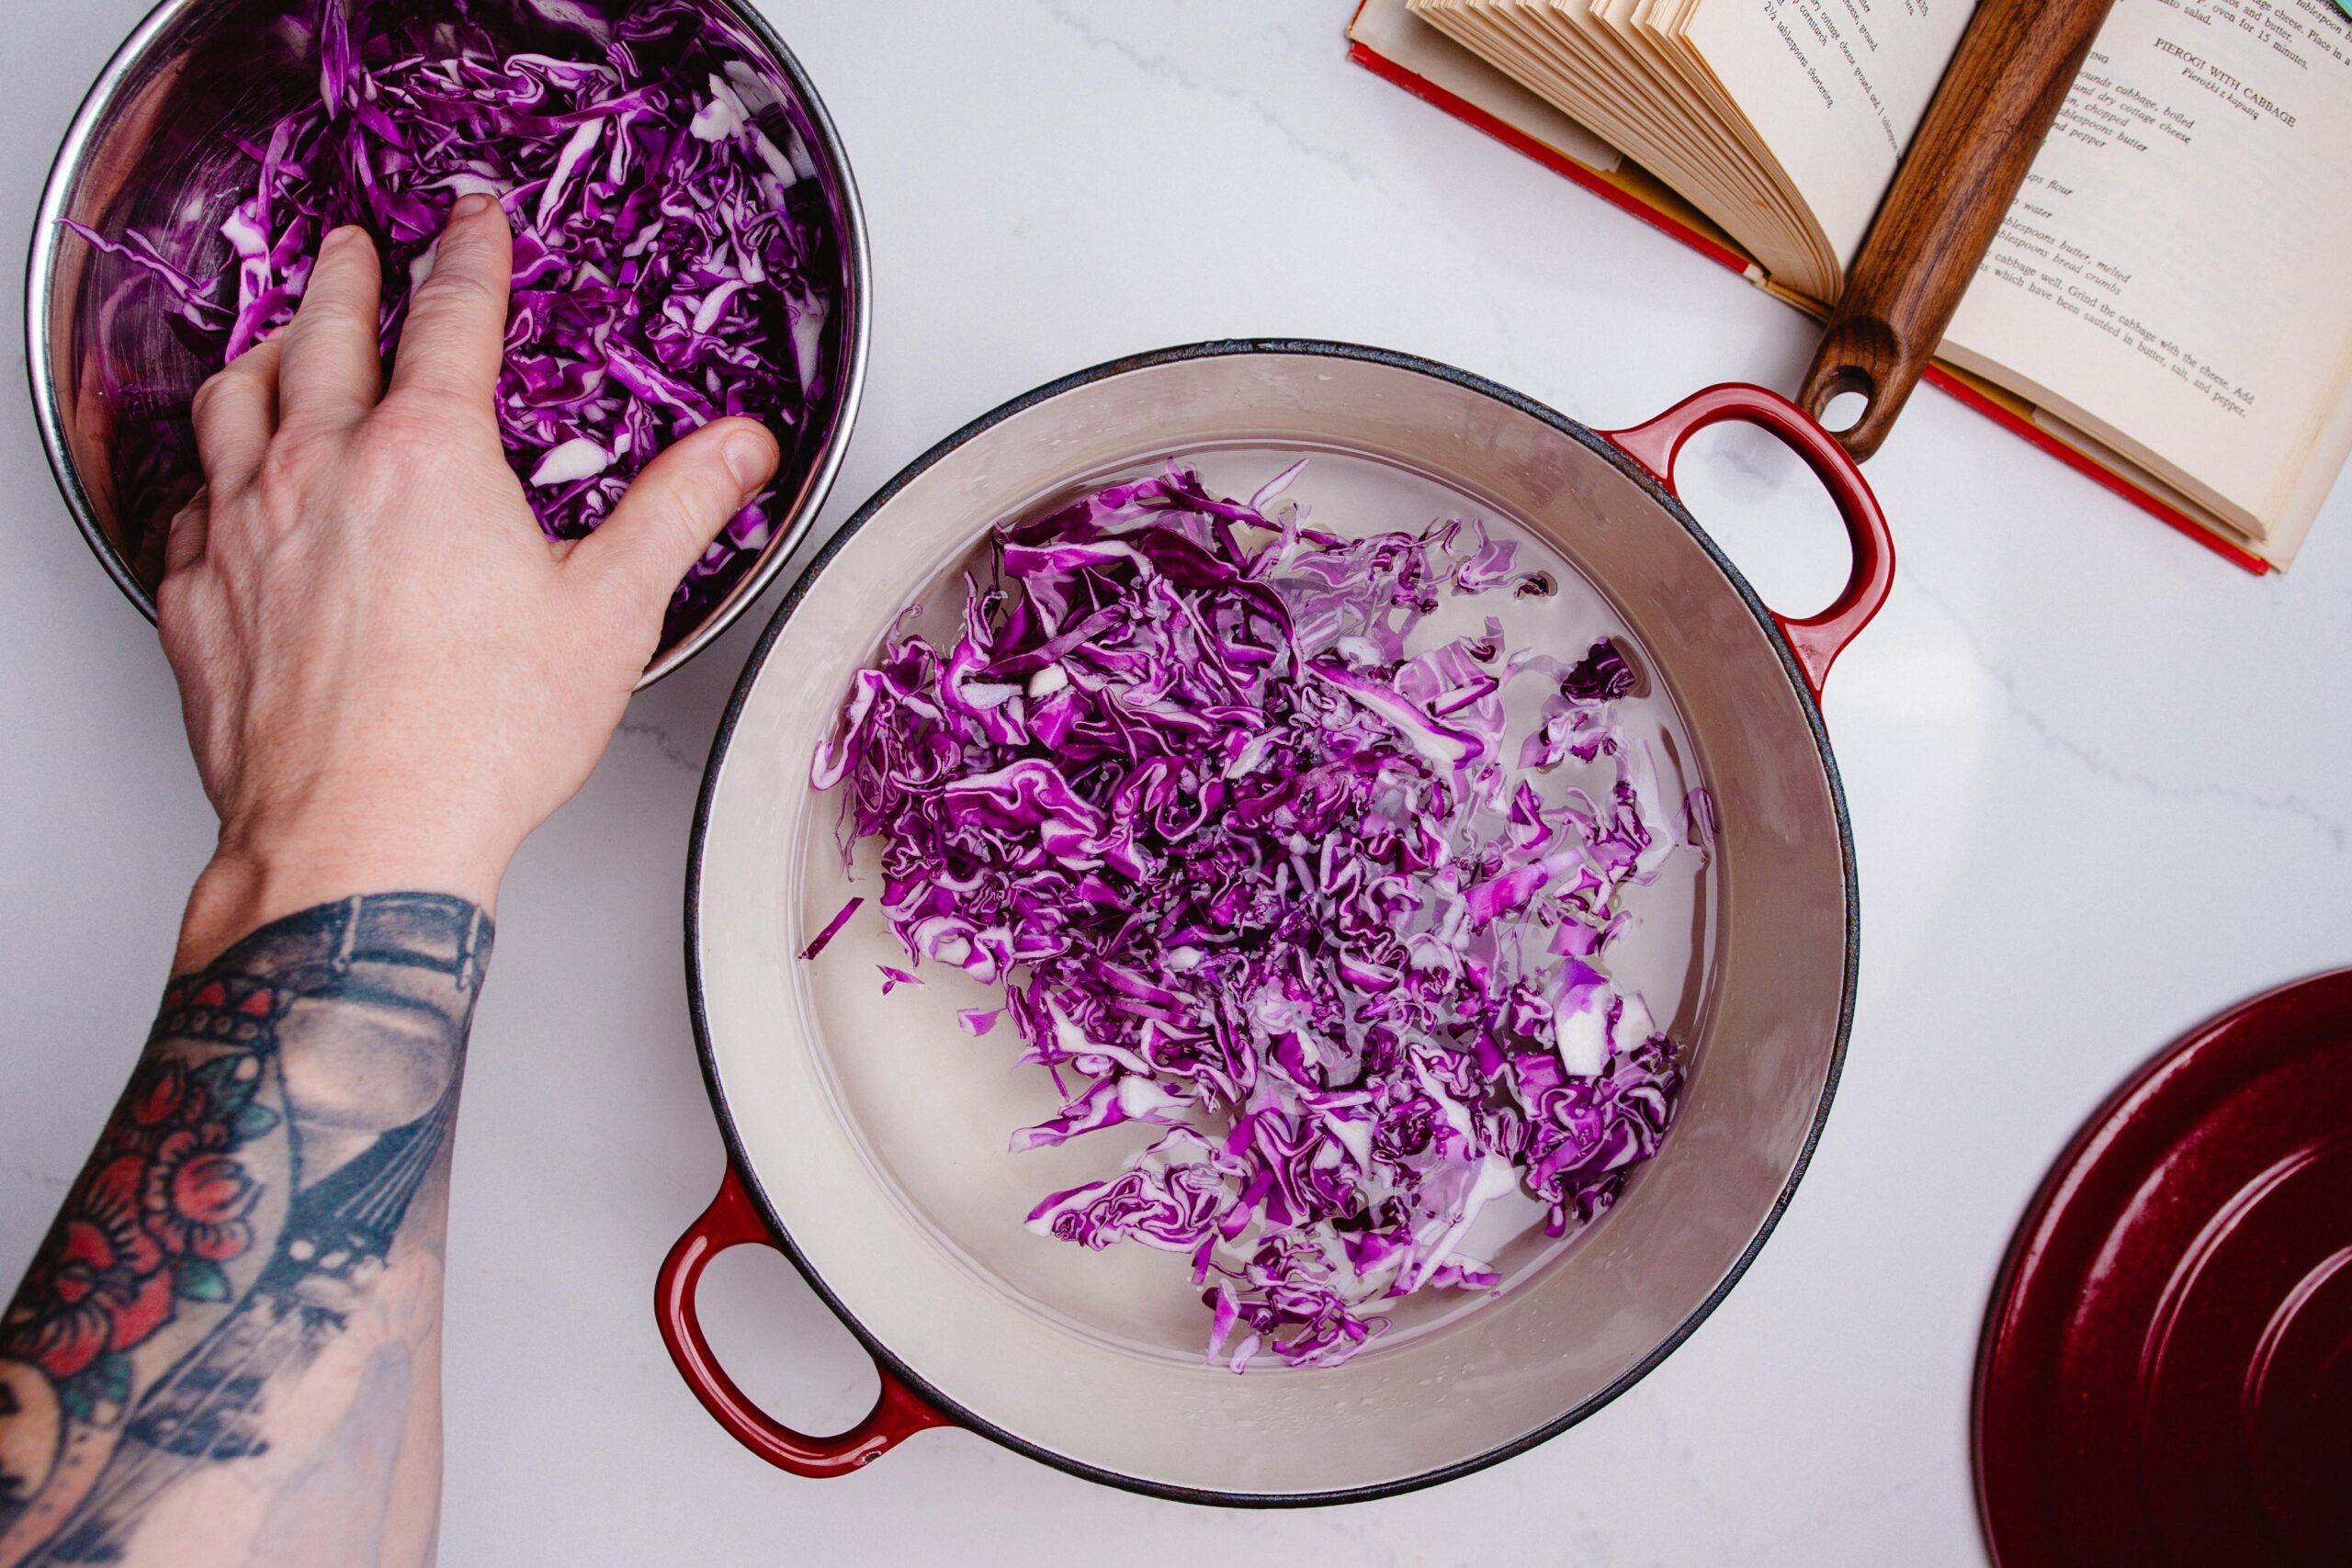
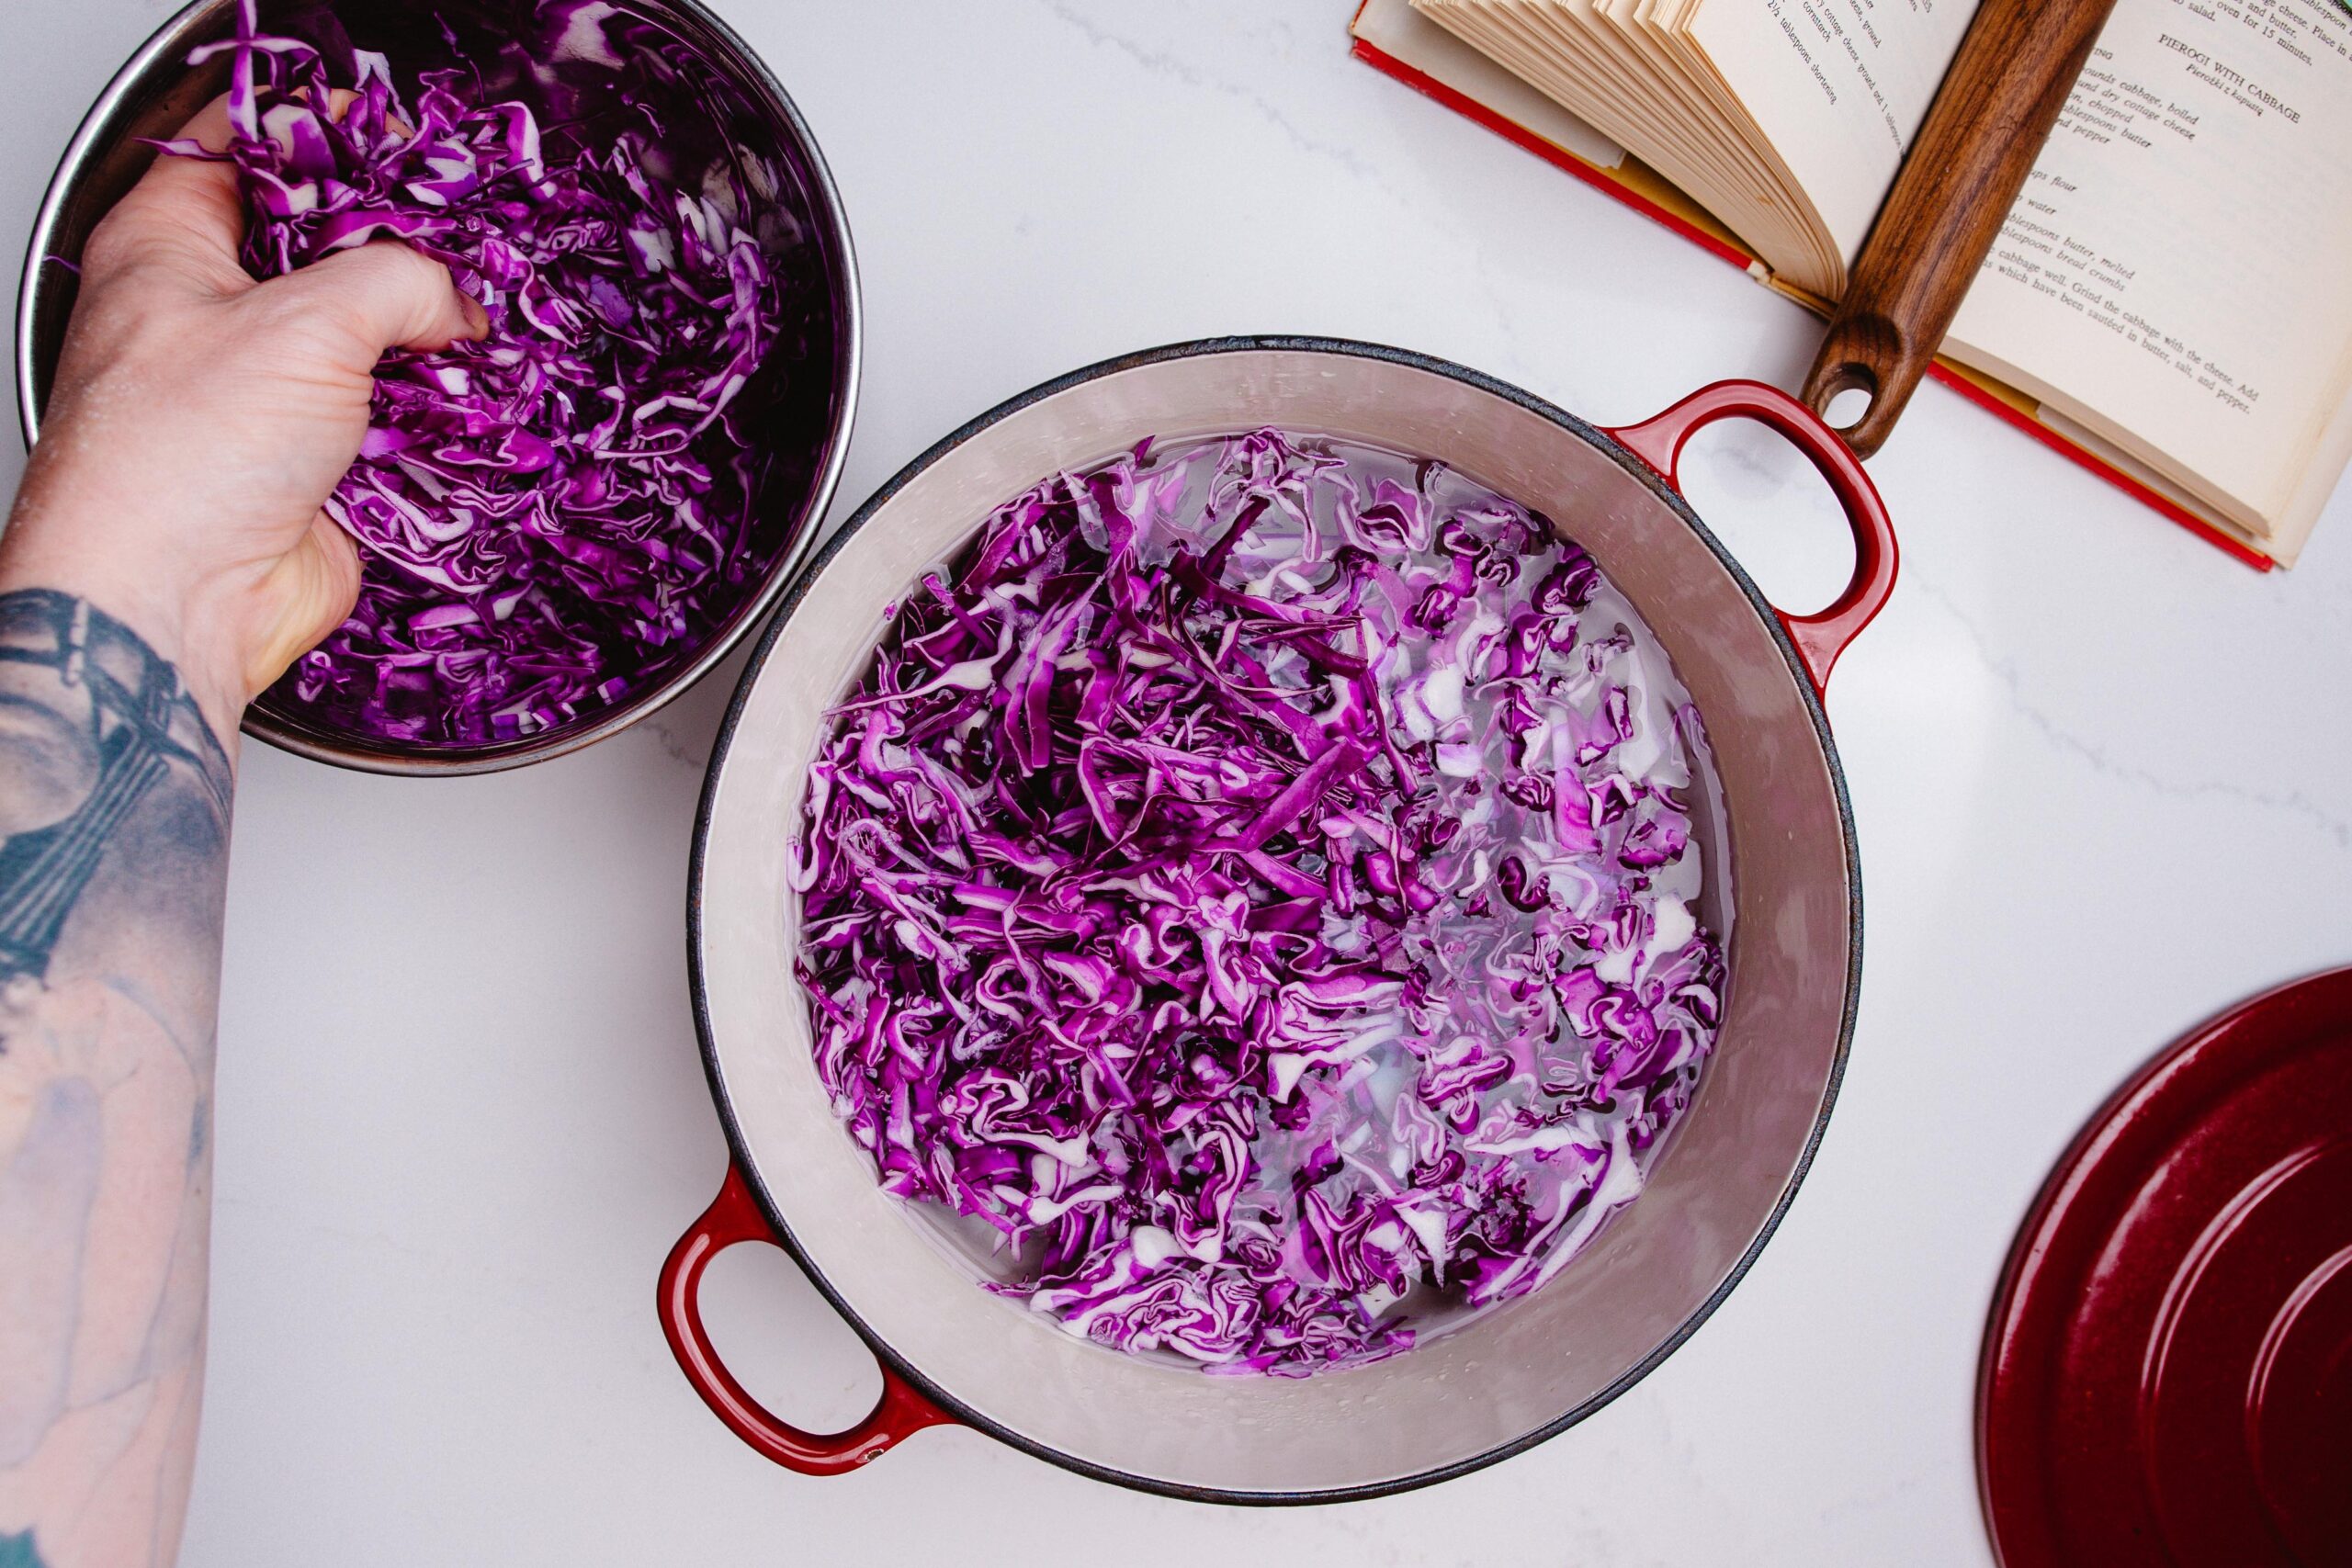
Finely shred a half head of Red Cabbage, like you’d see in a coleslaw, and then add to a large pot of salted, boiling water. Cover and allow to cook until tender, which should be between 8-10 minutes. It should have a little texture and not be mushy – just cooked through.
Slowly caramelize your diced onion in some butter over medium heat until you get a rich, amber color on the onions, and season to taste with salt and pepper.
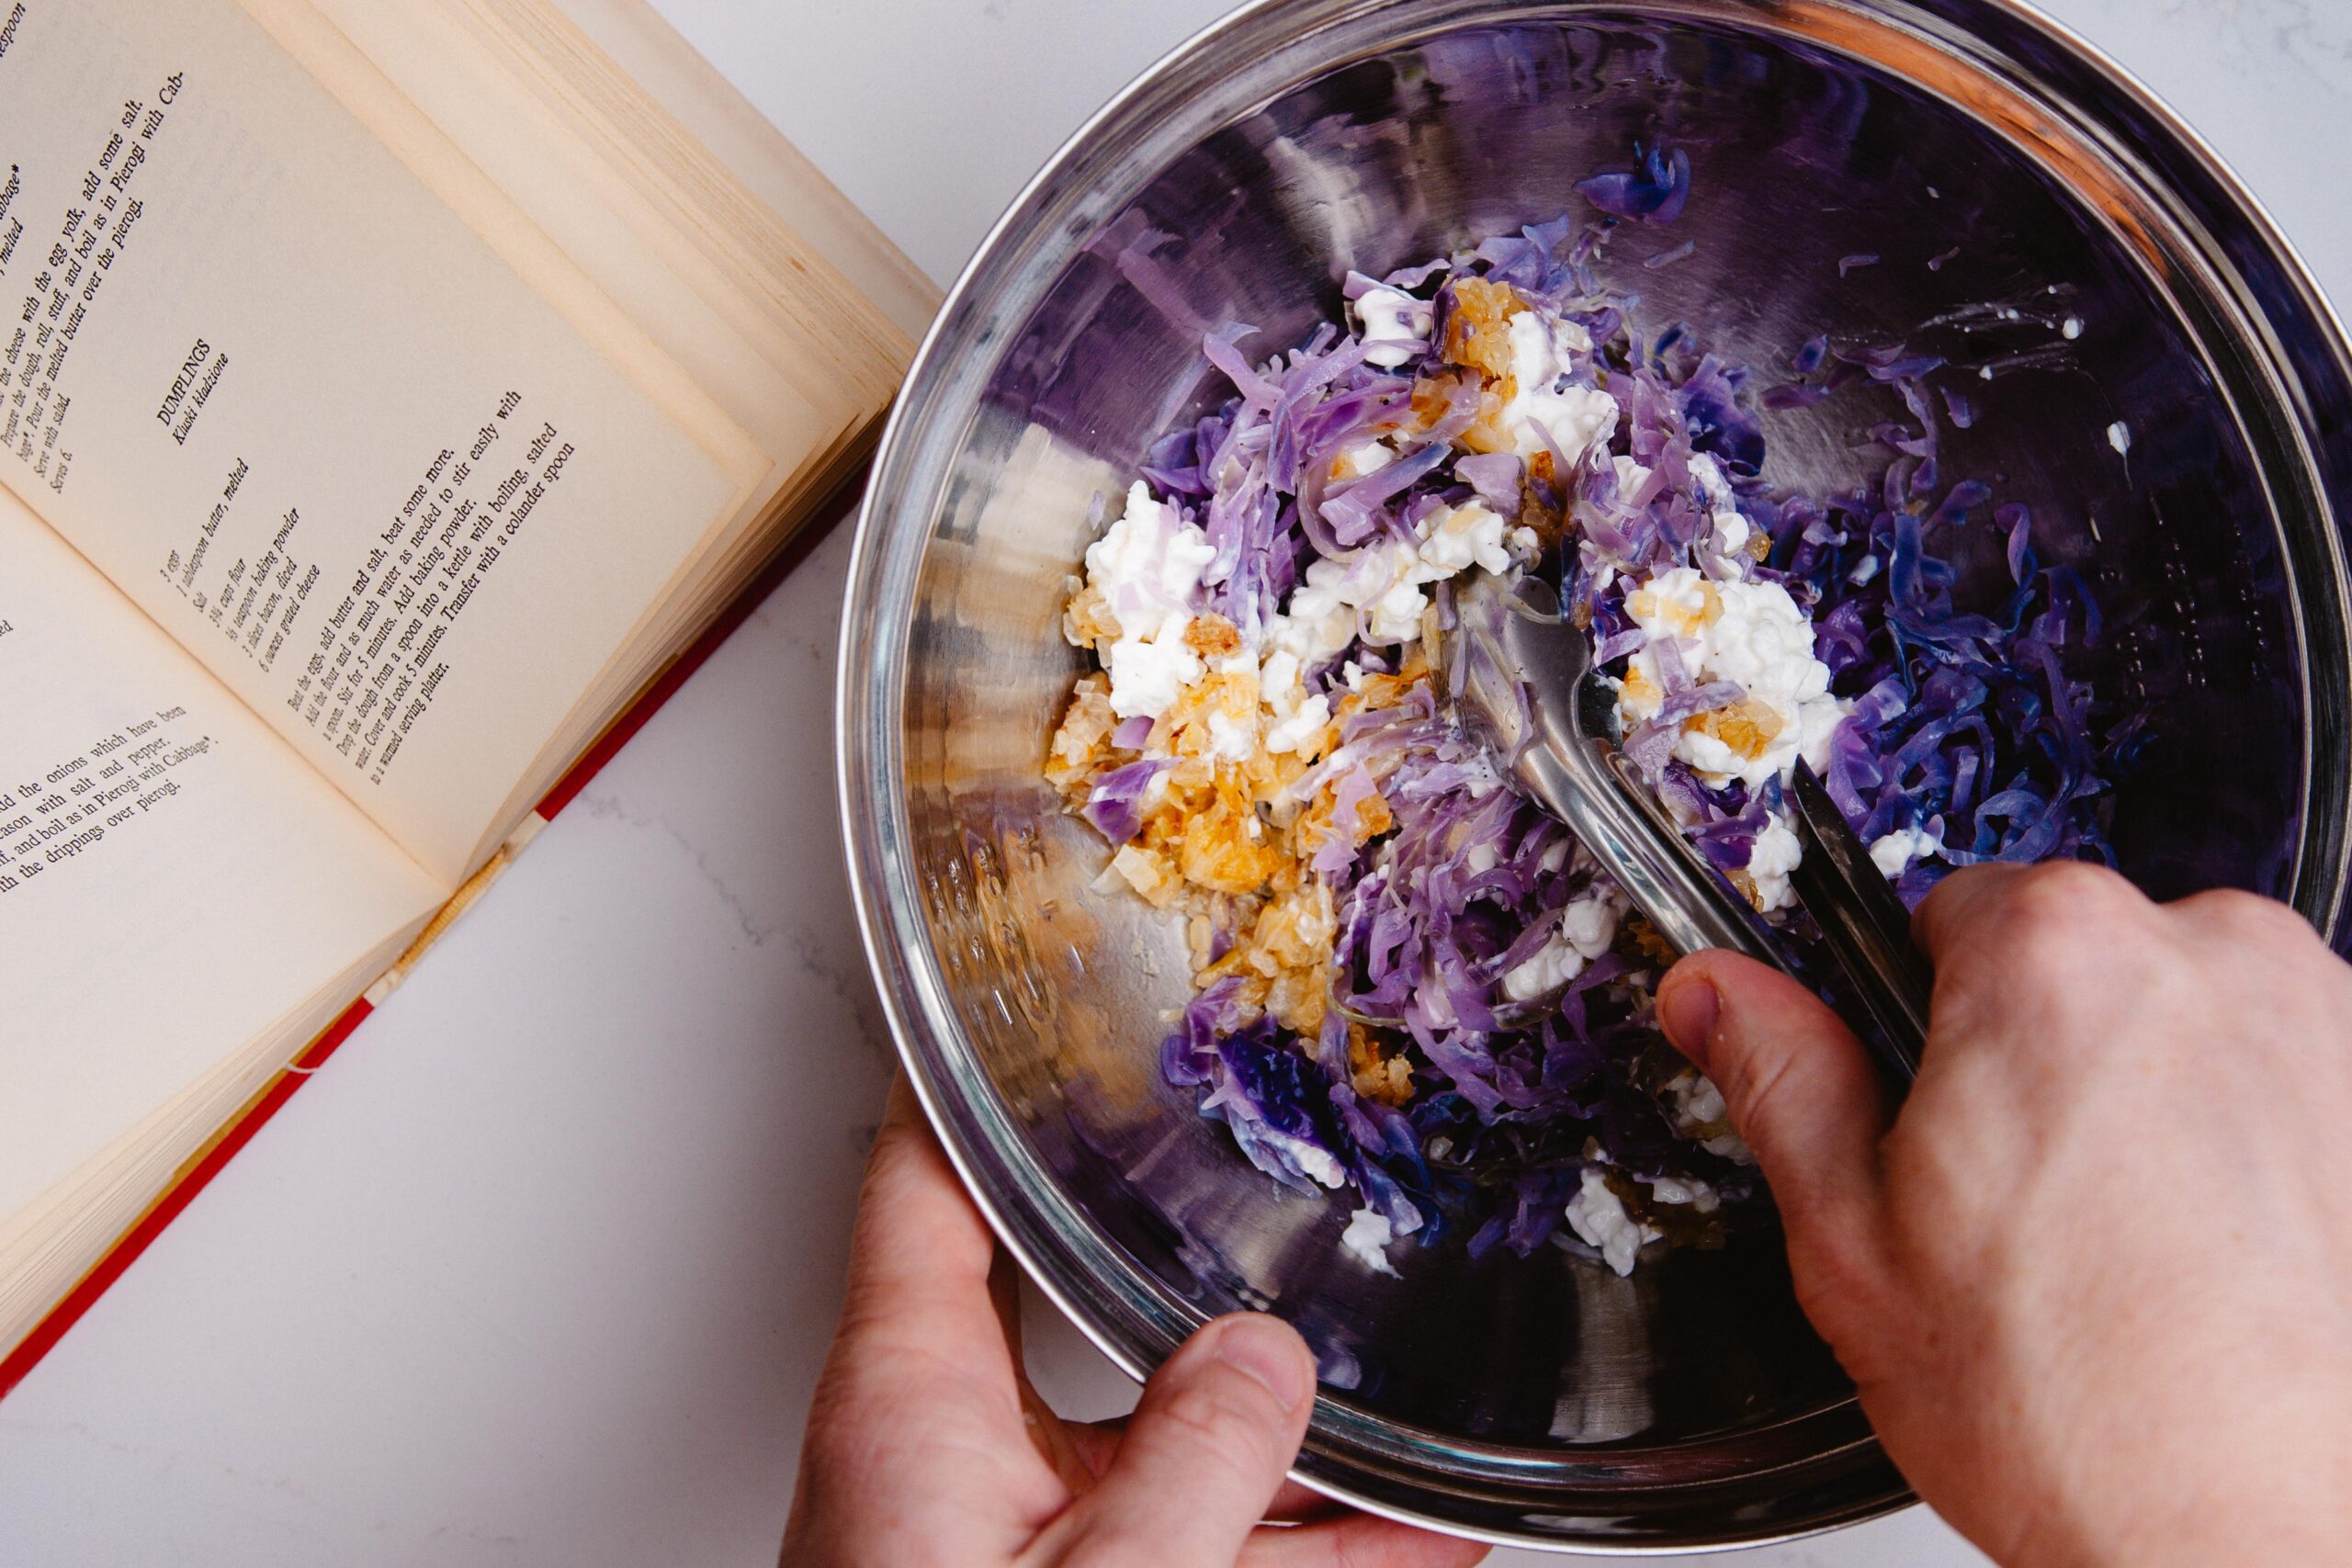
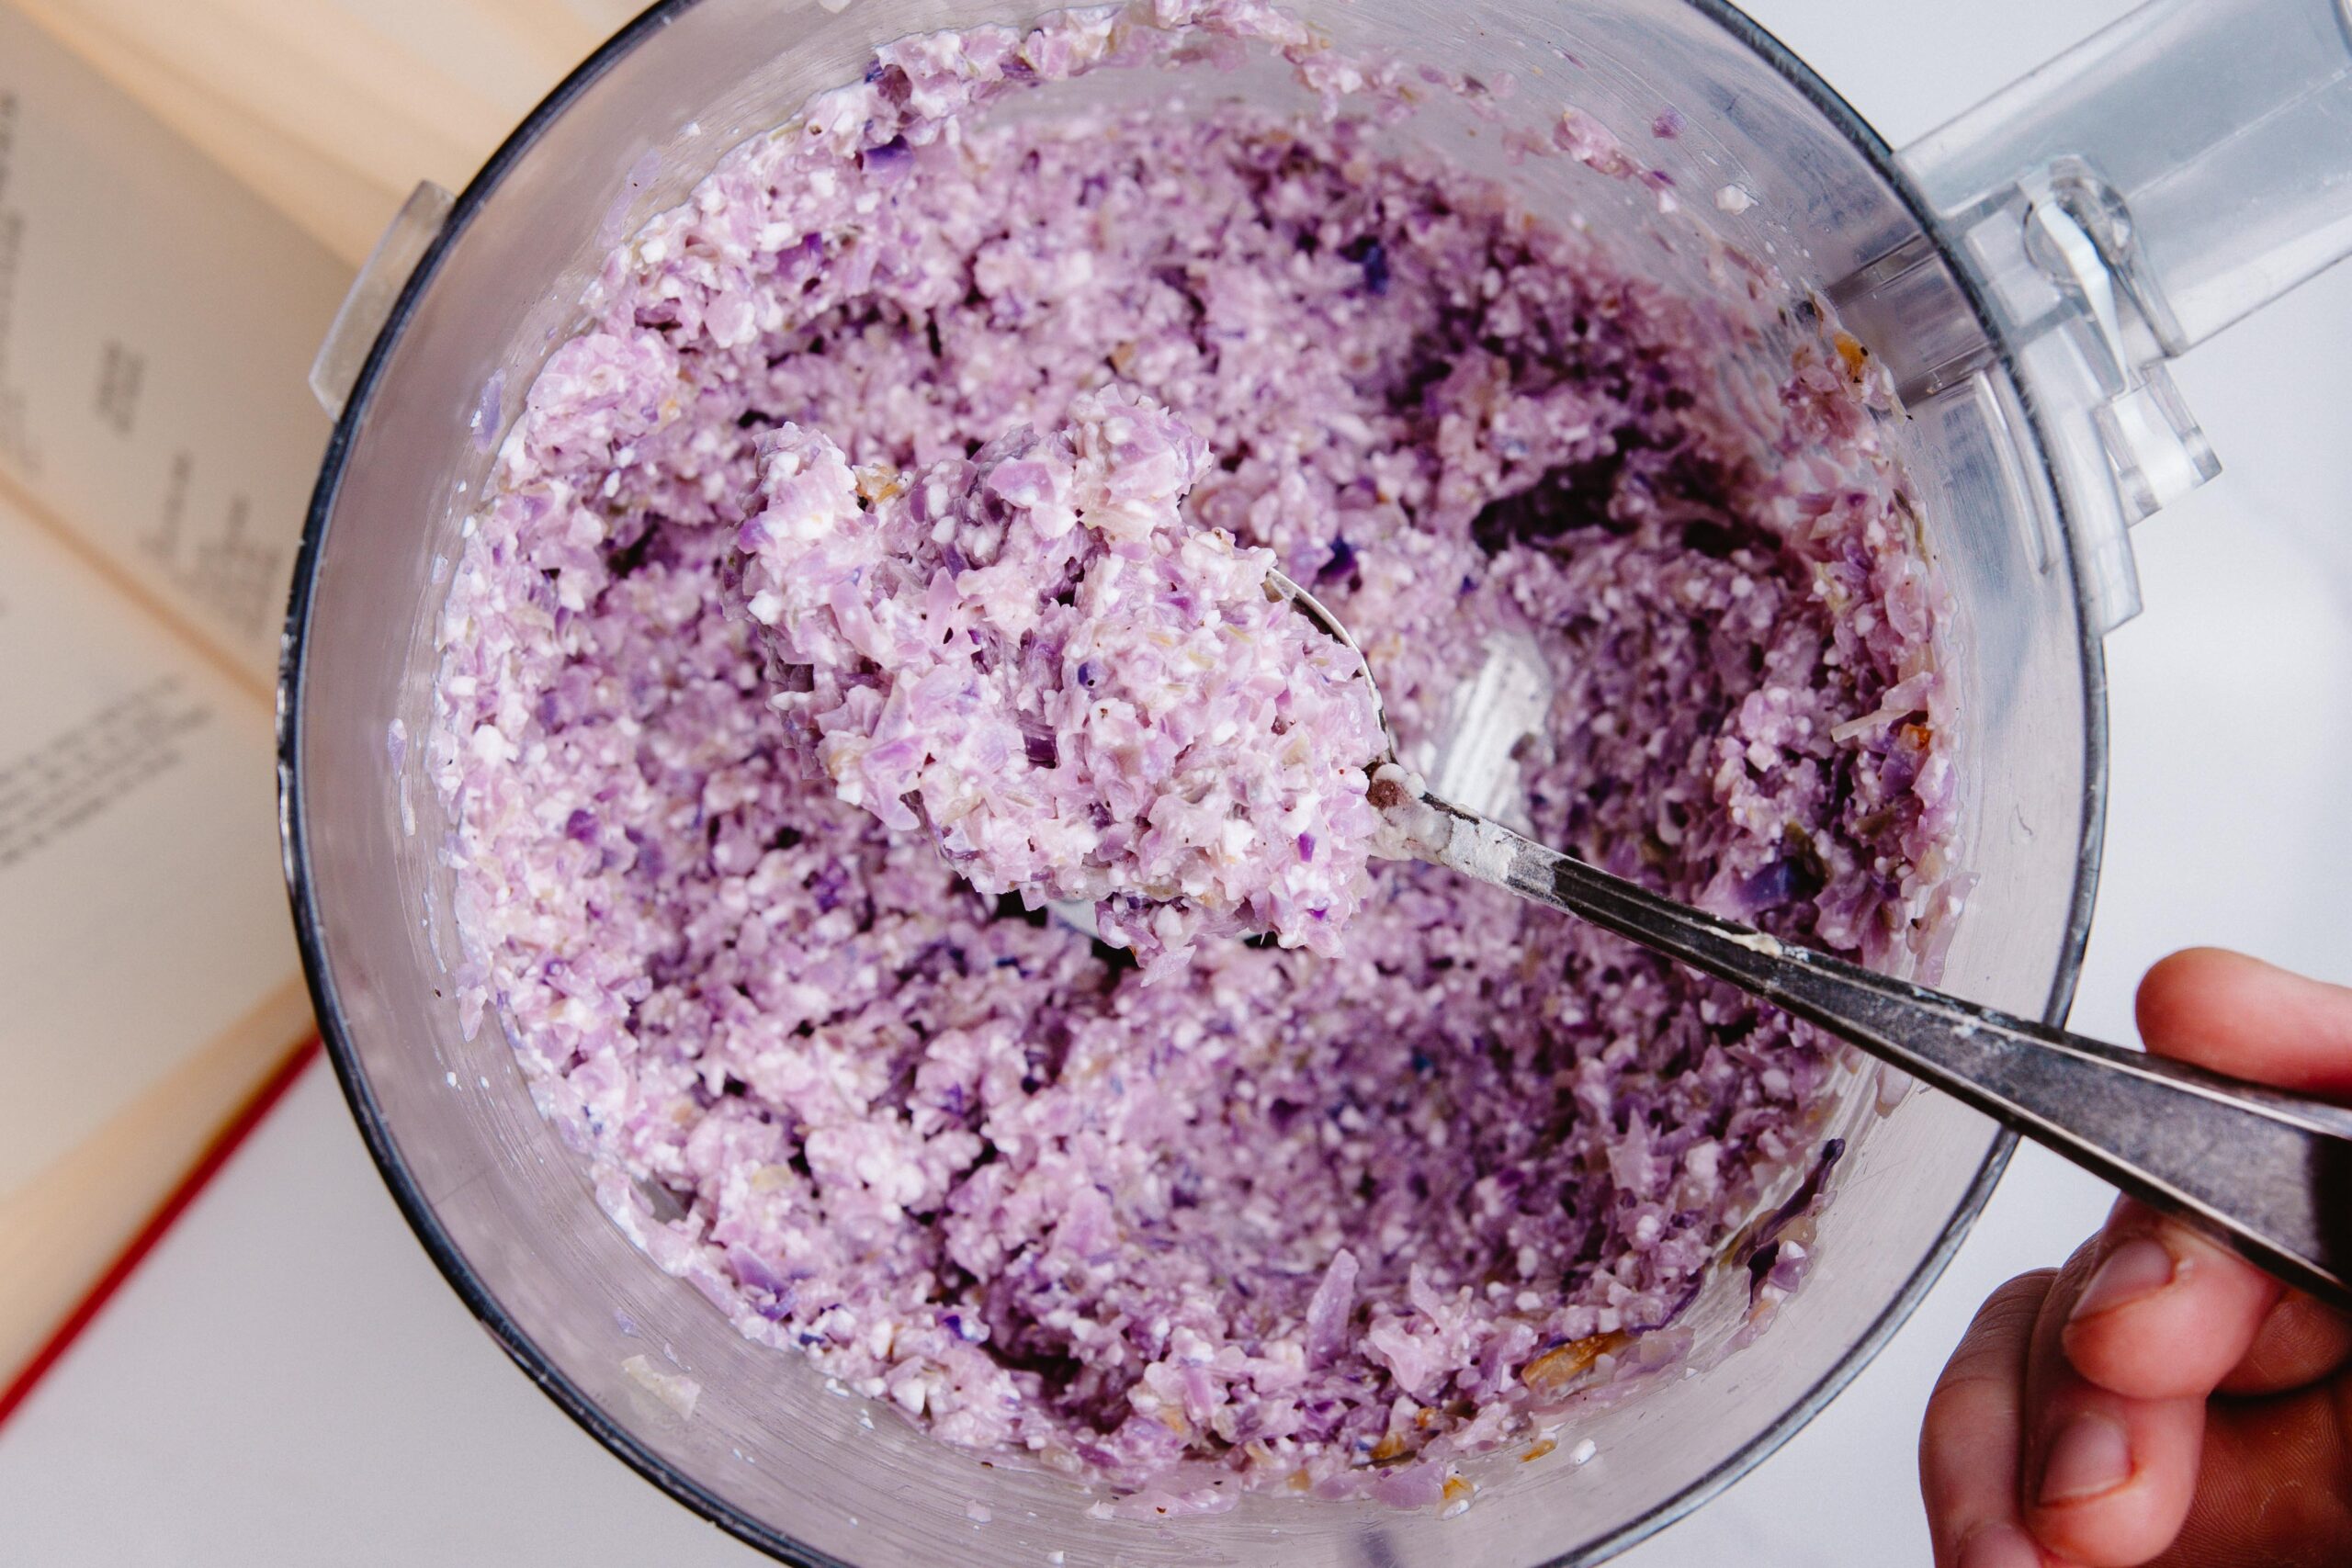
Once your onions are cooked and the cabbage has been removed from the water, place them all in a food processor, with the cottage cheese, and pulse briefly to just chop and blend everything together. It doesn’t need to be a puree, but should bind together.
Reserve the filling on the side in a bowl until you’re ready to fill the dumplings!
Onto the dough:
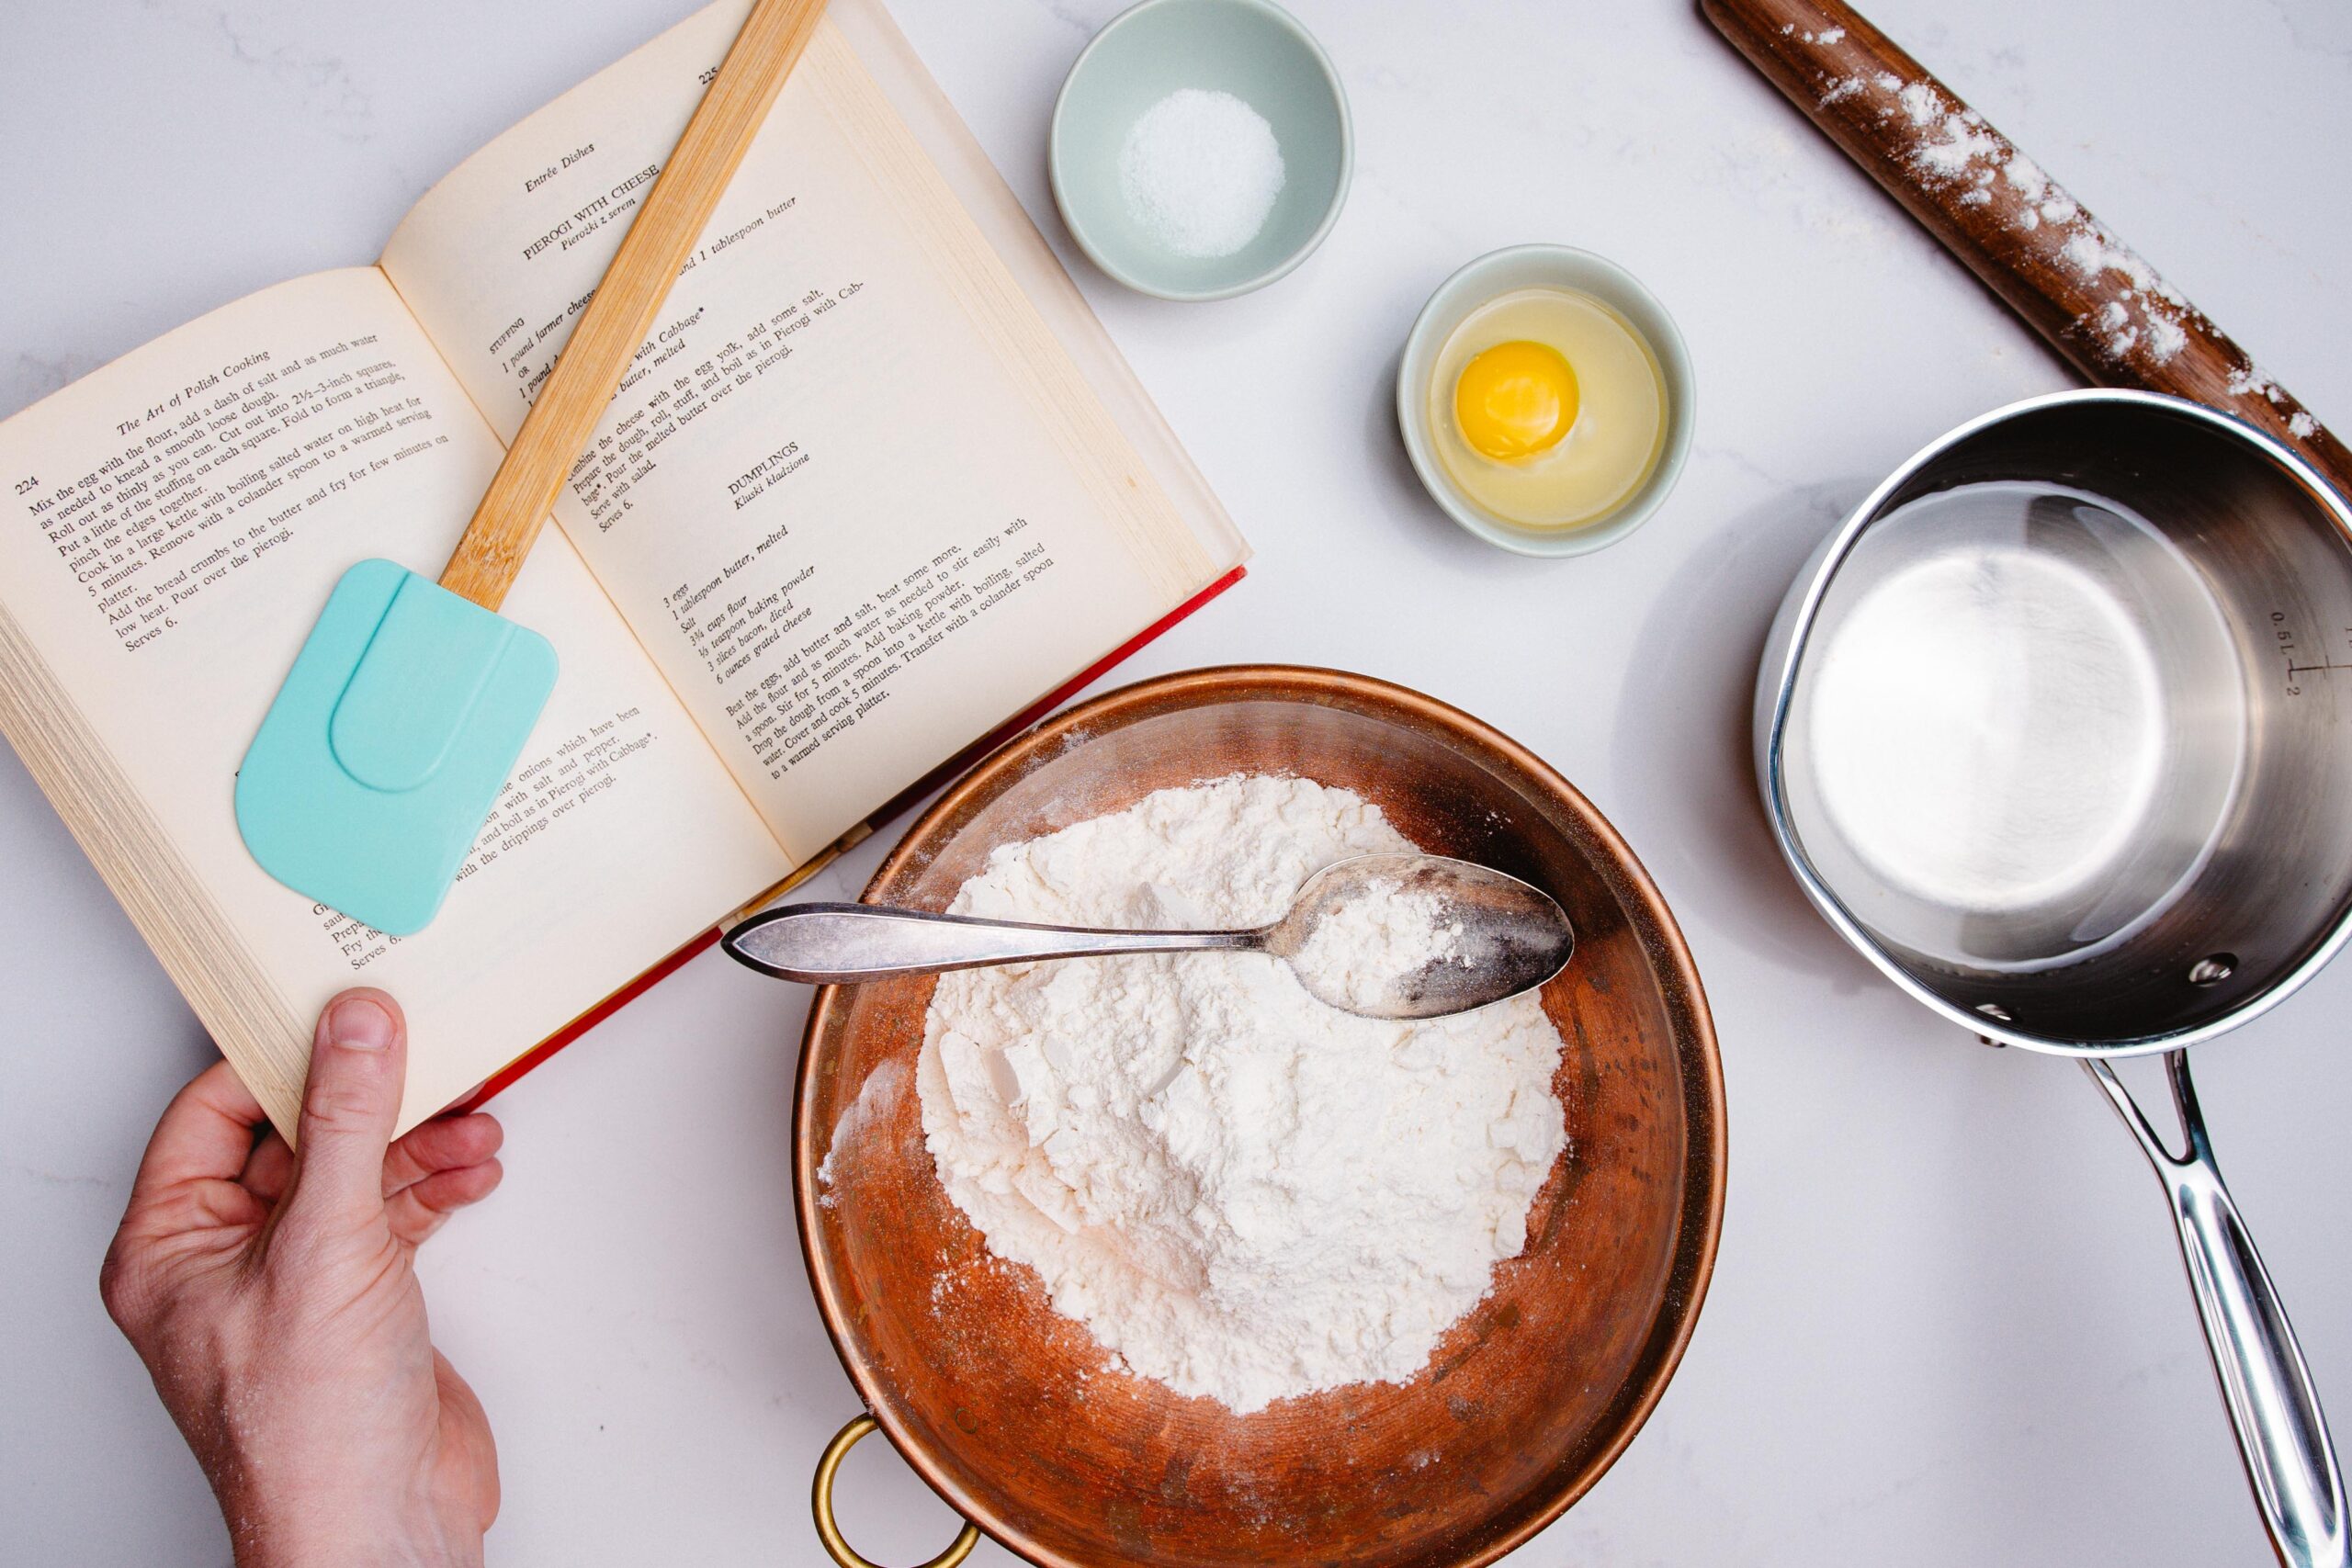
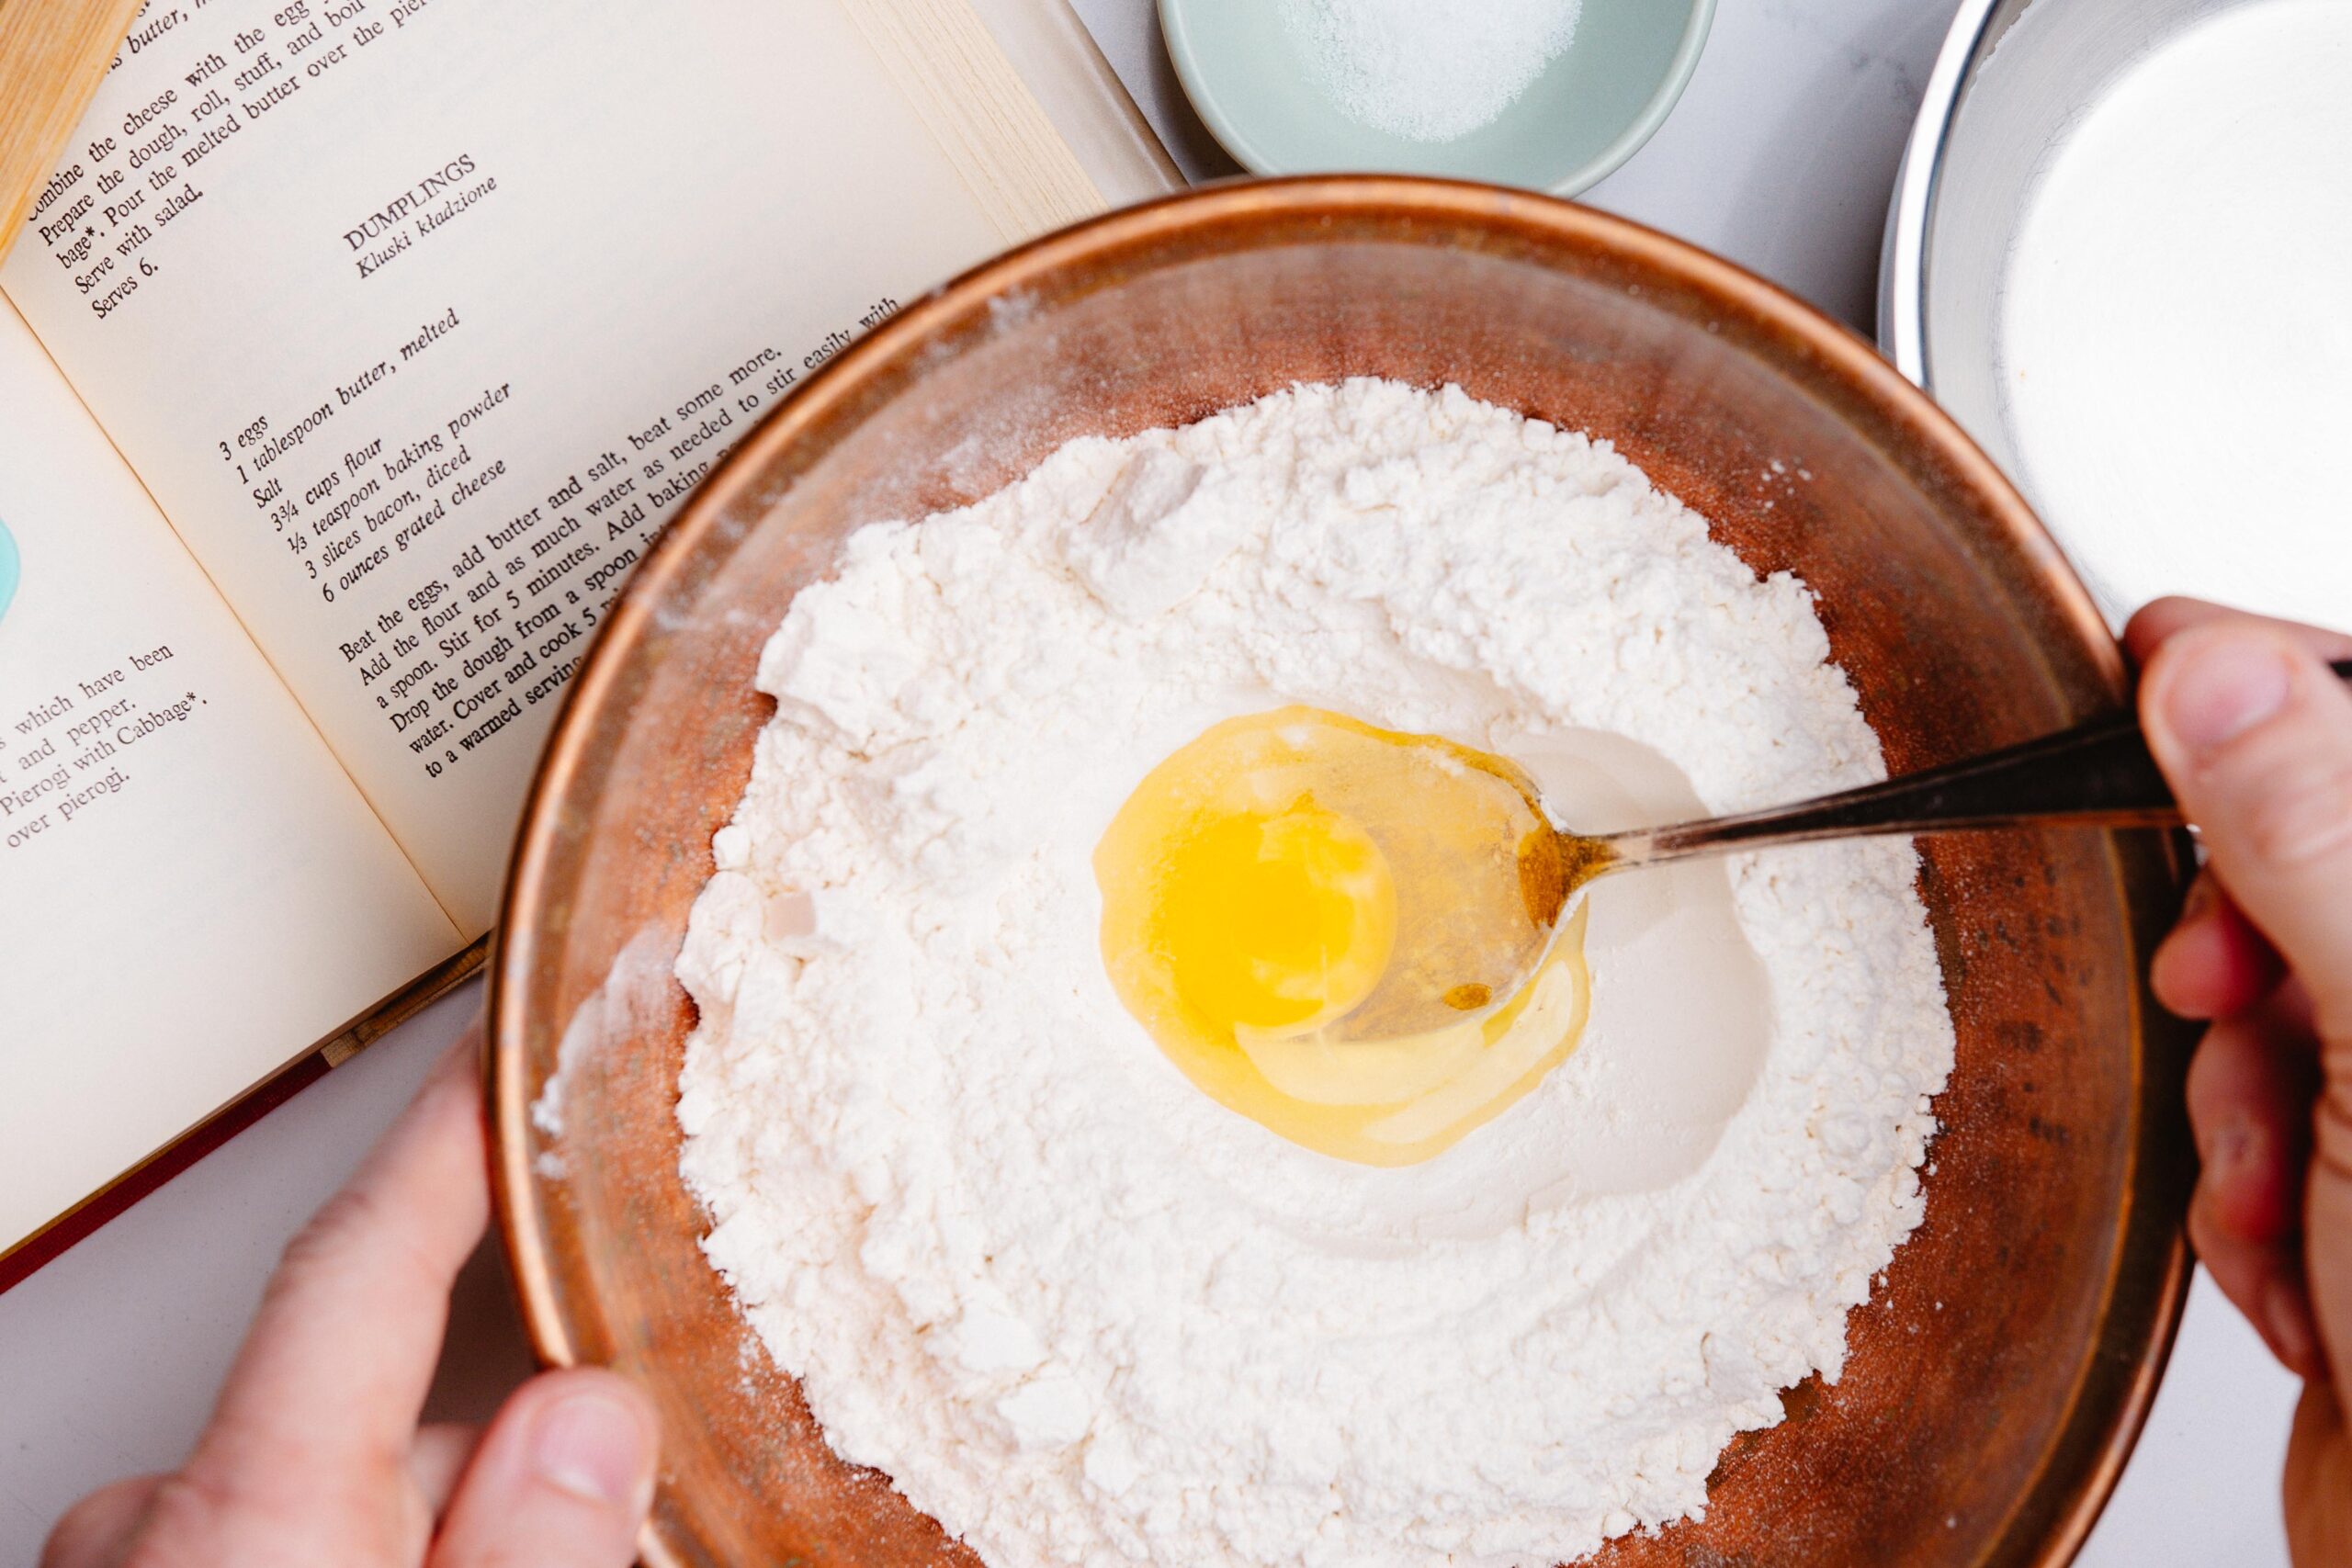
To make the dough, you can always do this by hand, but you will get tired Very Fast! So, I always encourage the use of a simple stand mixer with a paddle and hook attachment.
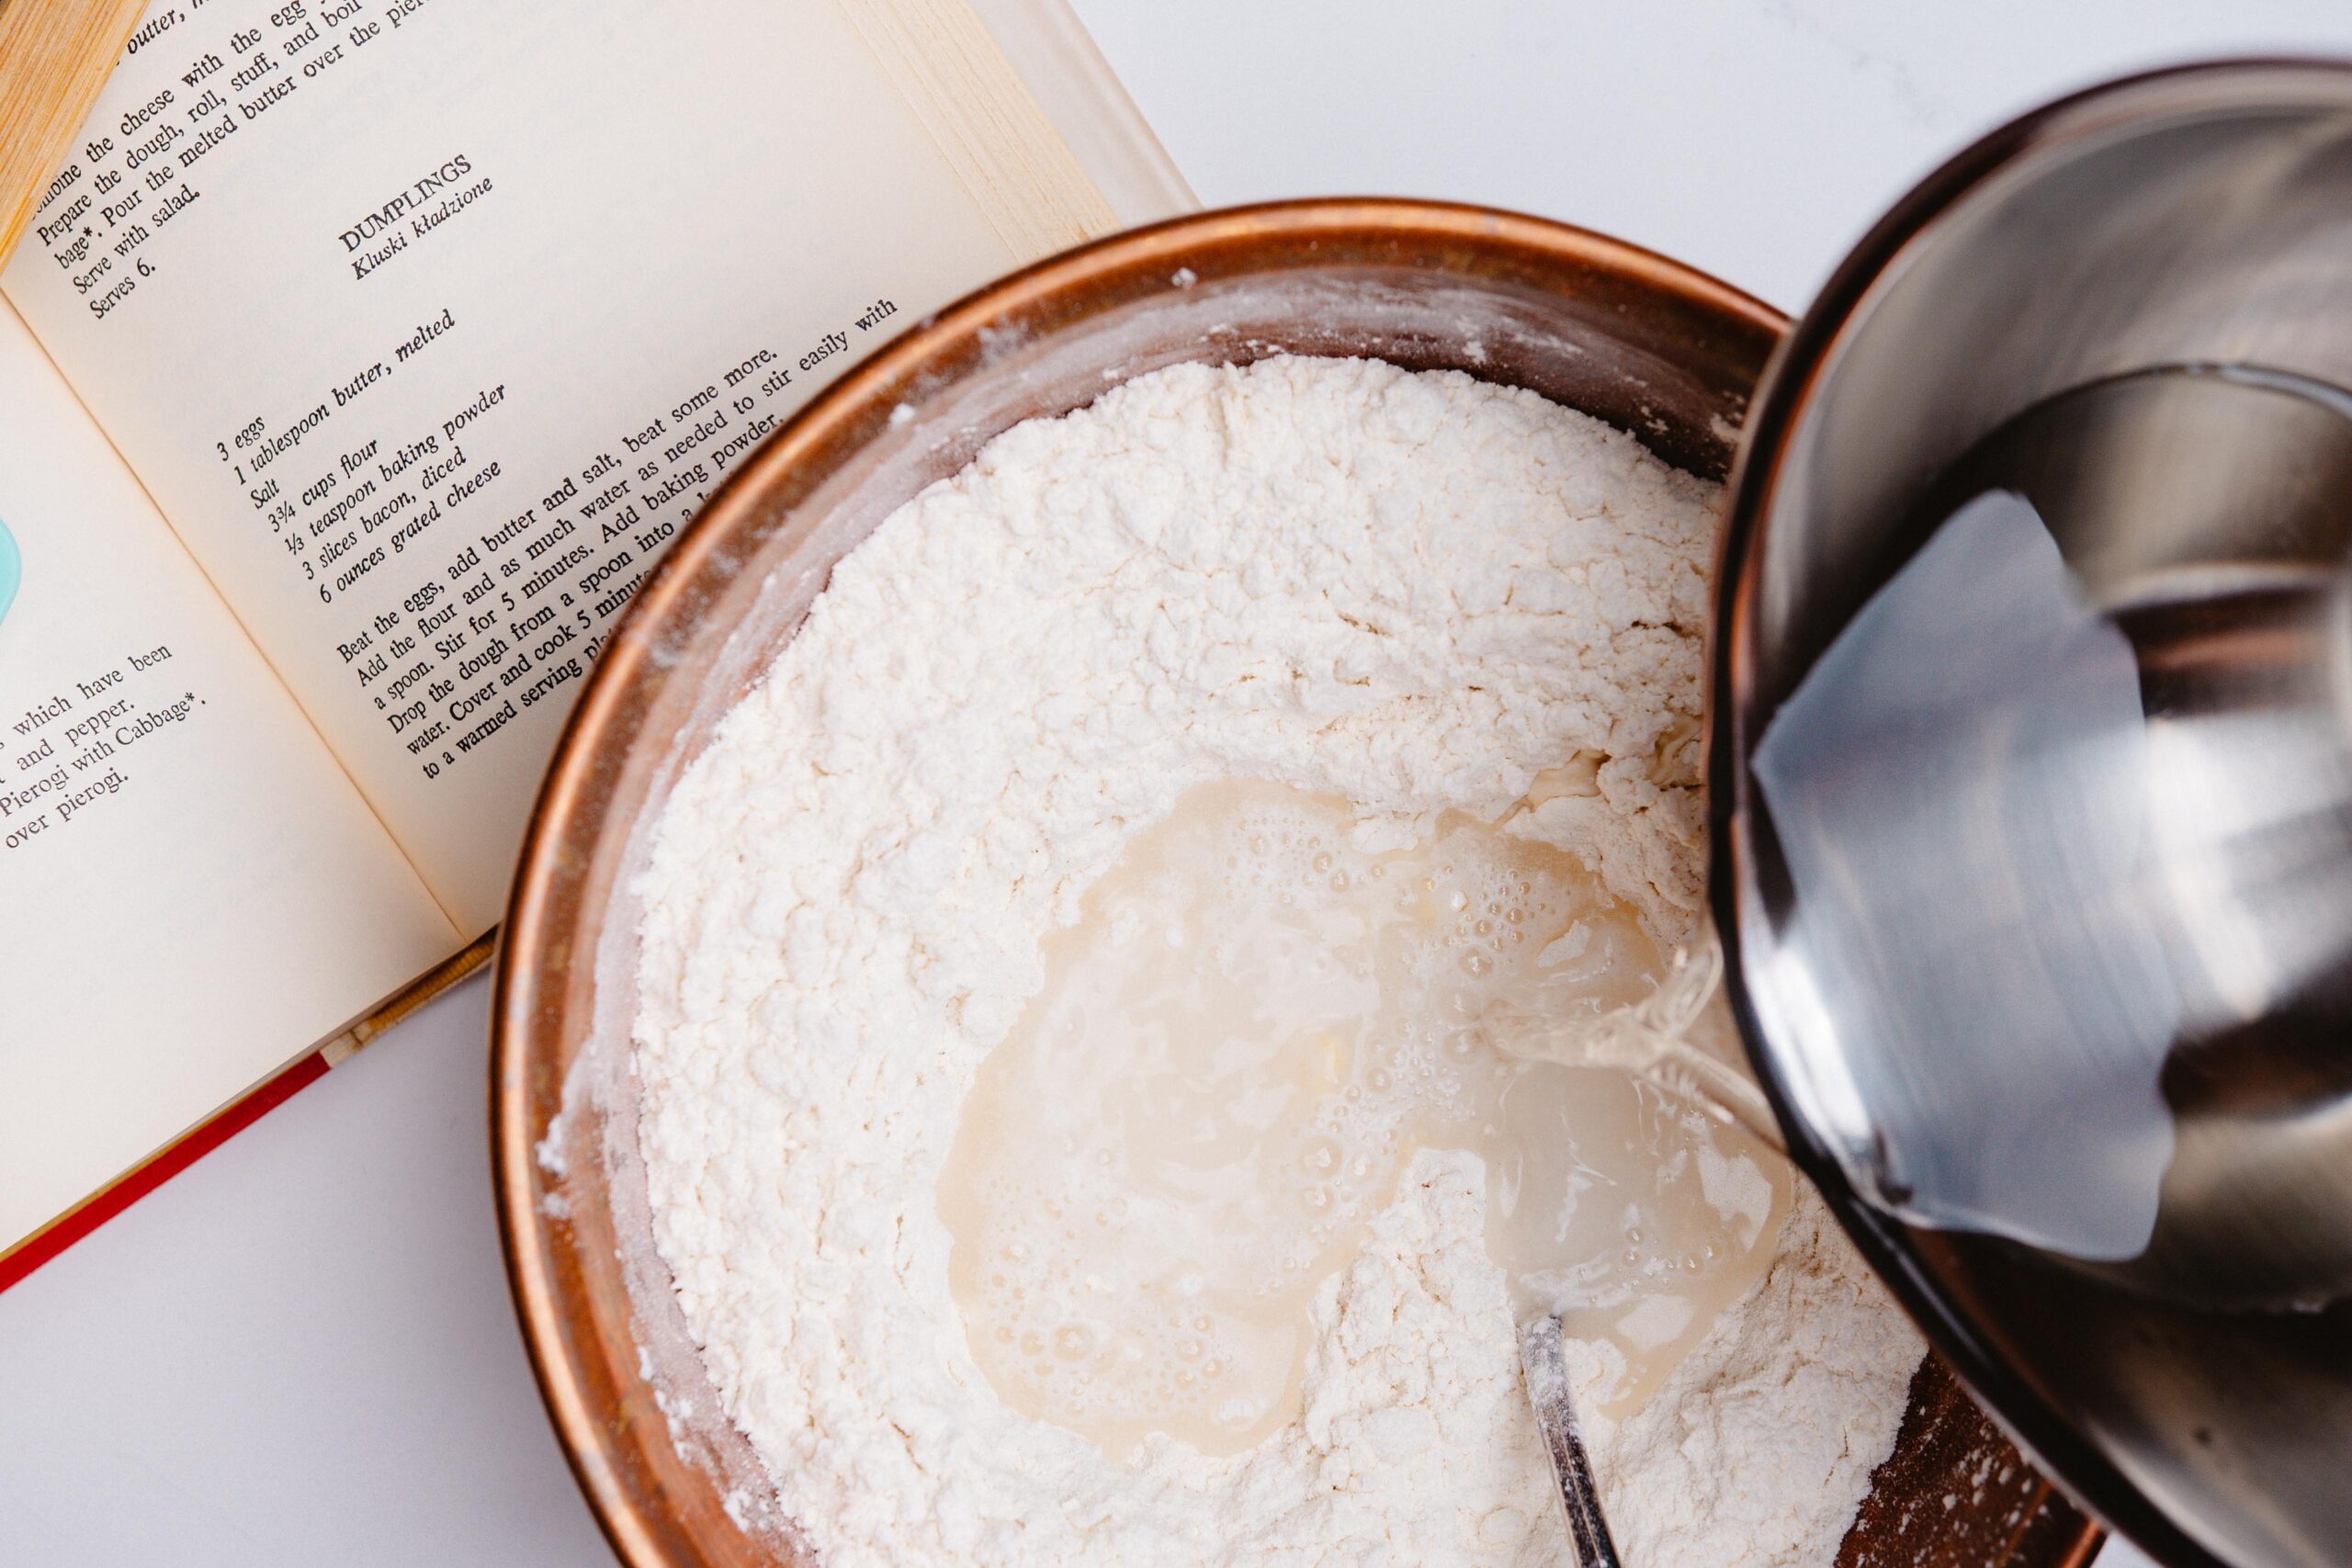
Begin by adding your Bread flour and AP Flour to the bowl and gently whisk together. With the paddle attachment and a medium-low speed, add your egg to the flour, along with your salt. While the paddle is still moving, slowly incorporate the water into the mixer.
It is important to note that doughs are rarely exact in measurements – humidity, elevation, type of flour and a hundred other factors determine how a dough will turn out, so try to trust your feeling on this, rather than plan for the exact amount of water to lead you home. If you end up over hydrating your dough and it’s too sticky, don’t worry! You can always add a tablespoon of flour at a time until you
get the desired dough, and likewise with more water! Trust yourself.
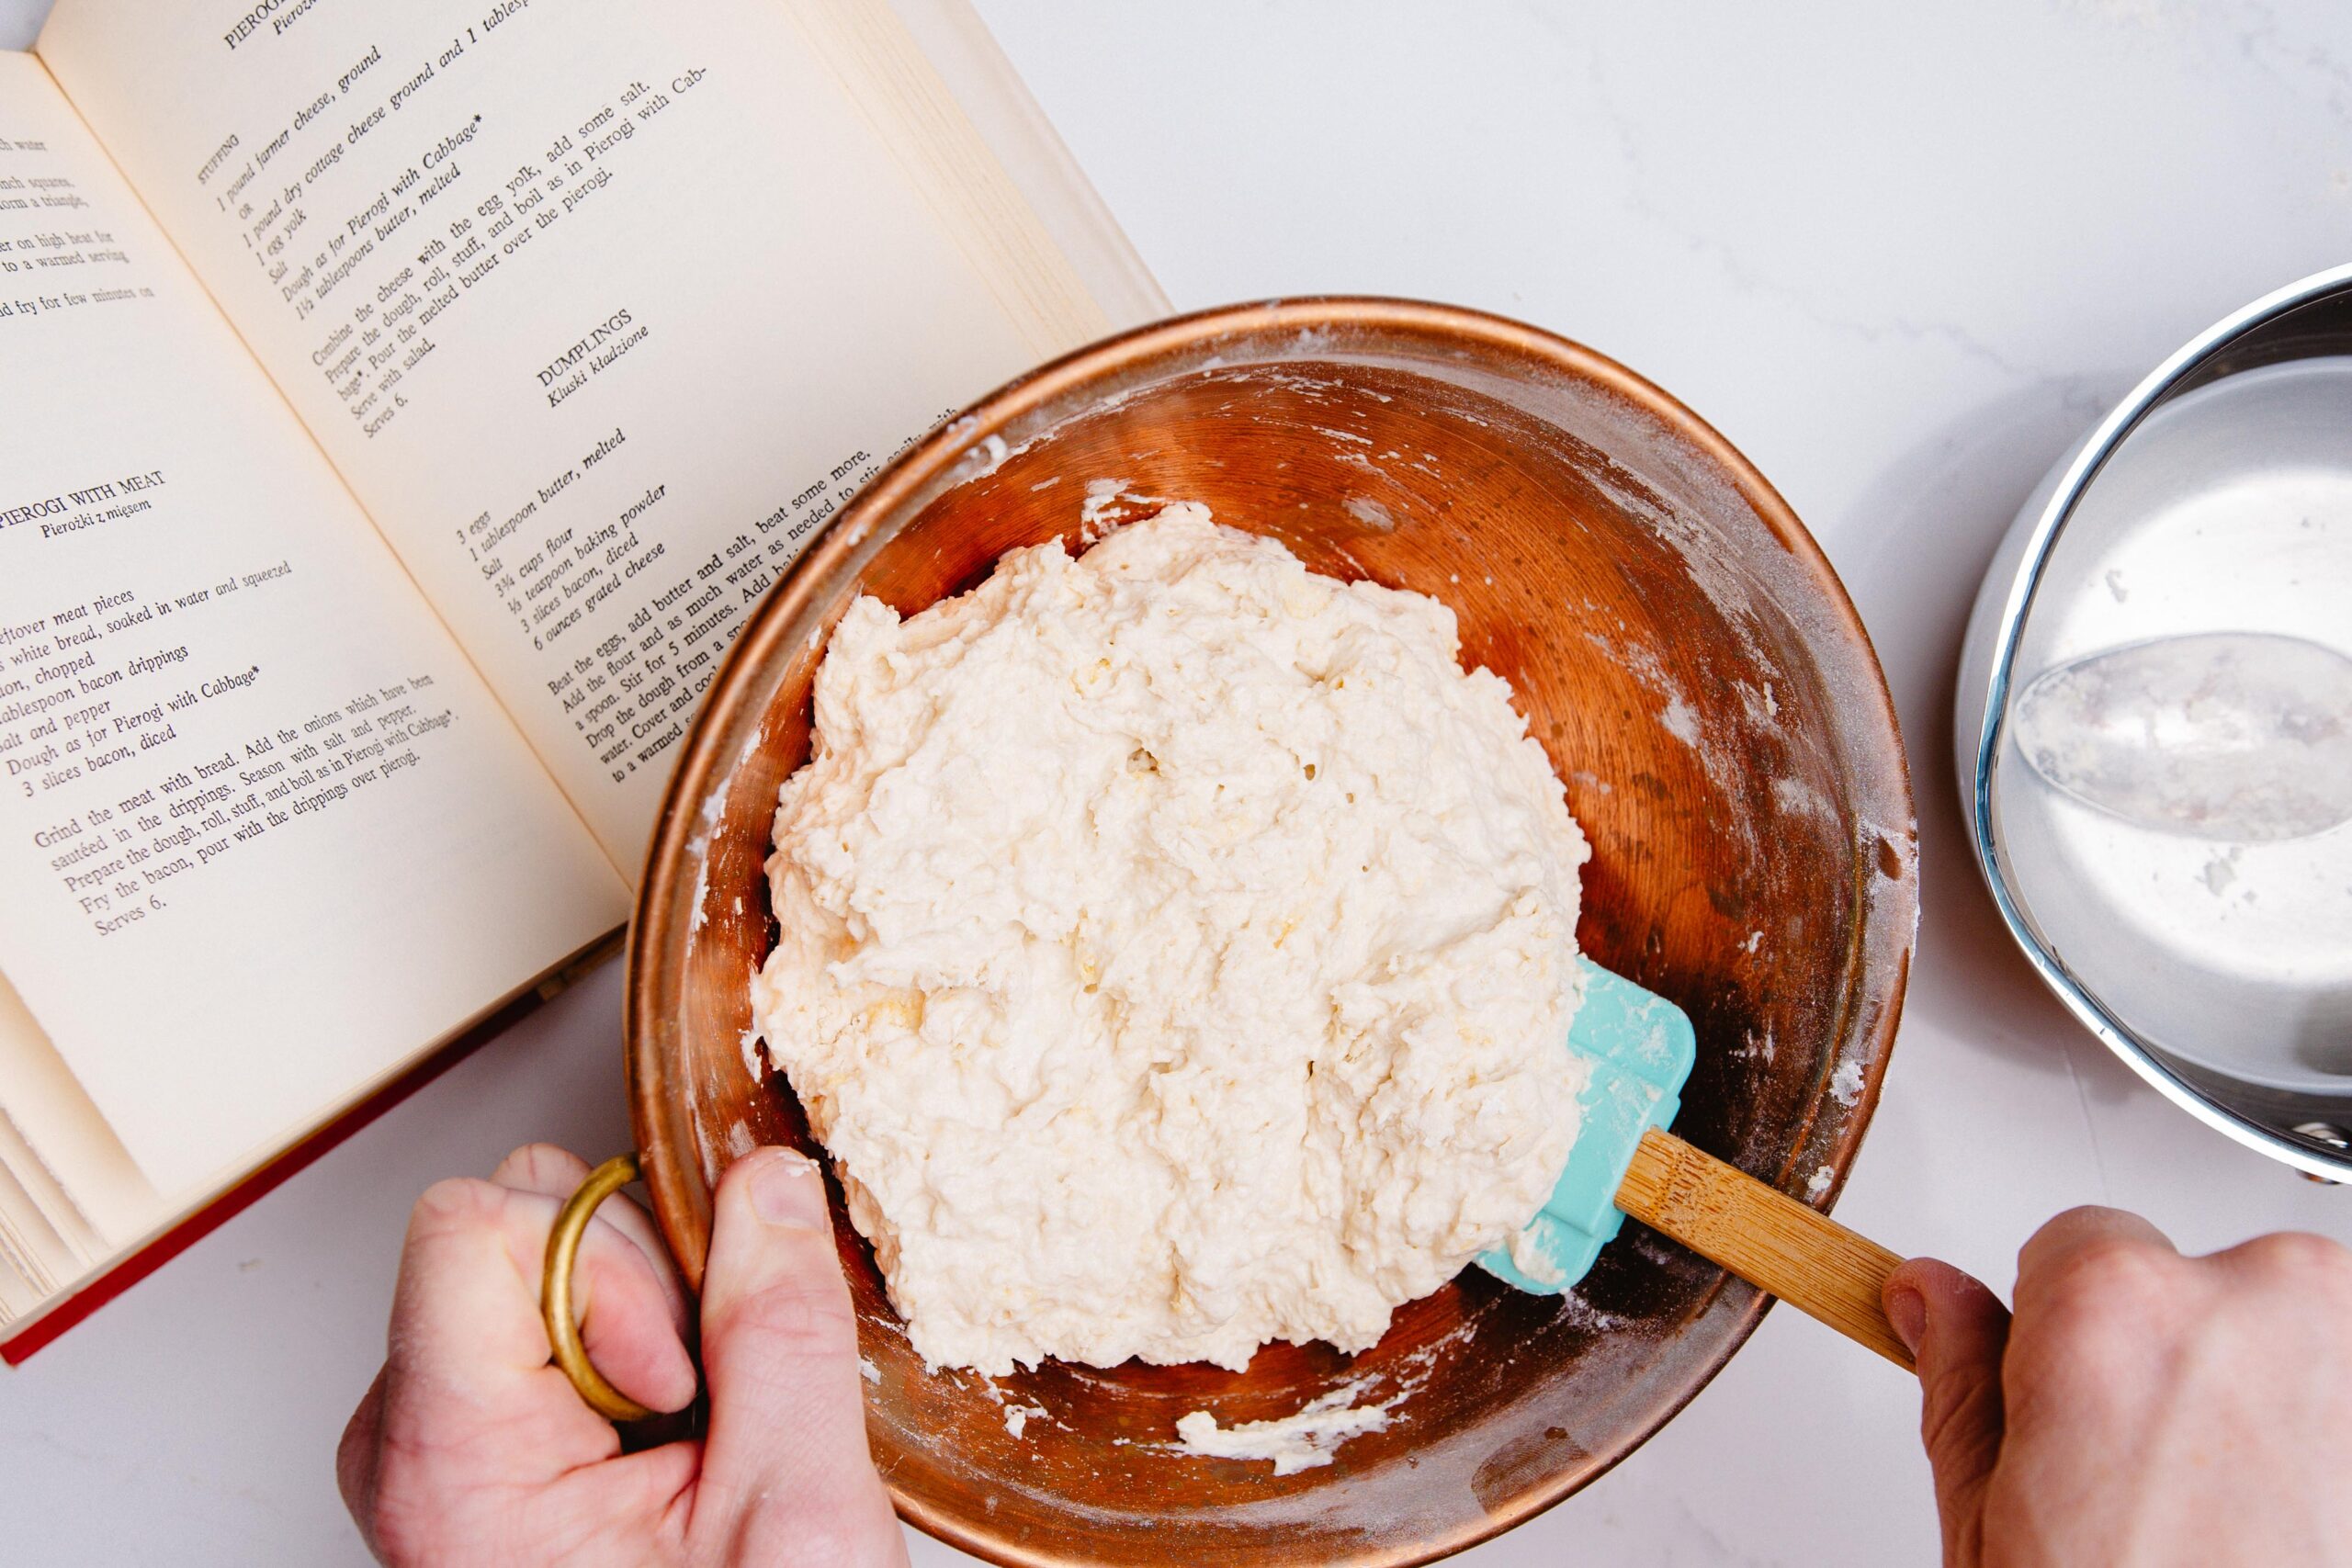
Once enough water is added to begin to form a dough, stop the mixer and change the paddle for the dough hook. You can run this on medium speed for about 8 minutes or so, until the dough starts to show the gluten strands stretching, tearing and it has a cohesive bond. It’ll be slightly tacky to the touch, but not sticking to your fingers. If it’s gluey or sticking to your hand when you touch it, add a bit more flour, mix and test again.
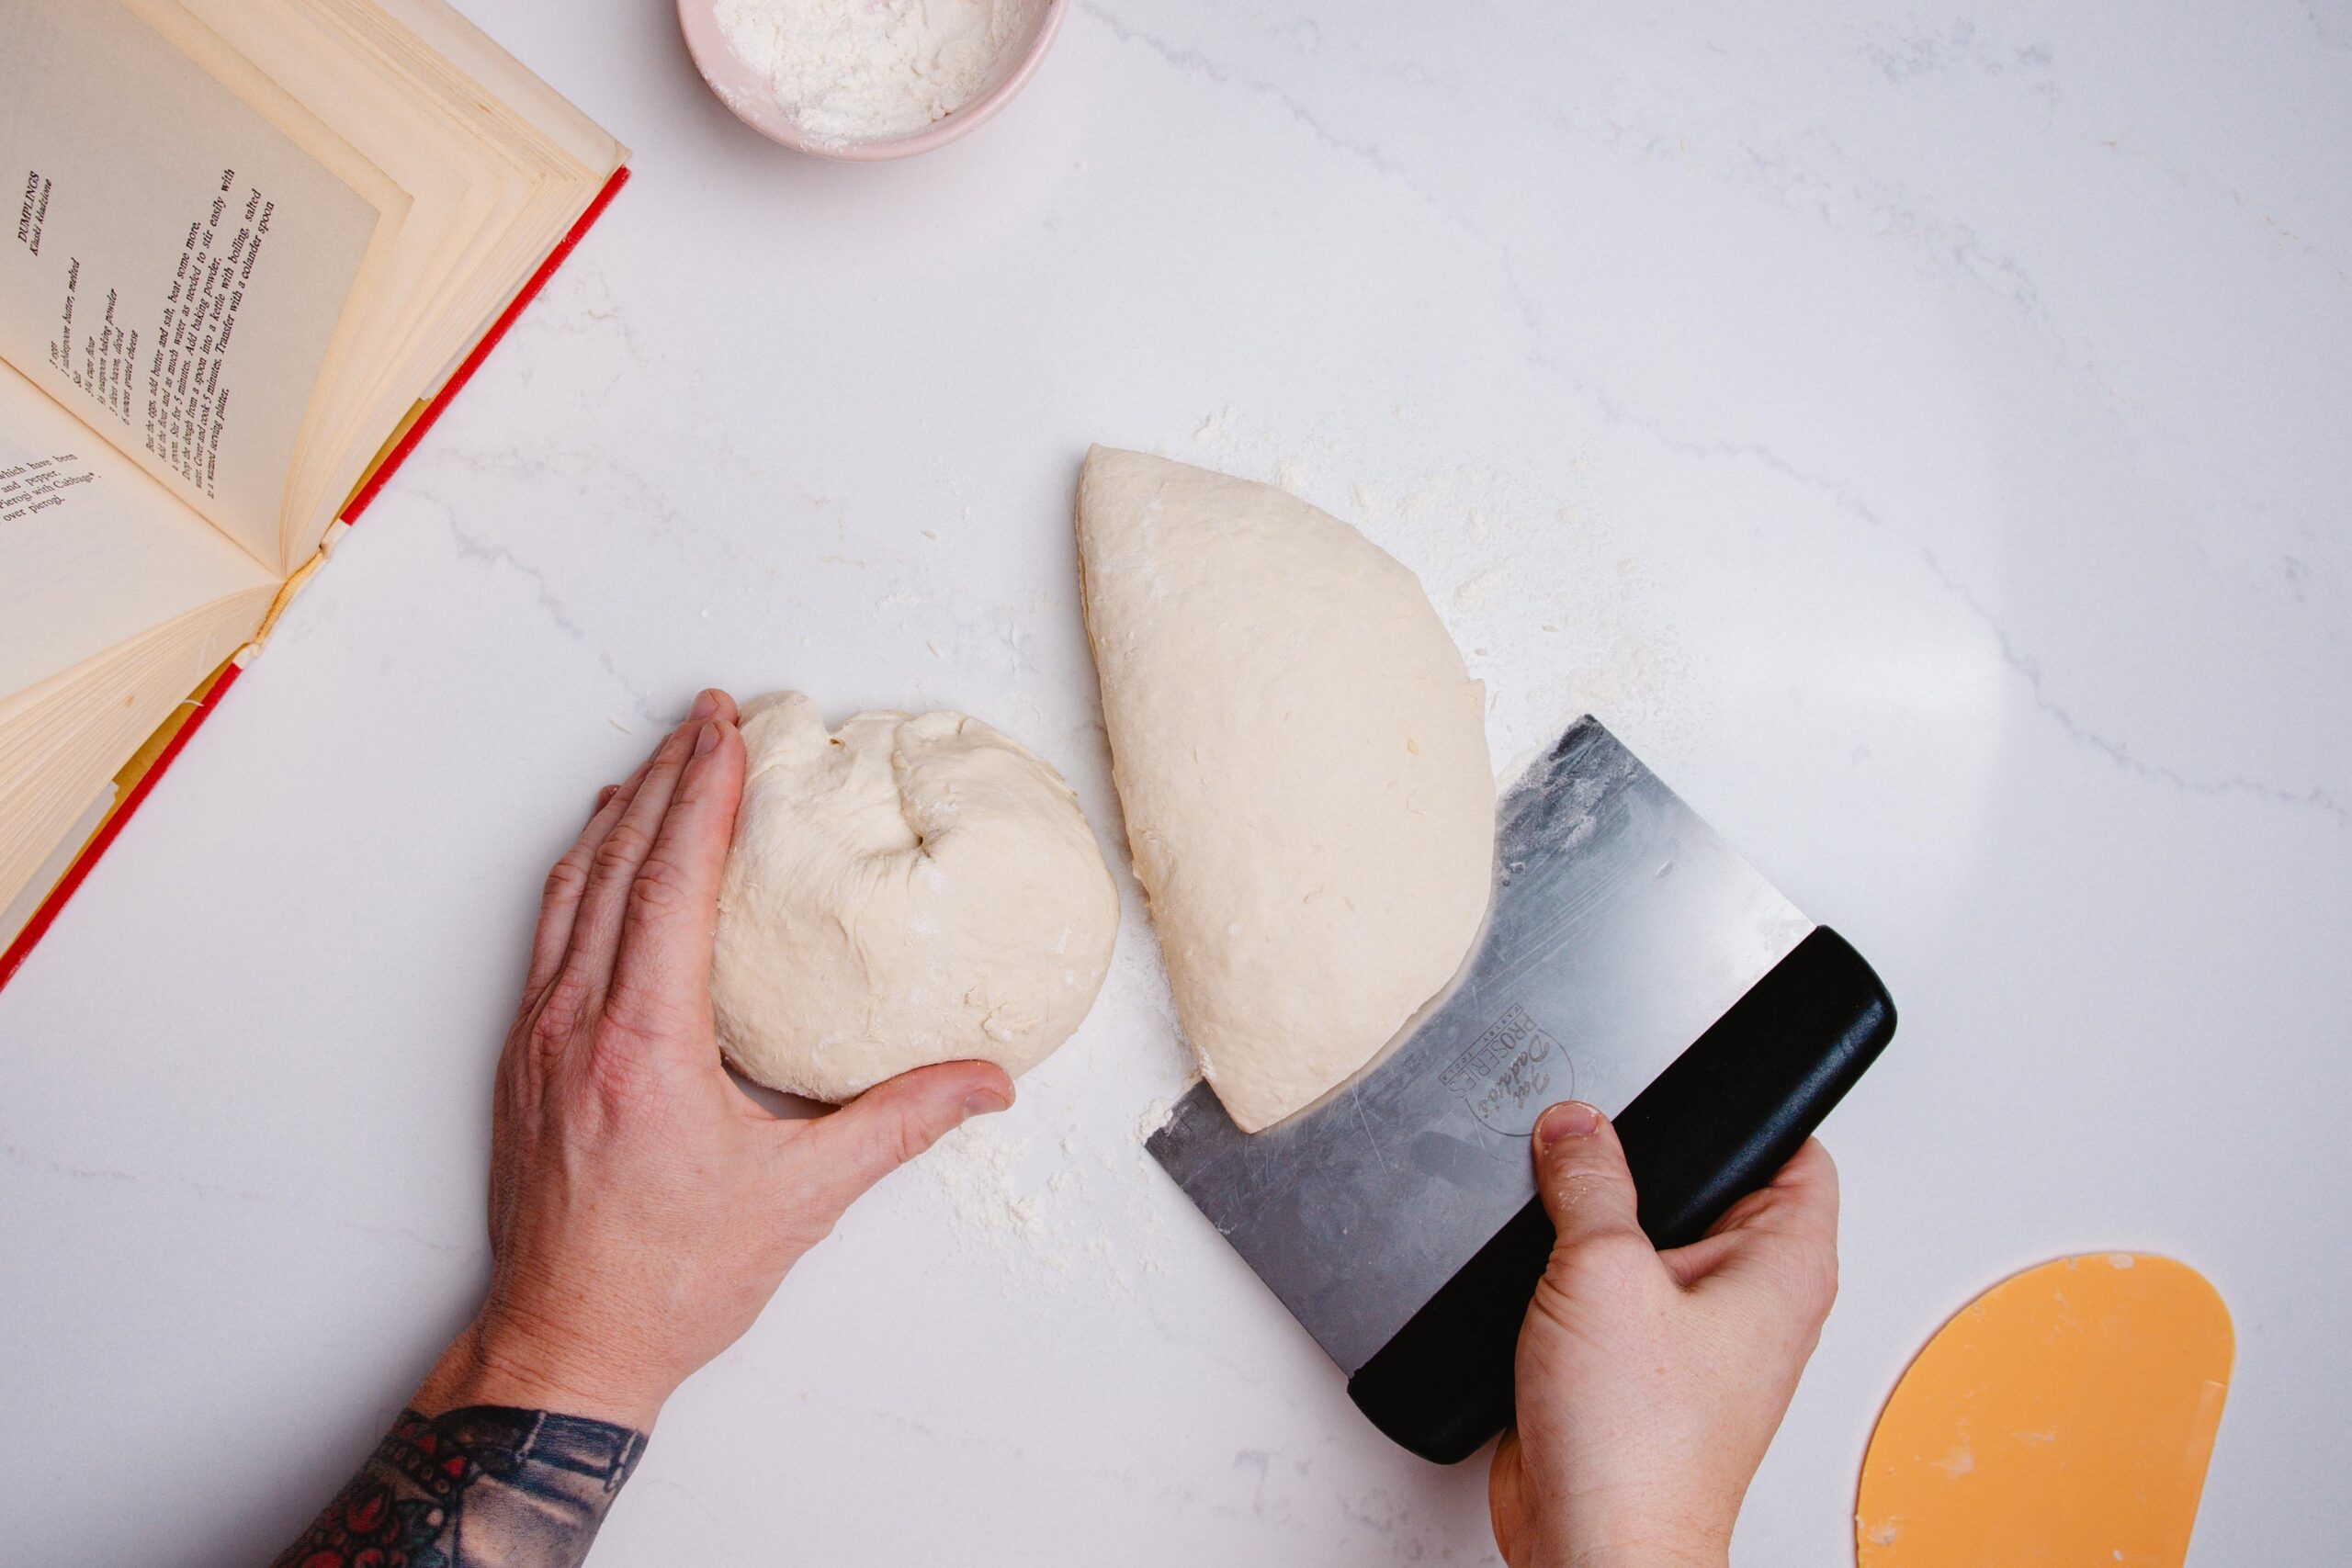
When the dough is ready, remove the bowl from the mixer, turn the dough onto the counter, tuck the sides underneath itself to that it forms a smooth dome. Then transfer this back to a lightly greased bowl to rest for about 30 minutes, with a damp towel placed on top to prevent it from drying out.
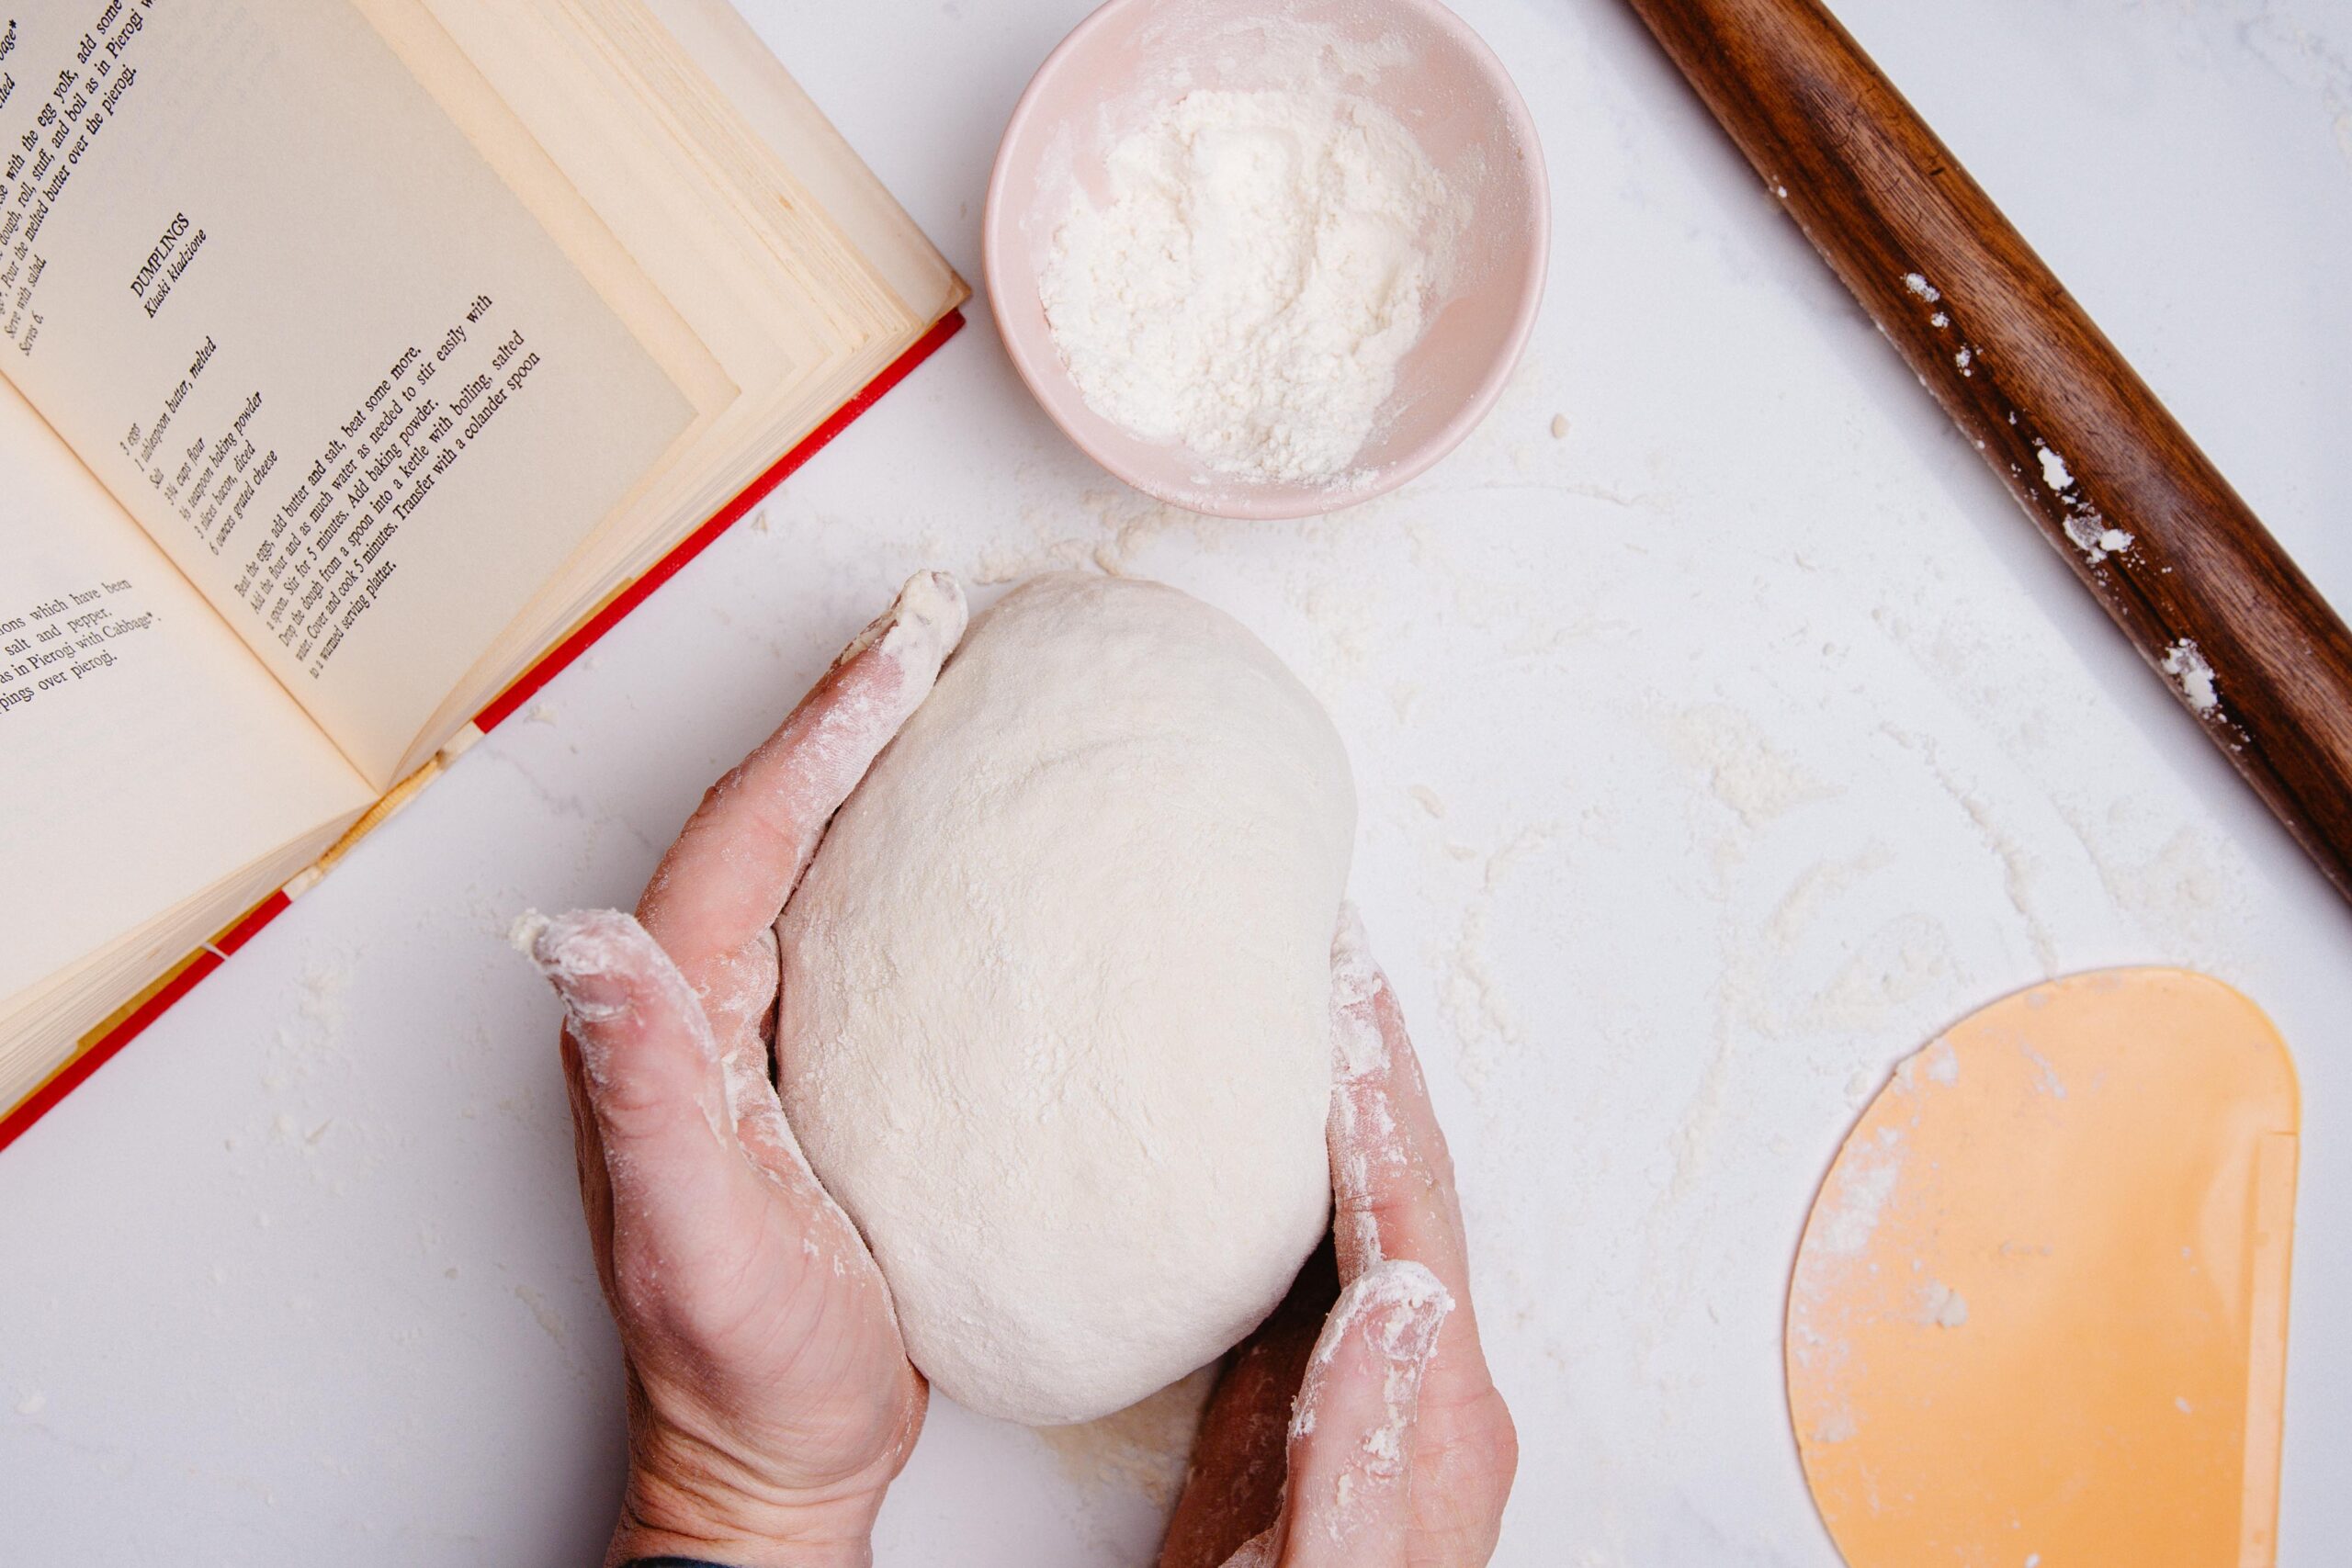
After beating that dough up for 10+ minutes, you need to allow the gluten to relax, otherwise when you go to roll it out, it’ll just spring back or break.
So grab a Cold Brew, catch up on your favorite Bravo show and then get ready for the fun part!
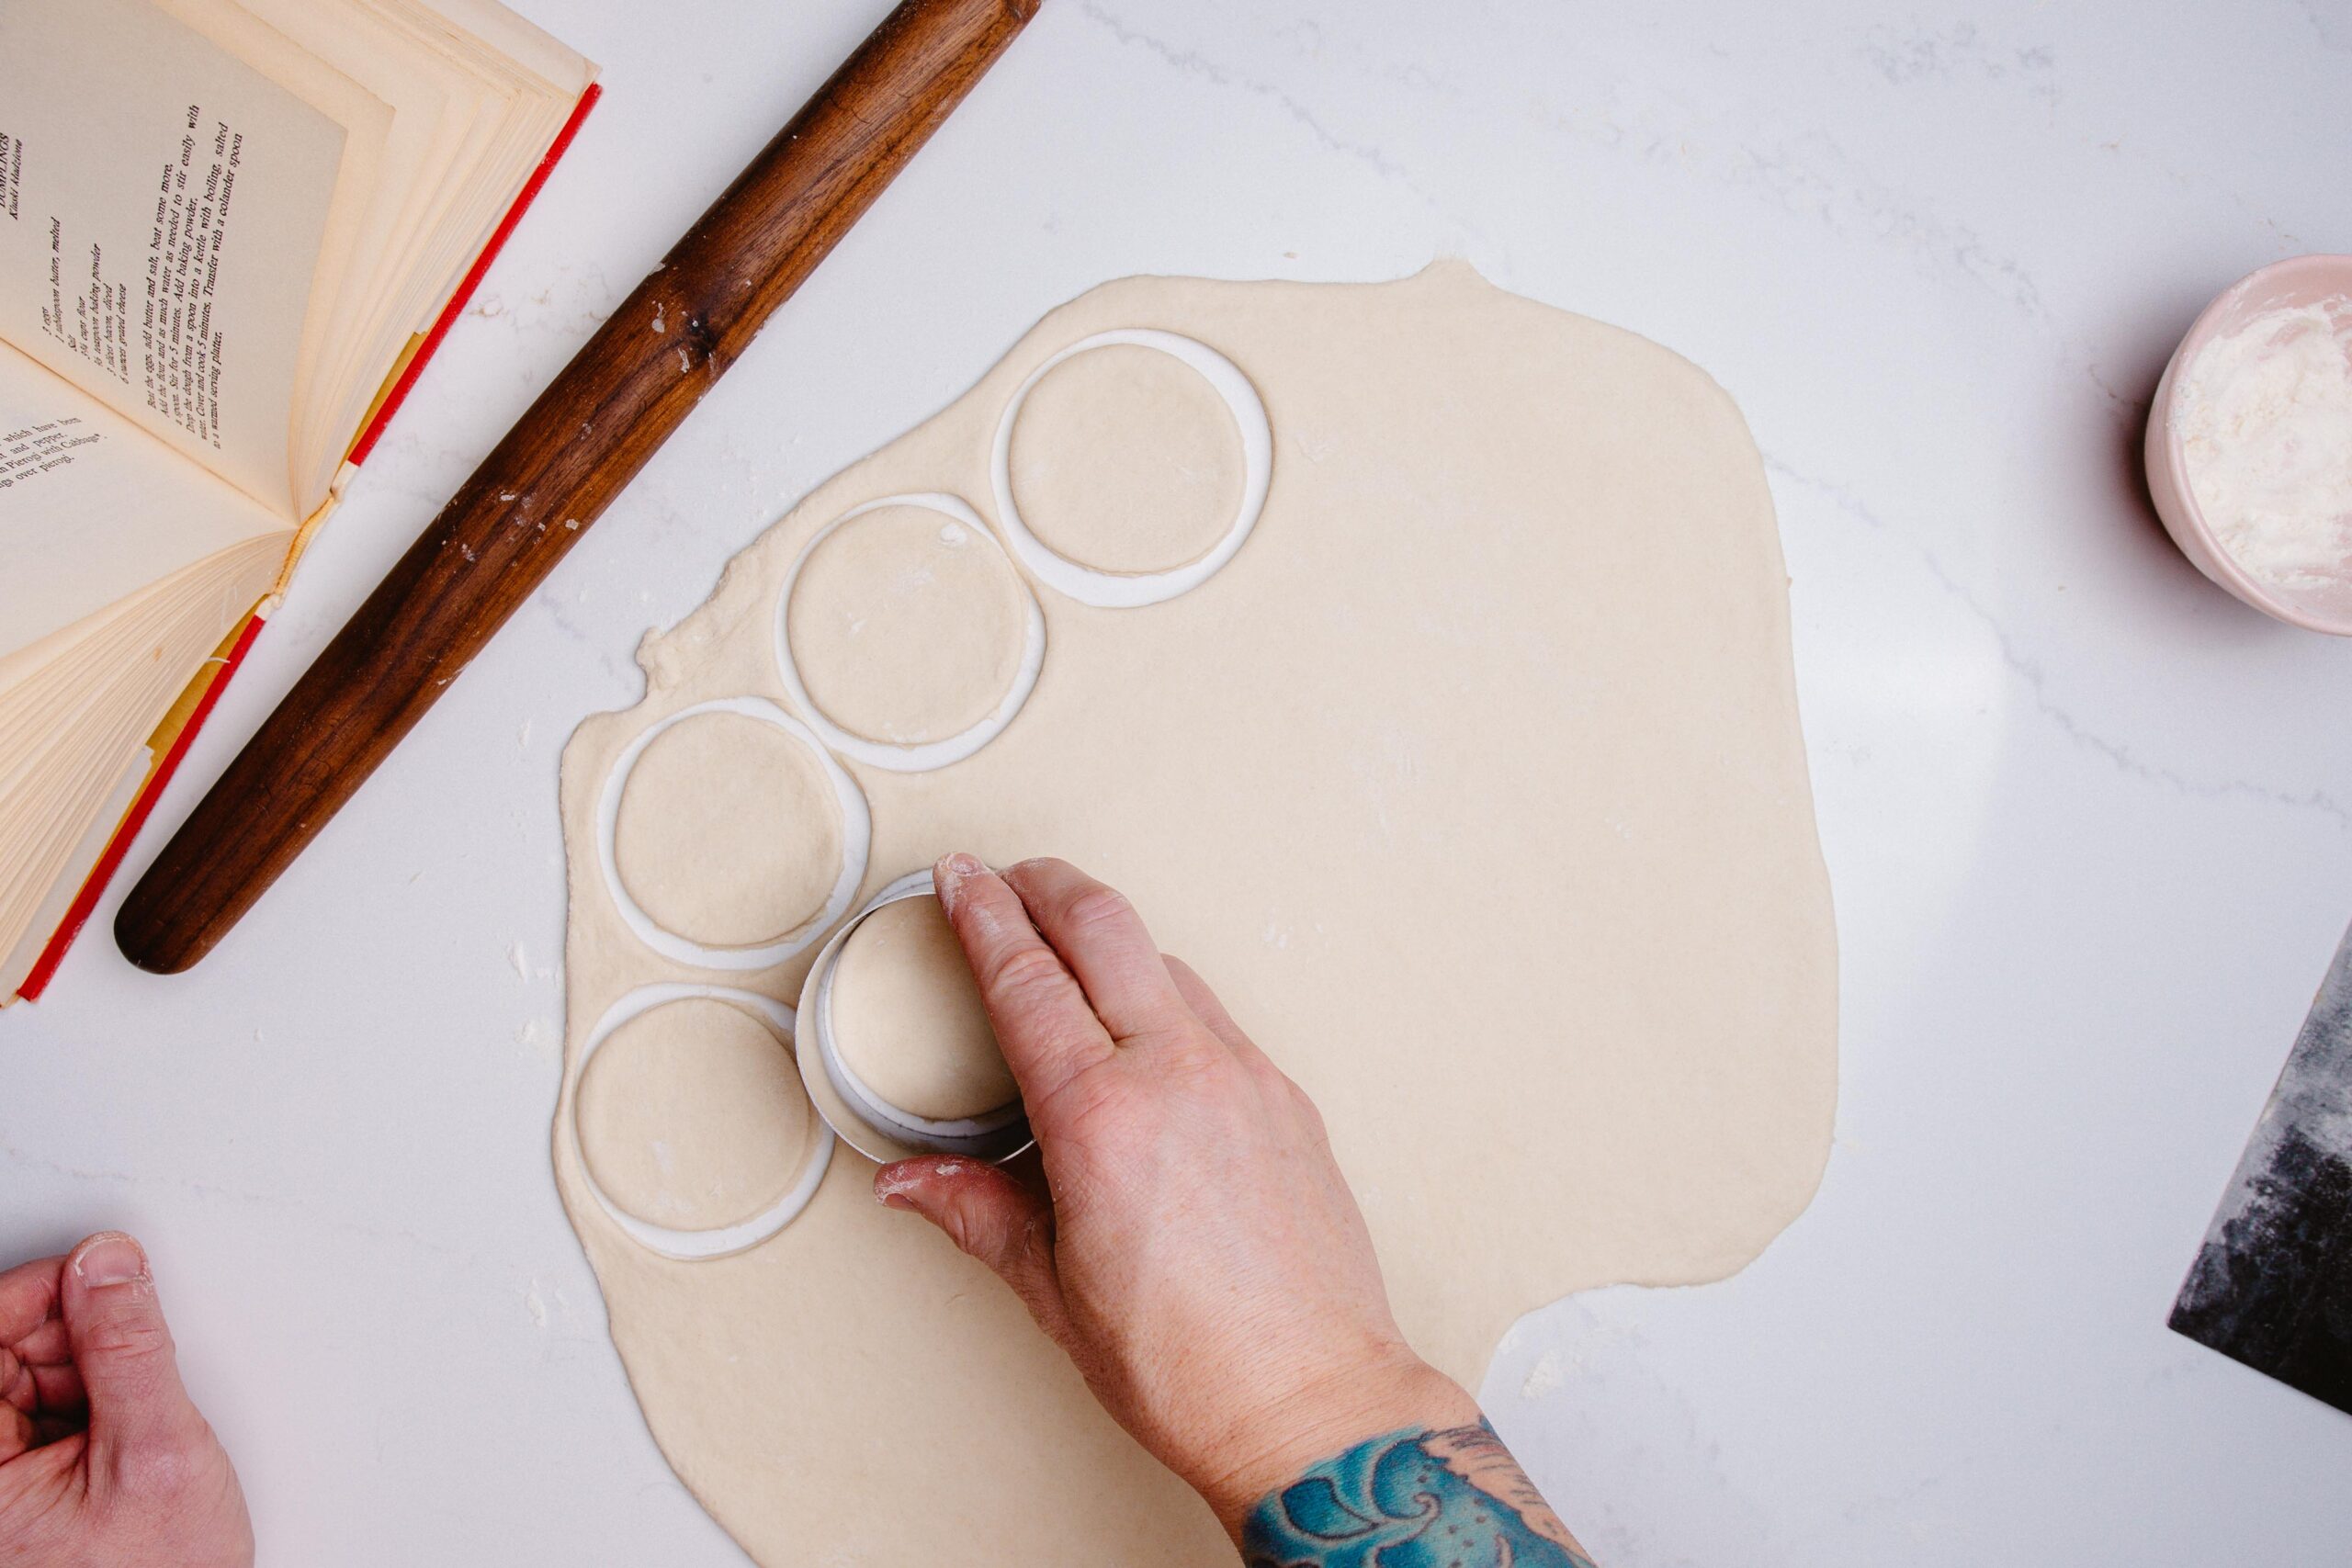
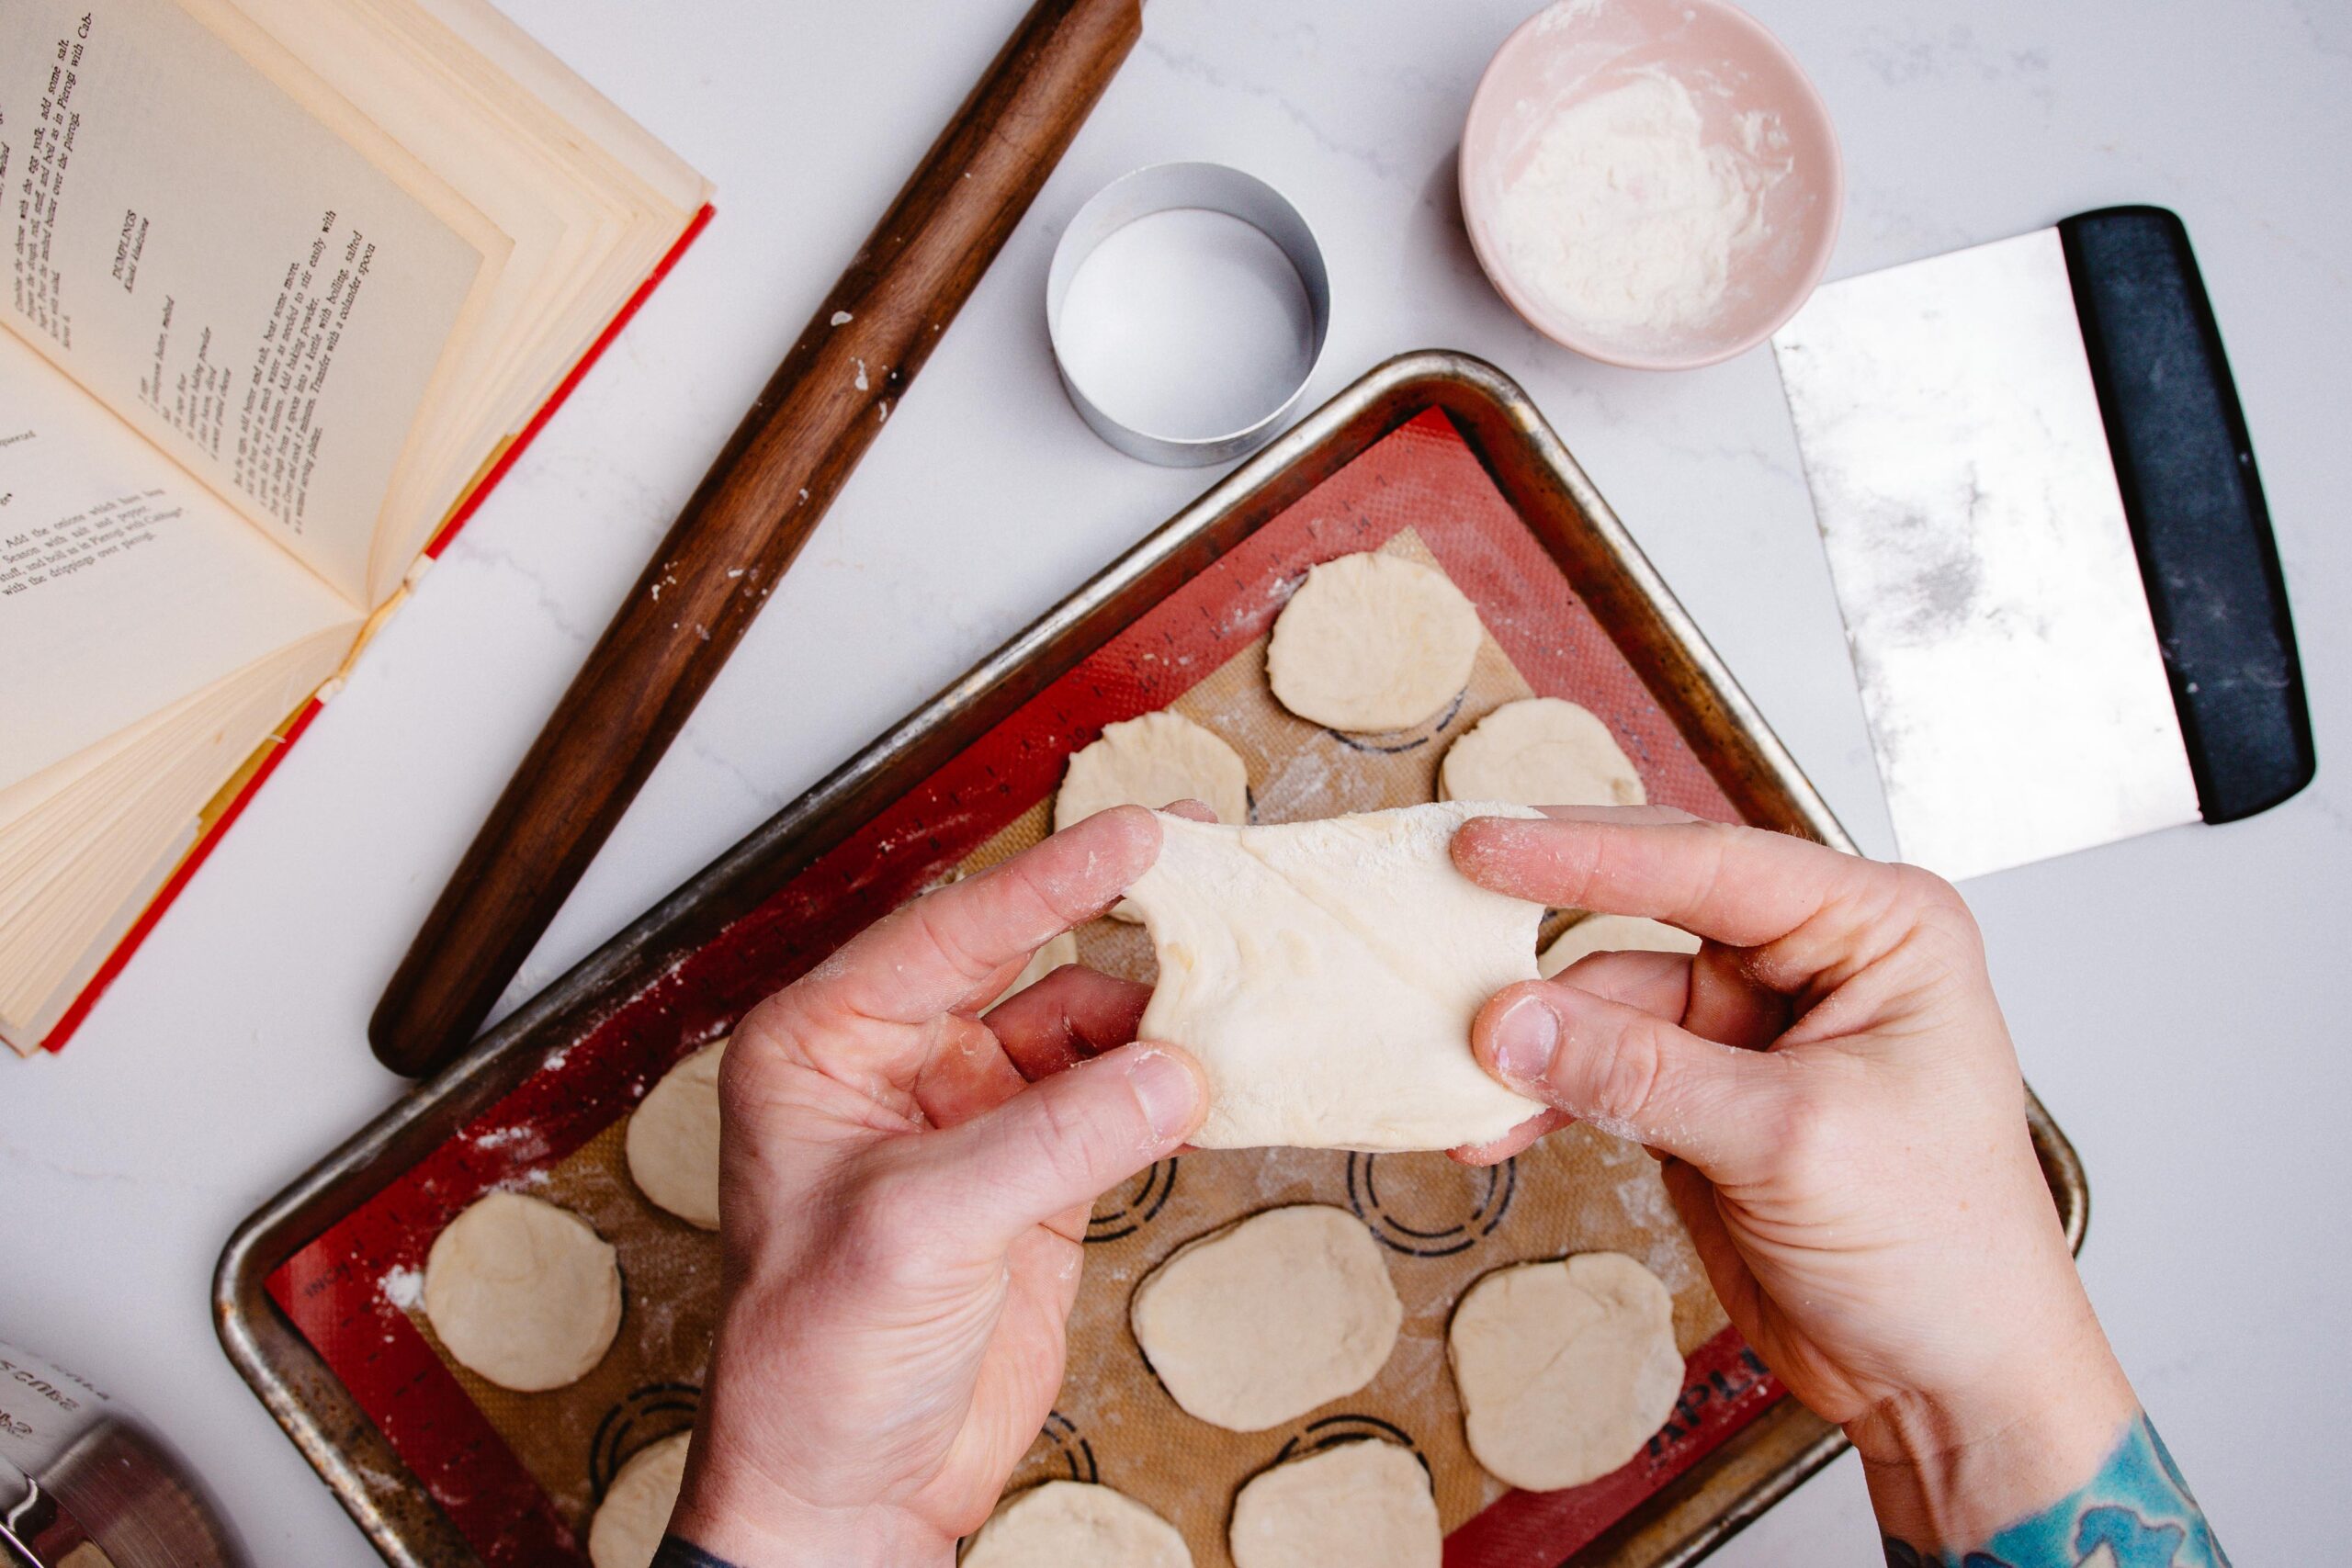
Now that the dough has rested, let’s use a Dough Cutter to split it into halves or quarters, keeping anything unused in the covered bowl, so they don’t dry out. You can use a rolling pin to simply flatten the dough to about the size of a few credit cards stacked together (maybe 1/4 inch thickness) and using a circular dough cutter, punch out circles of dough (or squares, it doesn’t really matter).
Reserve any extra dough in a ball and toss back in that bowl with the rest – it’s still good!
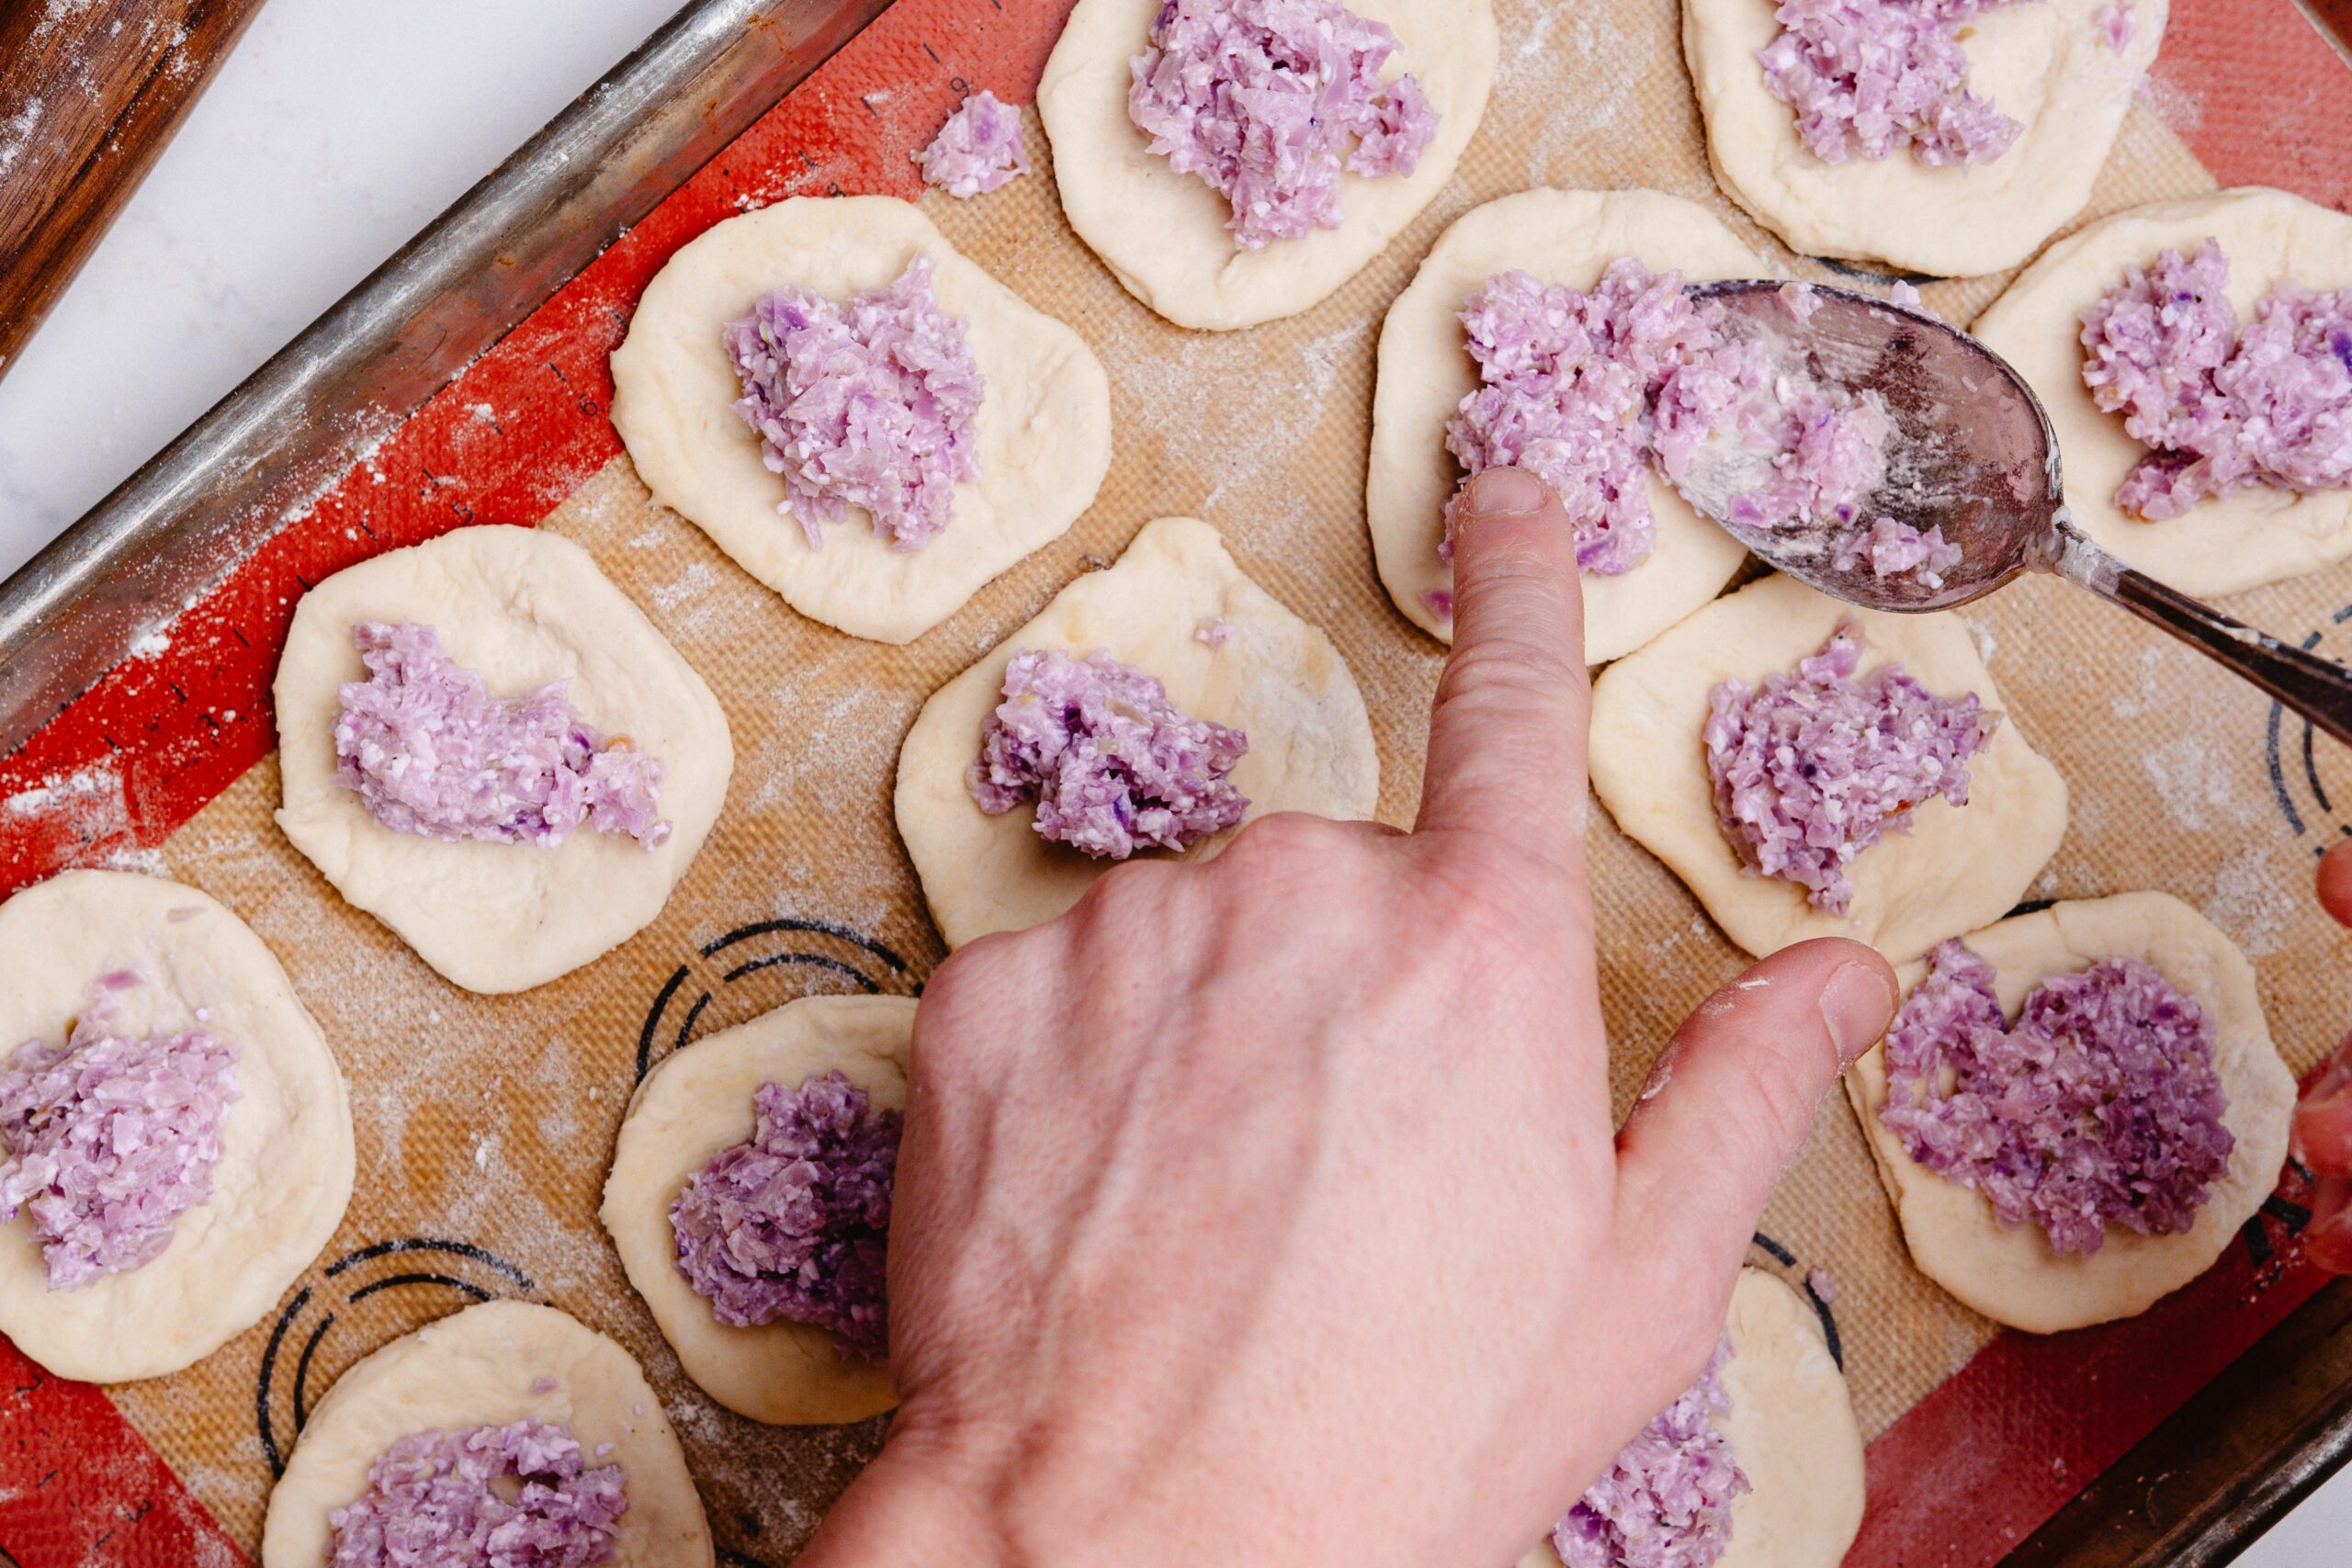
Then either using a spoon or piping bag, fill a small but generous amount of the cabbage filling in the center of each dumpling.
You can then carefully lift one up, slightly stretch it and then begin to pinch the center points together, then the outsides and closing any gaps you see.
You want a tightly sealed dumpling, or your filling will absolutely spill out when boiling them.
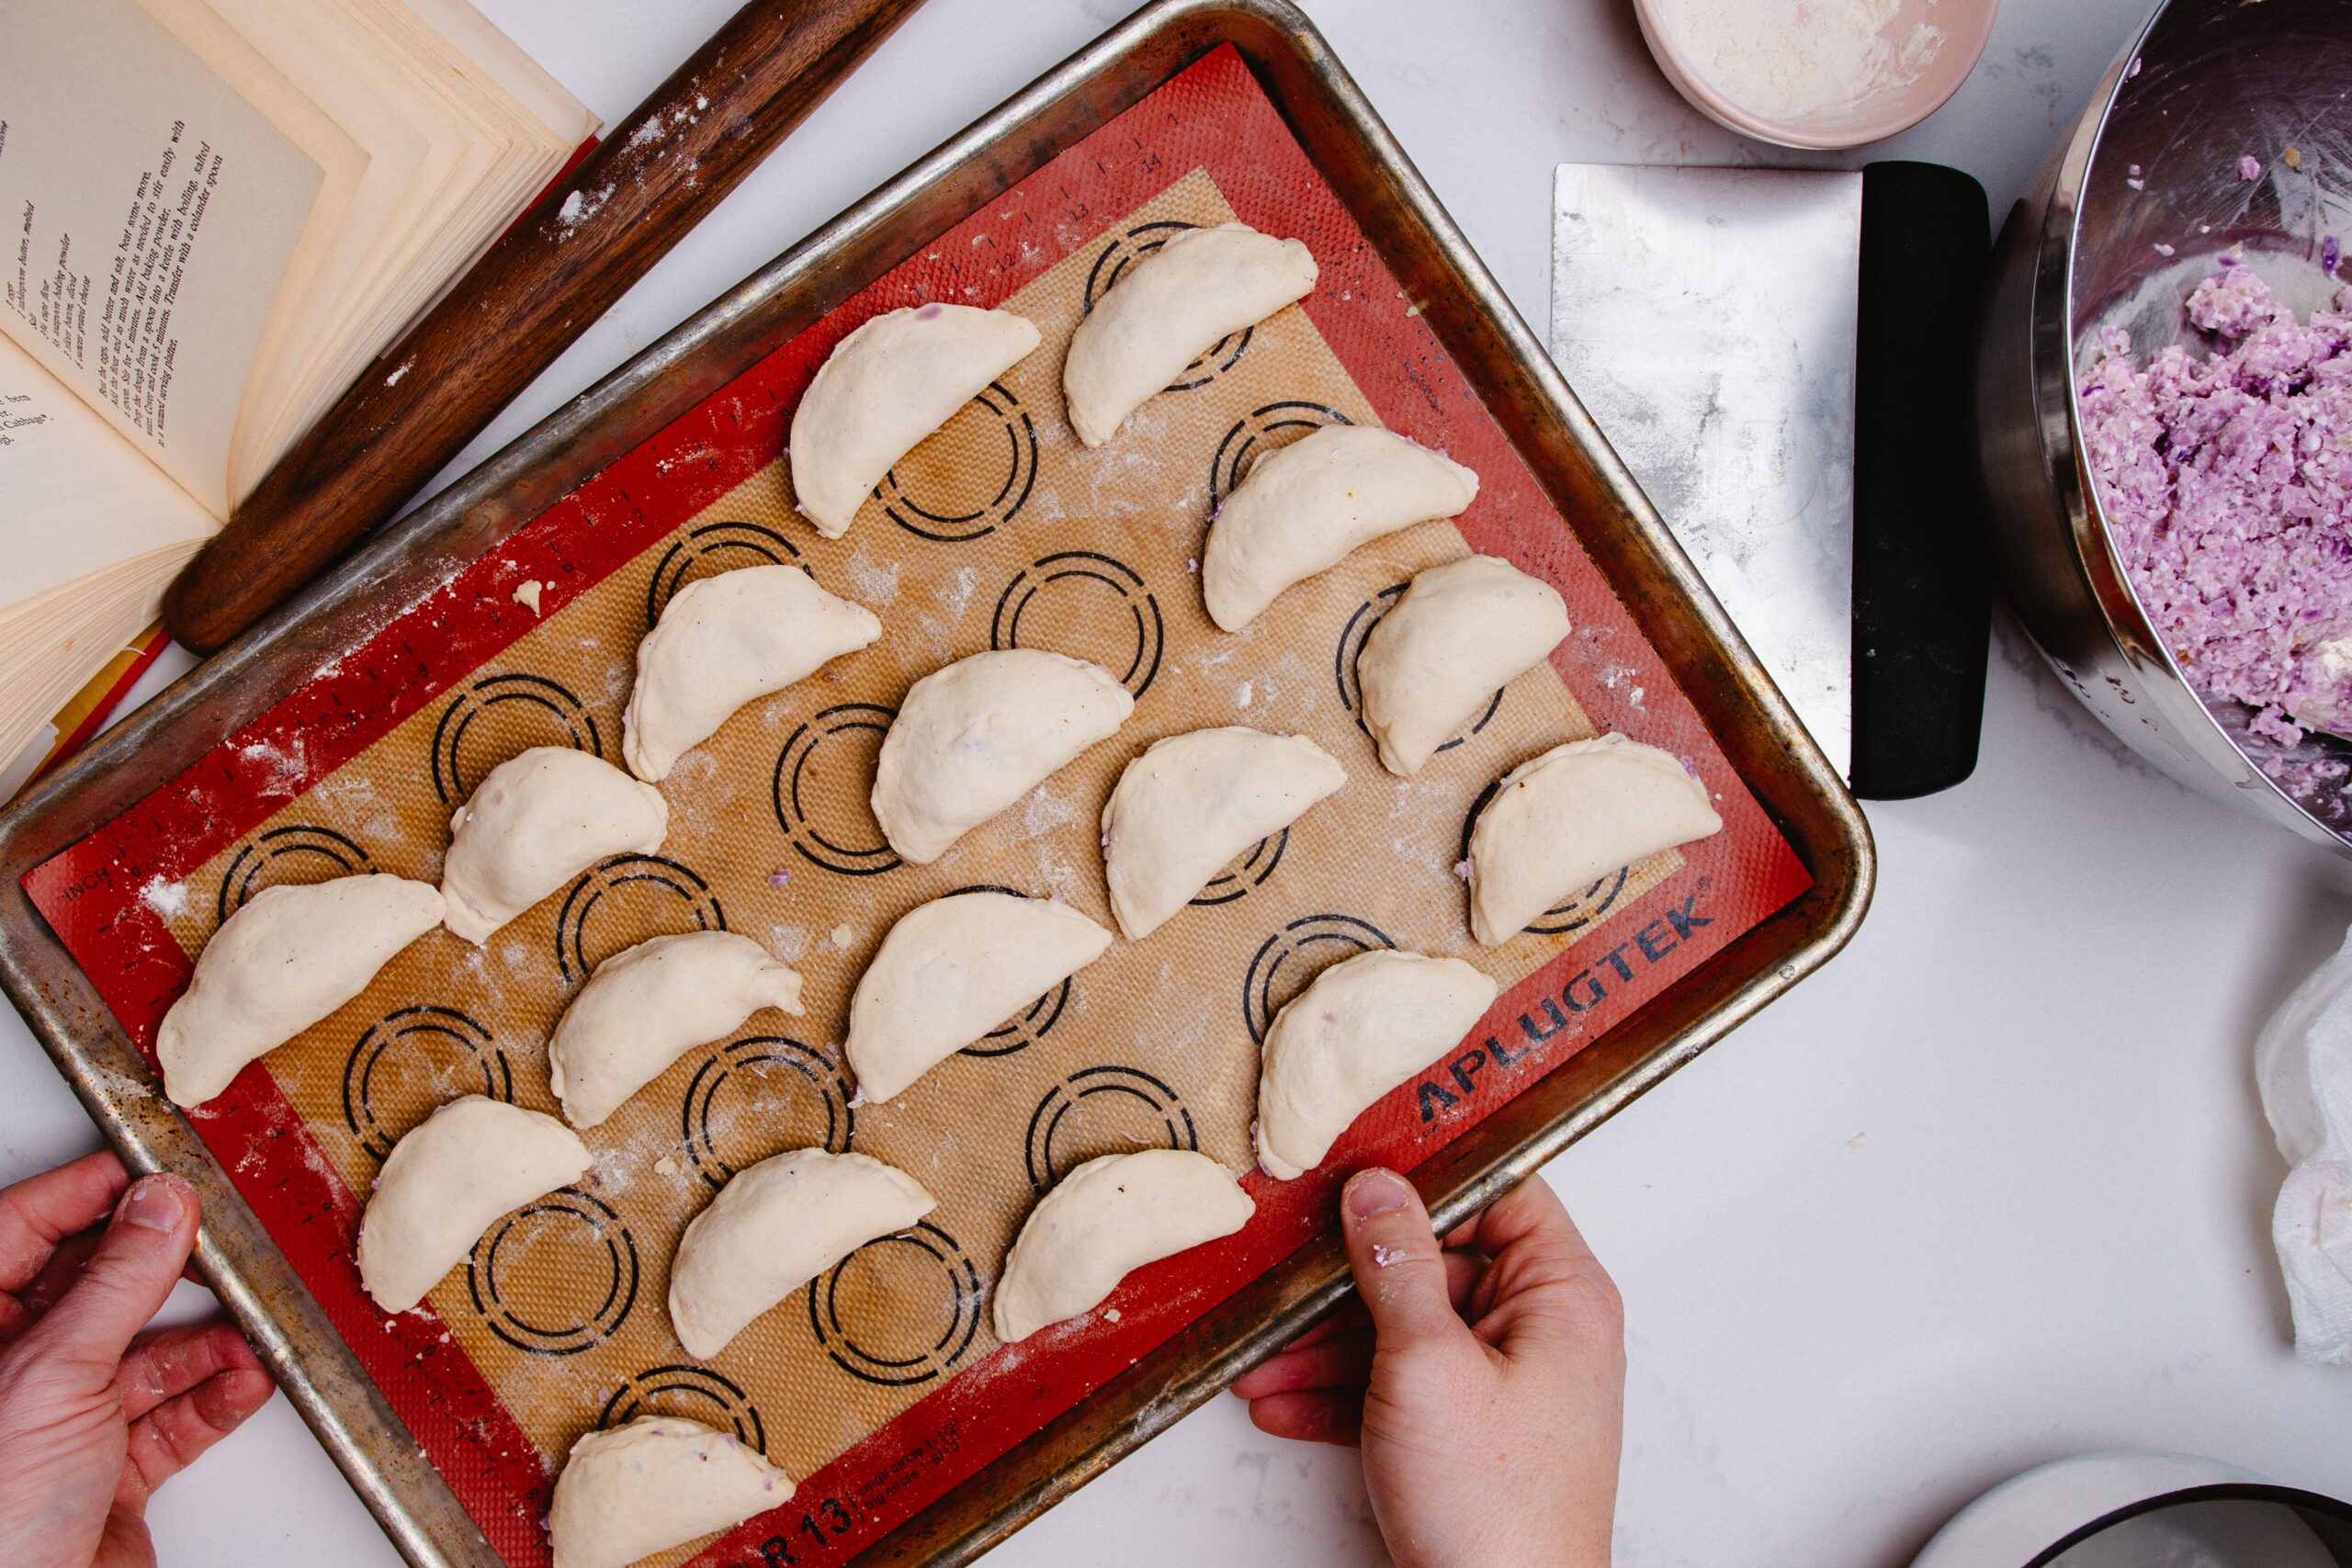
Repeat this process until you’ve filled all of your dumplings!
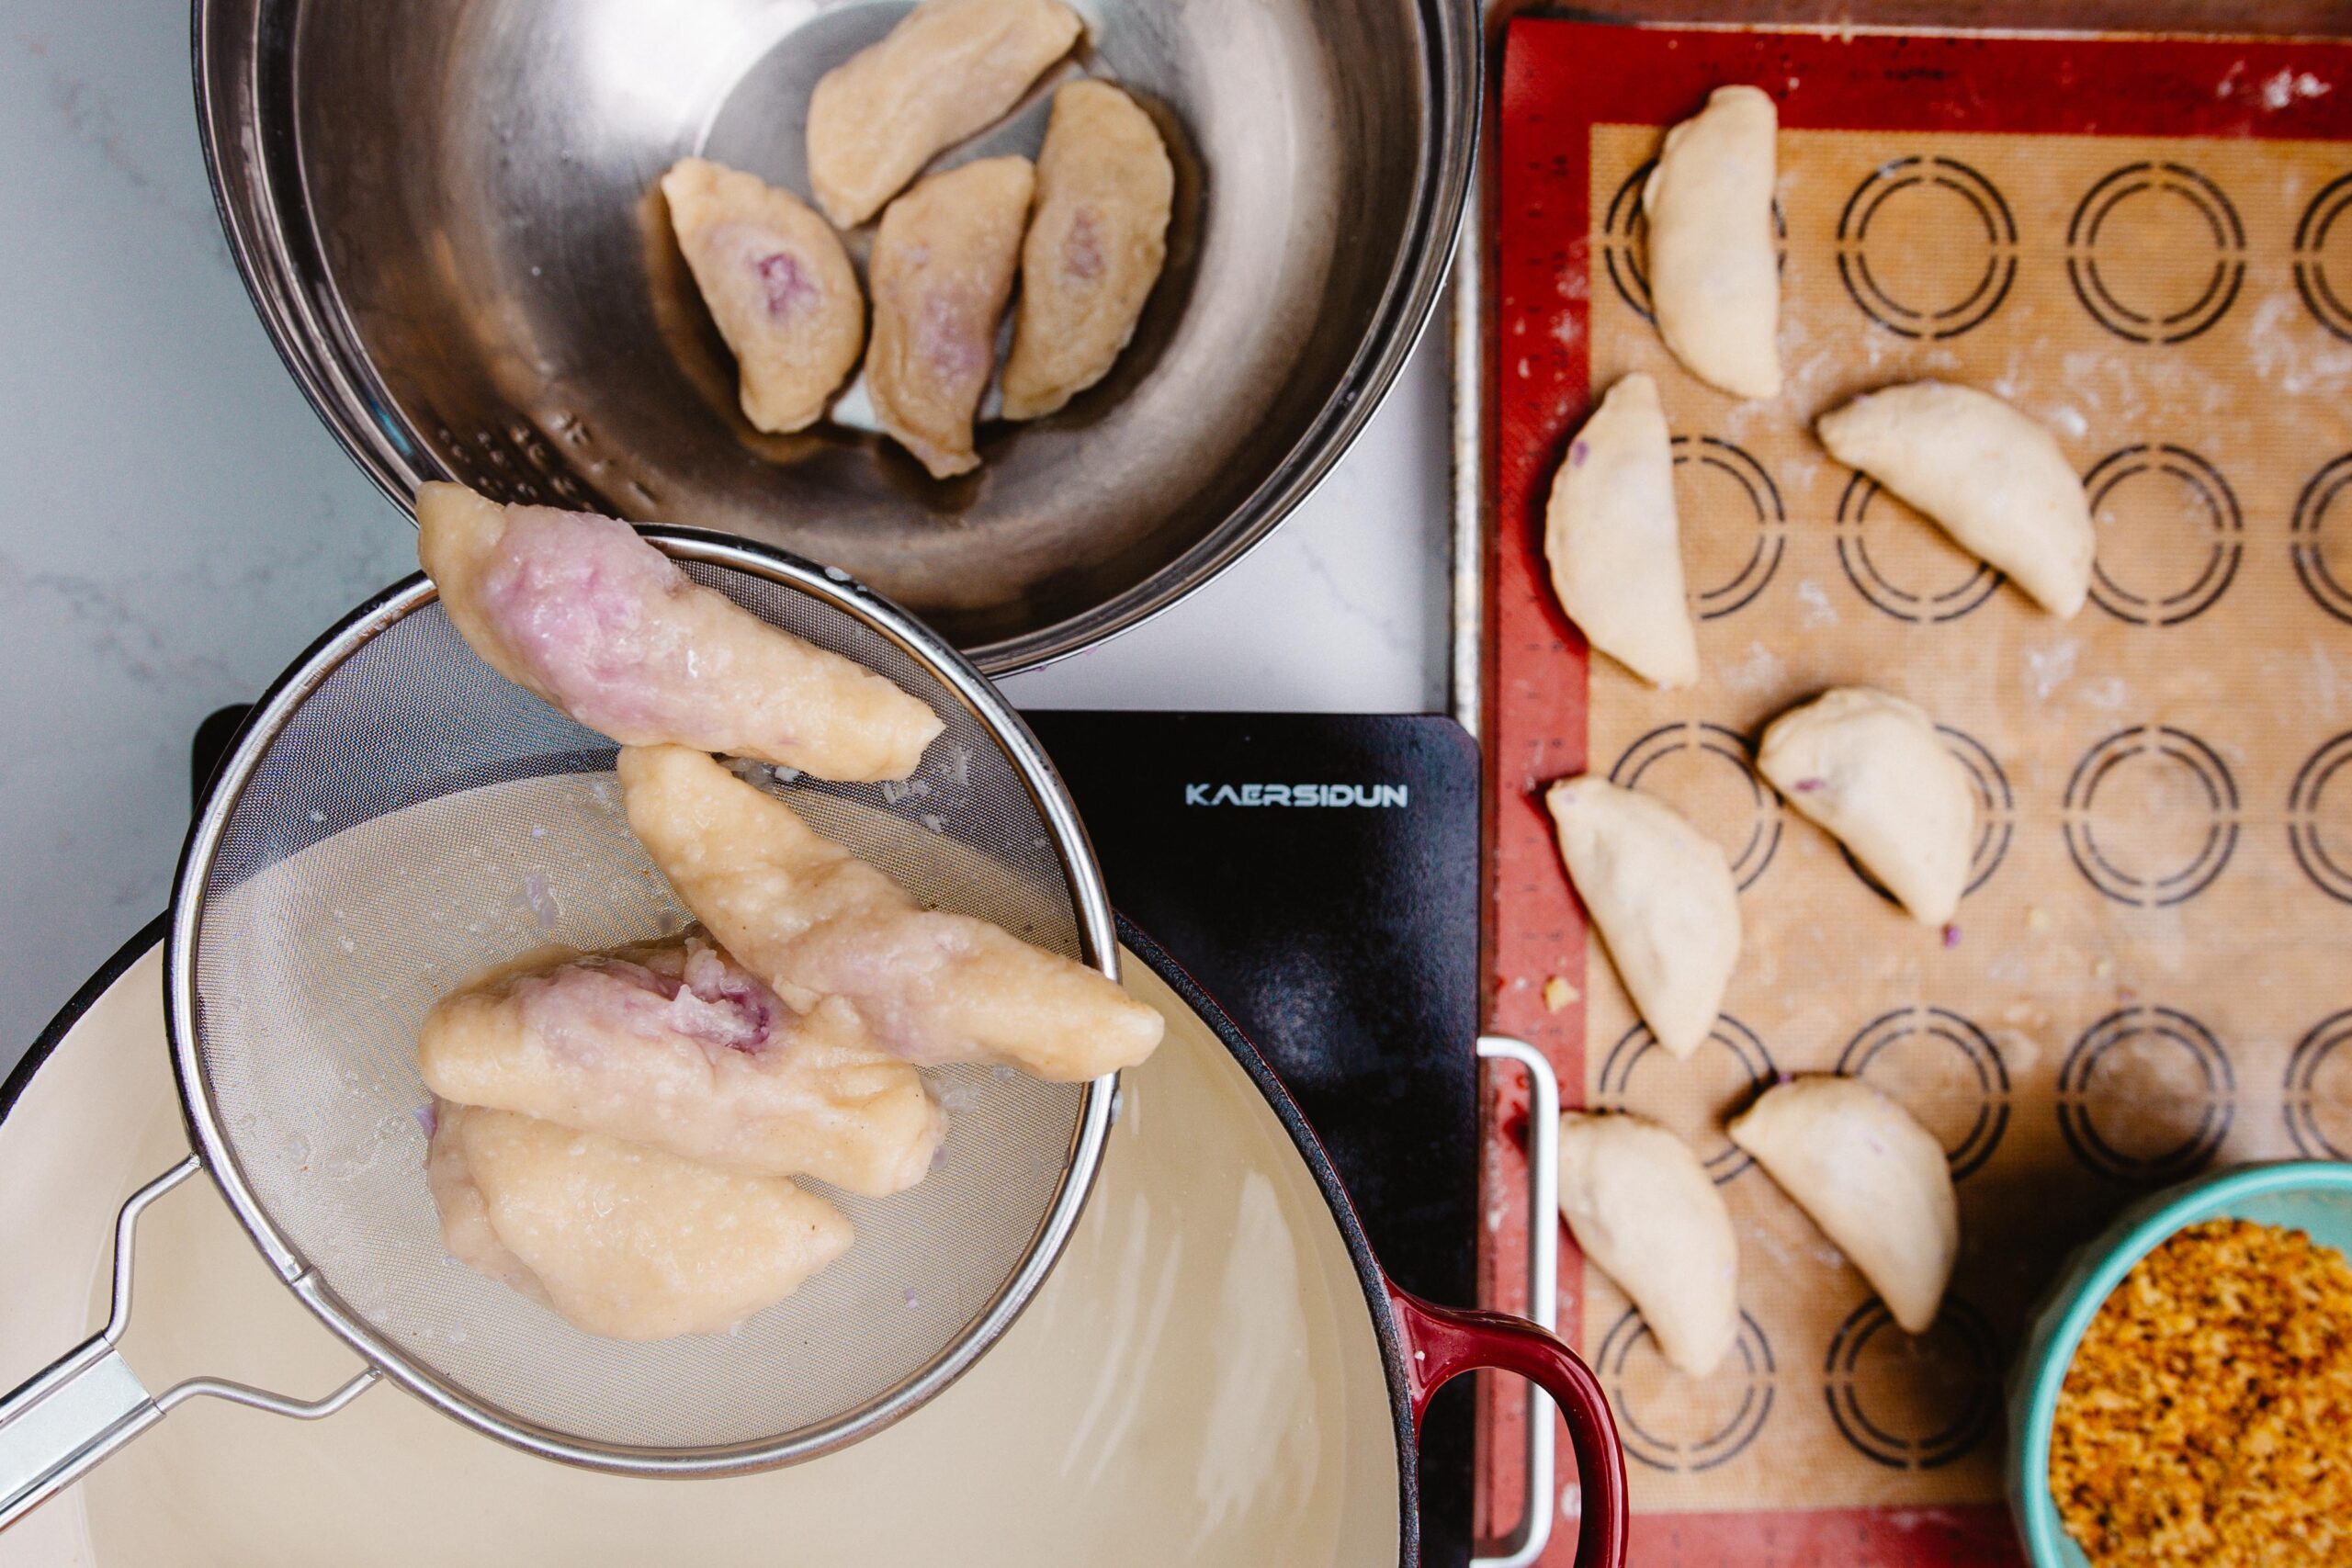
A trick that I use is to Freeze the dumplings on a sheet tray once they are made, working on the next batch. This will harden the filling and the dough enough to prevent any tearing before you cook them in the boiling water.
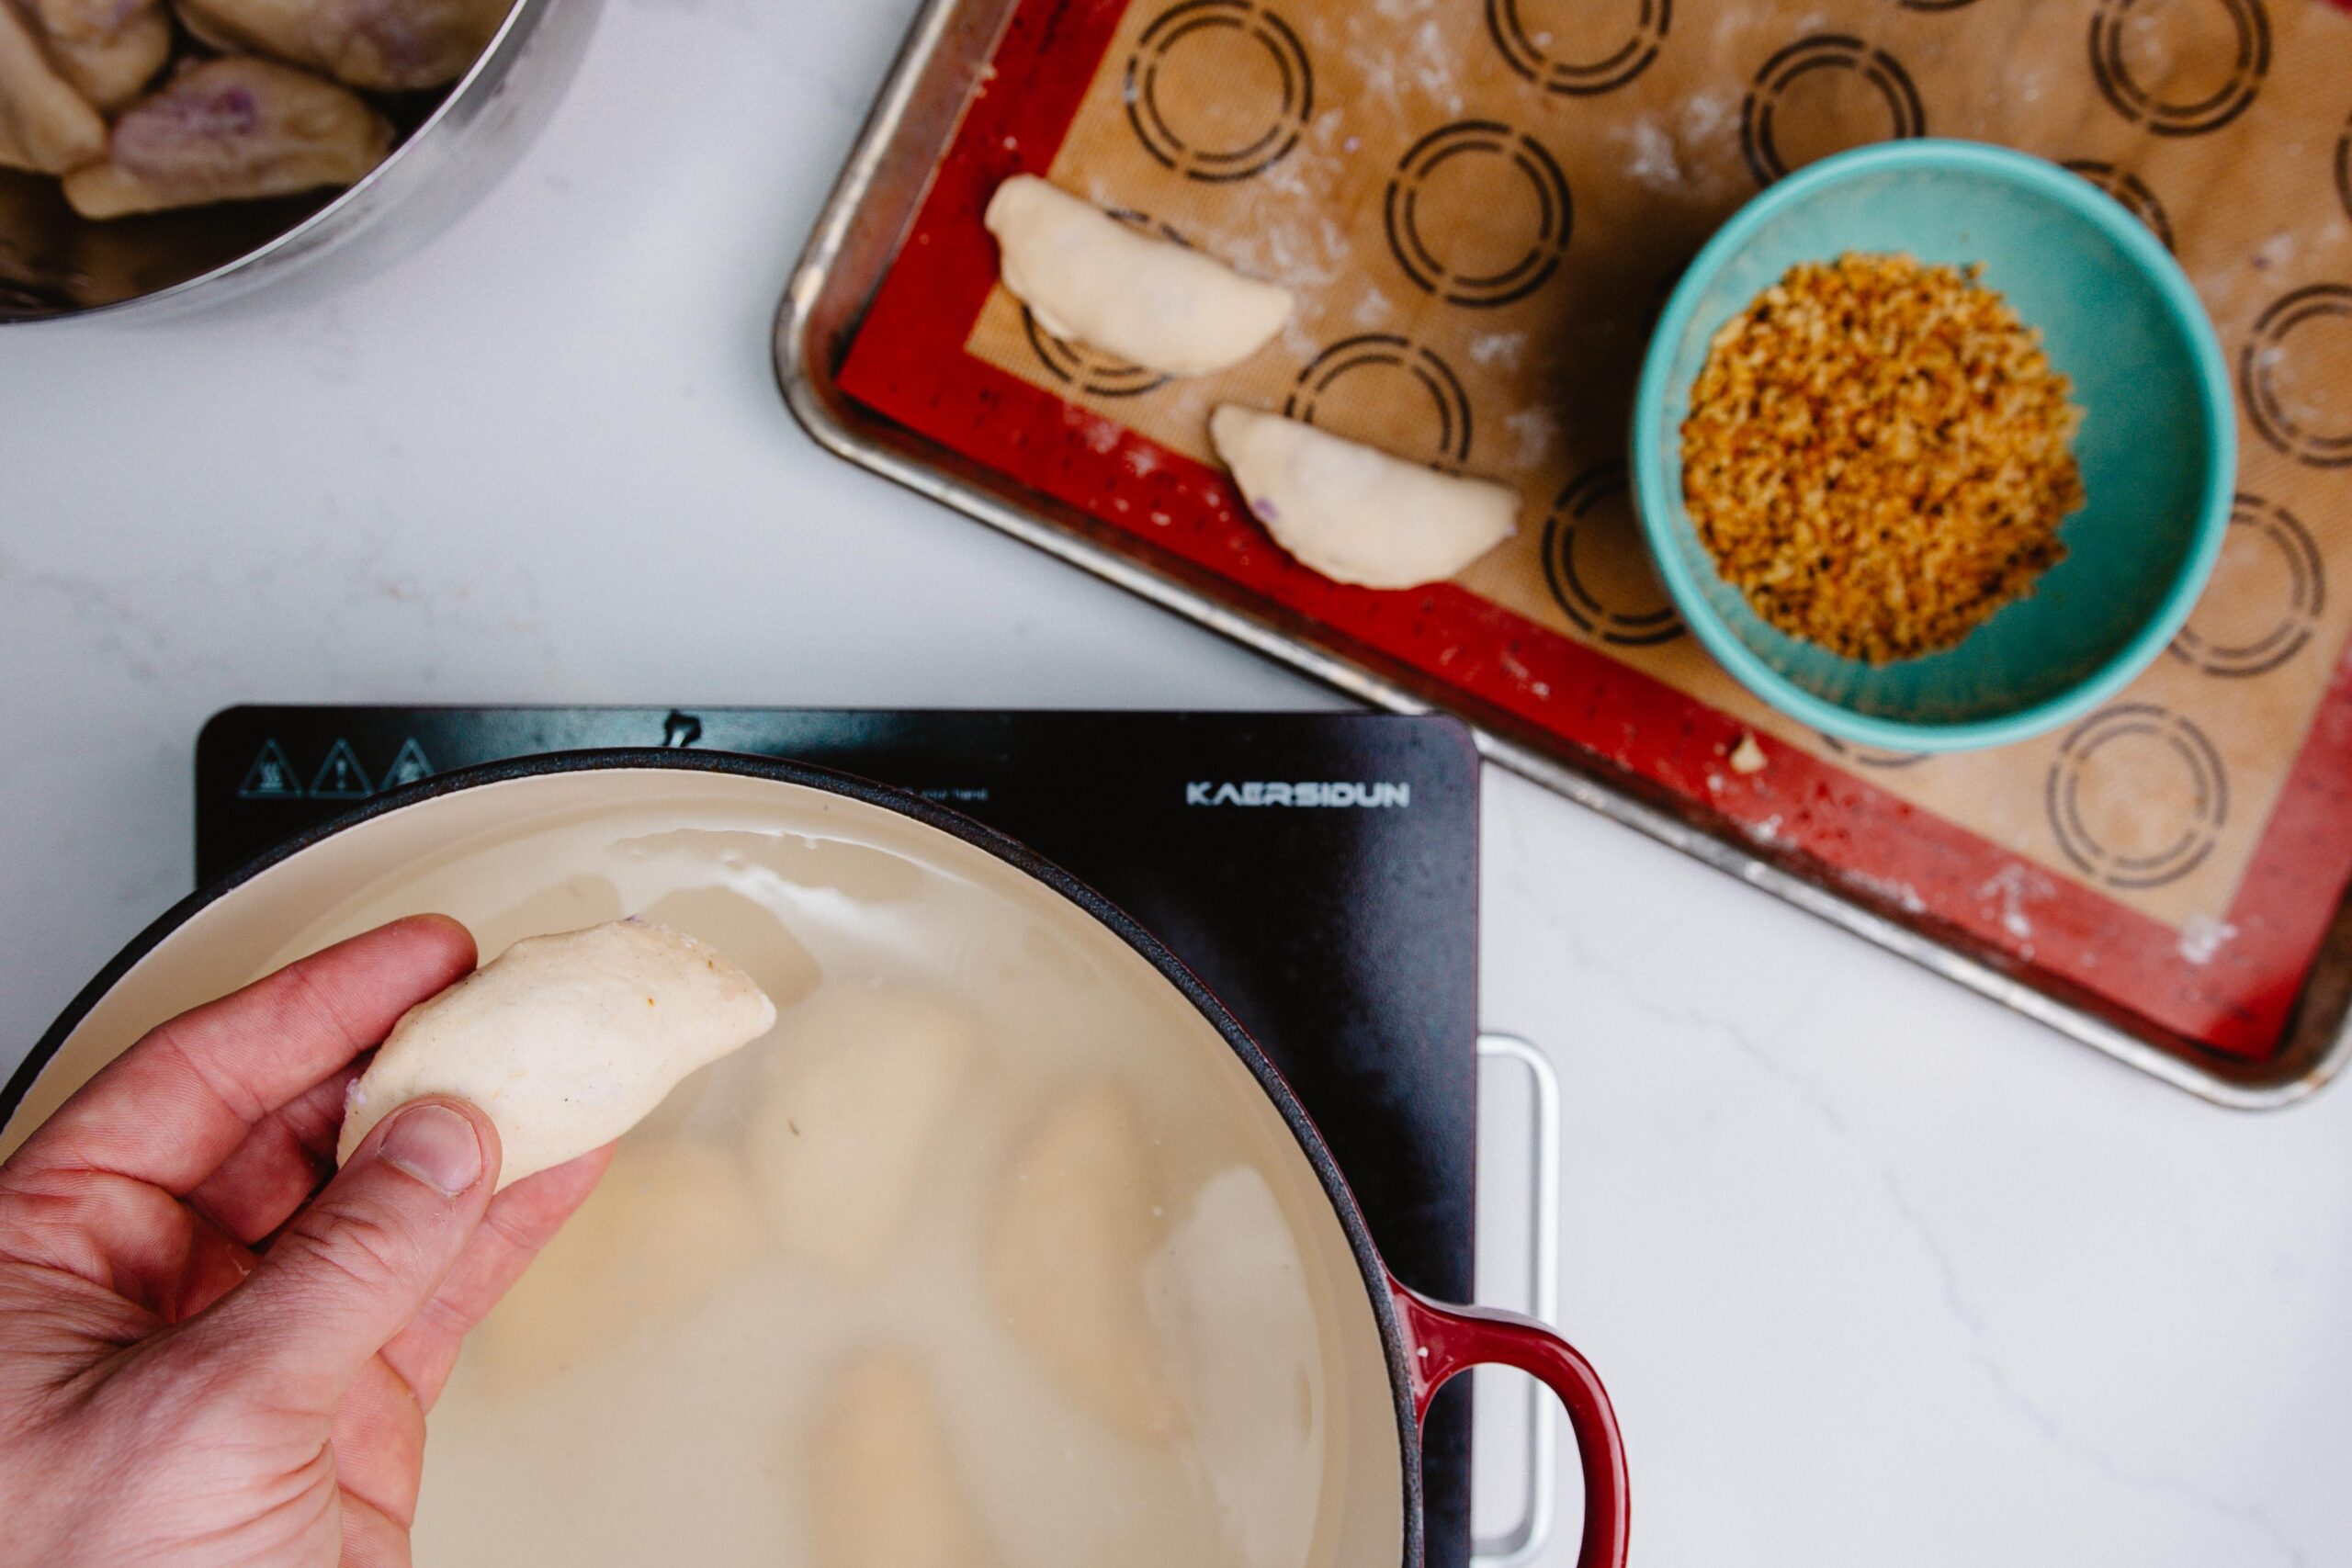
Once your dumplings are finished and frozen, bring a large pot of salted water to a rolling boil, add your desired amount of Pierogis in and cook until they float!
Be sure to check that they’re not sticking to the bottom of the pot with a spatula, or they won’t float.
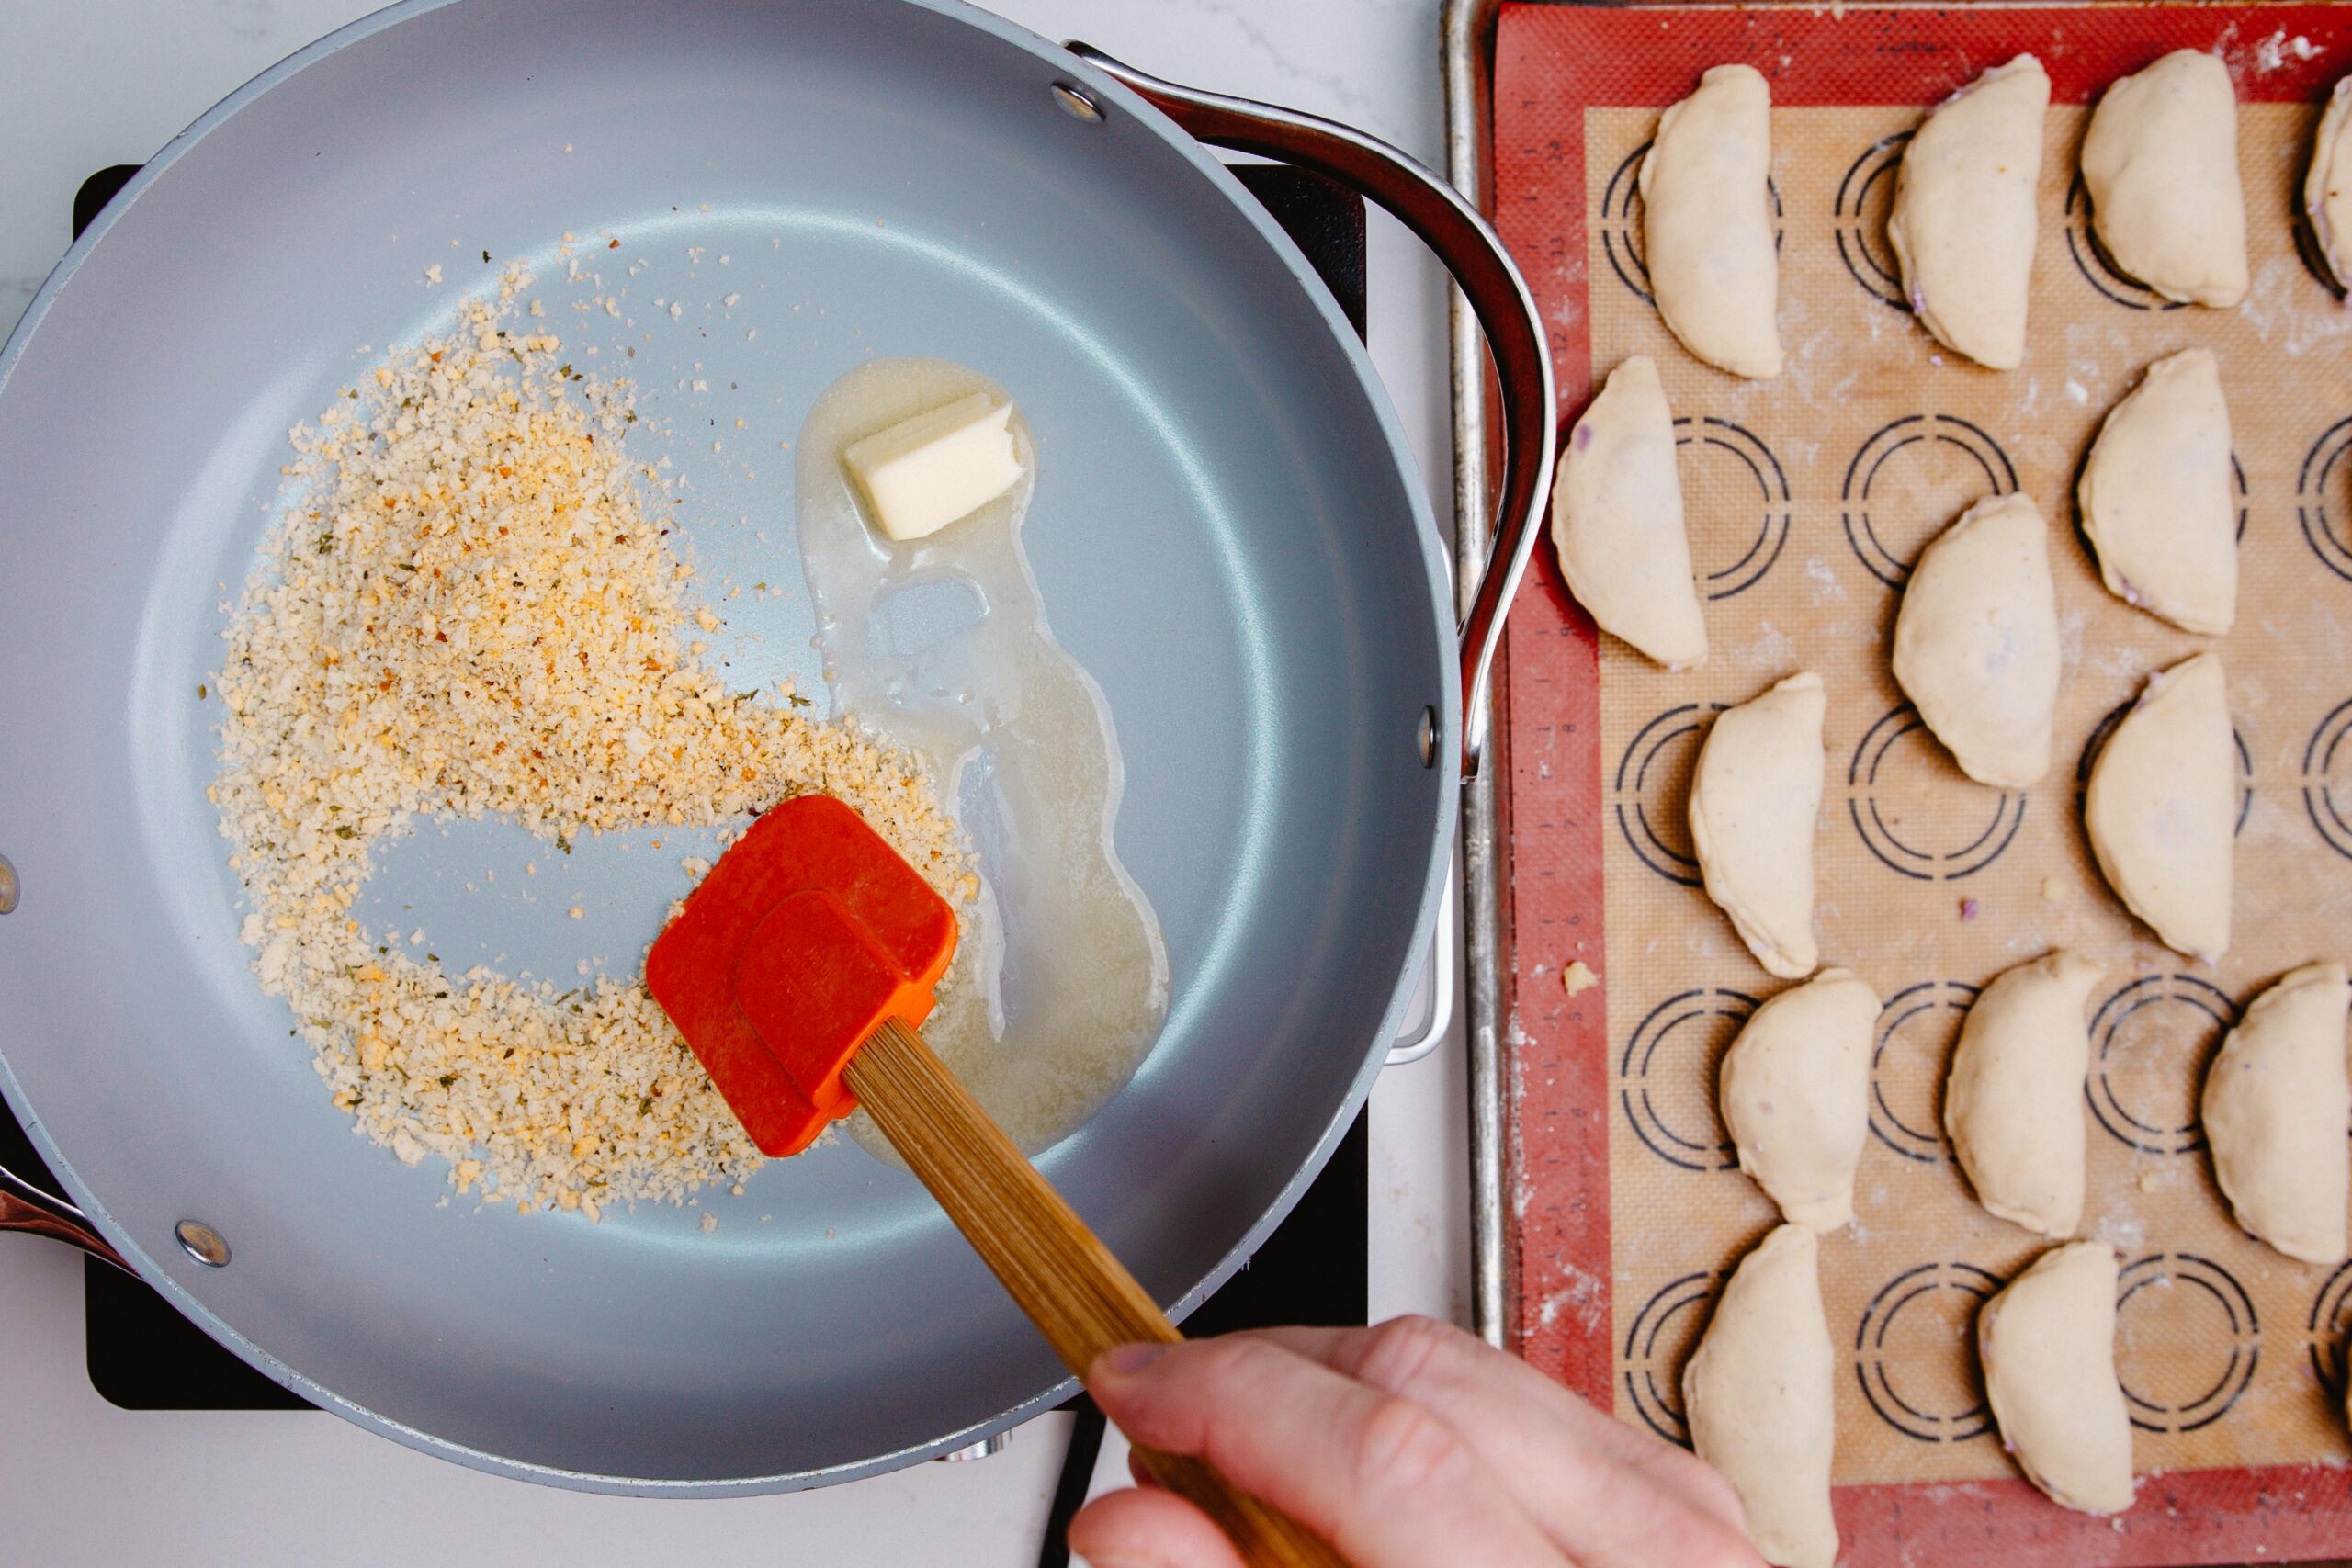
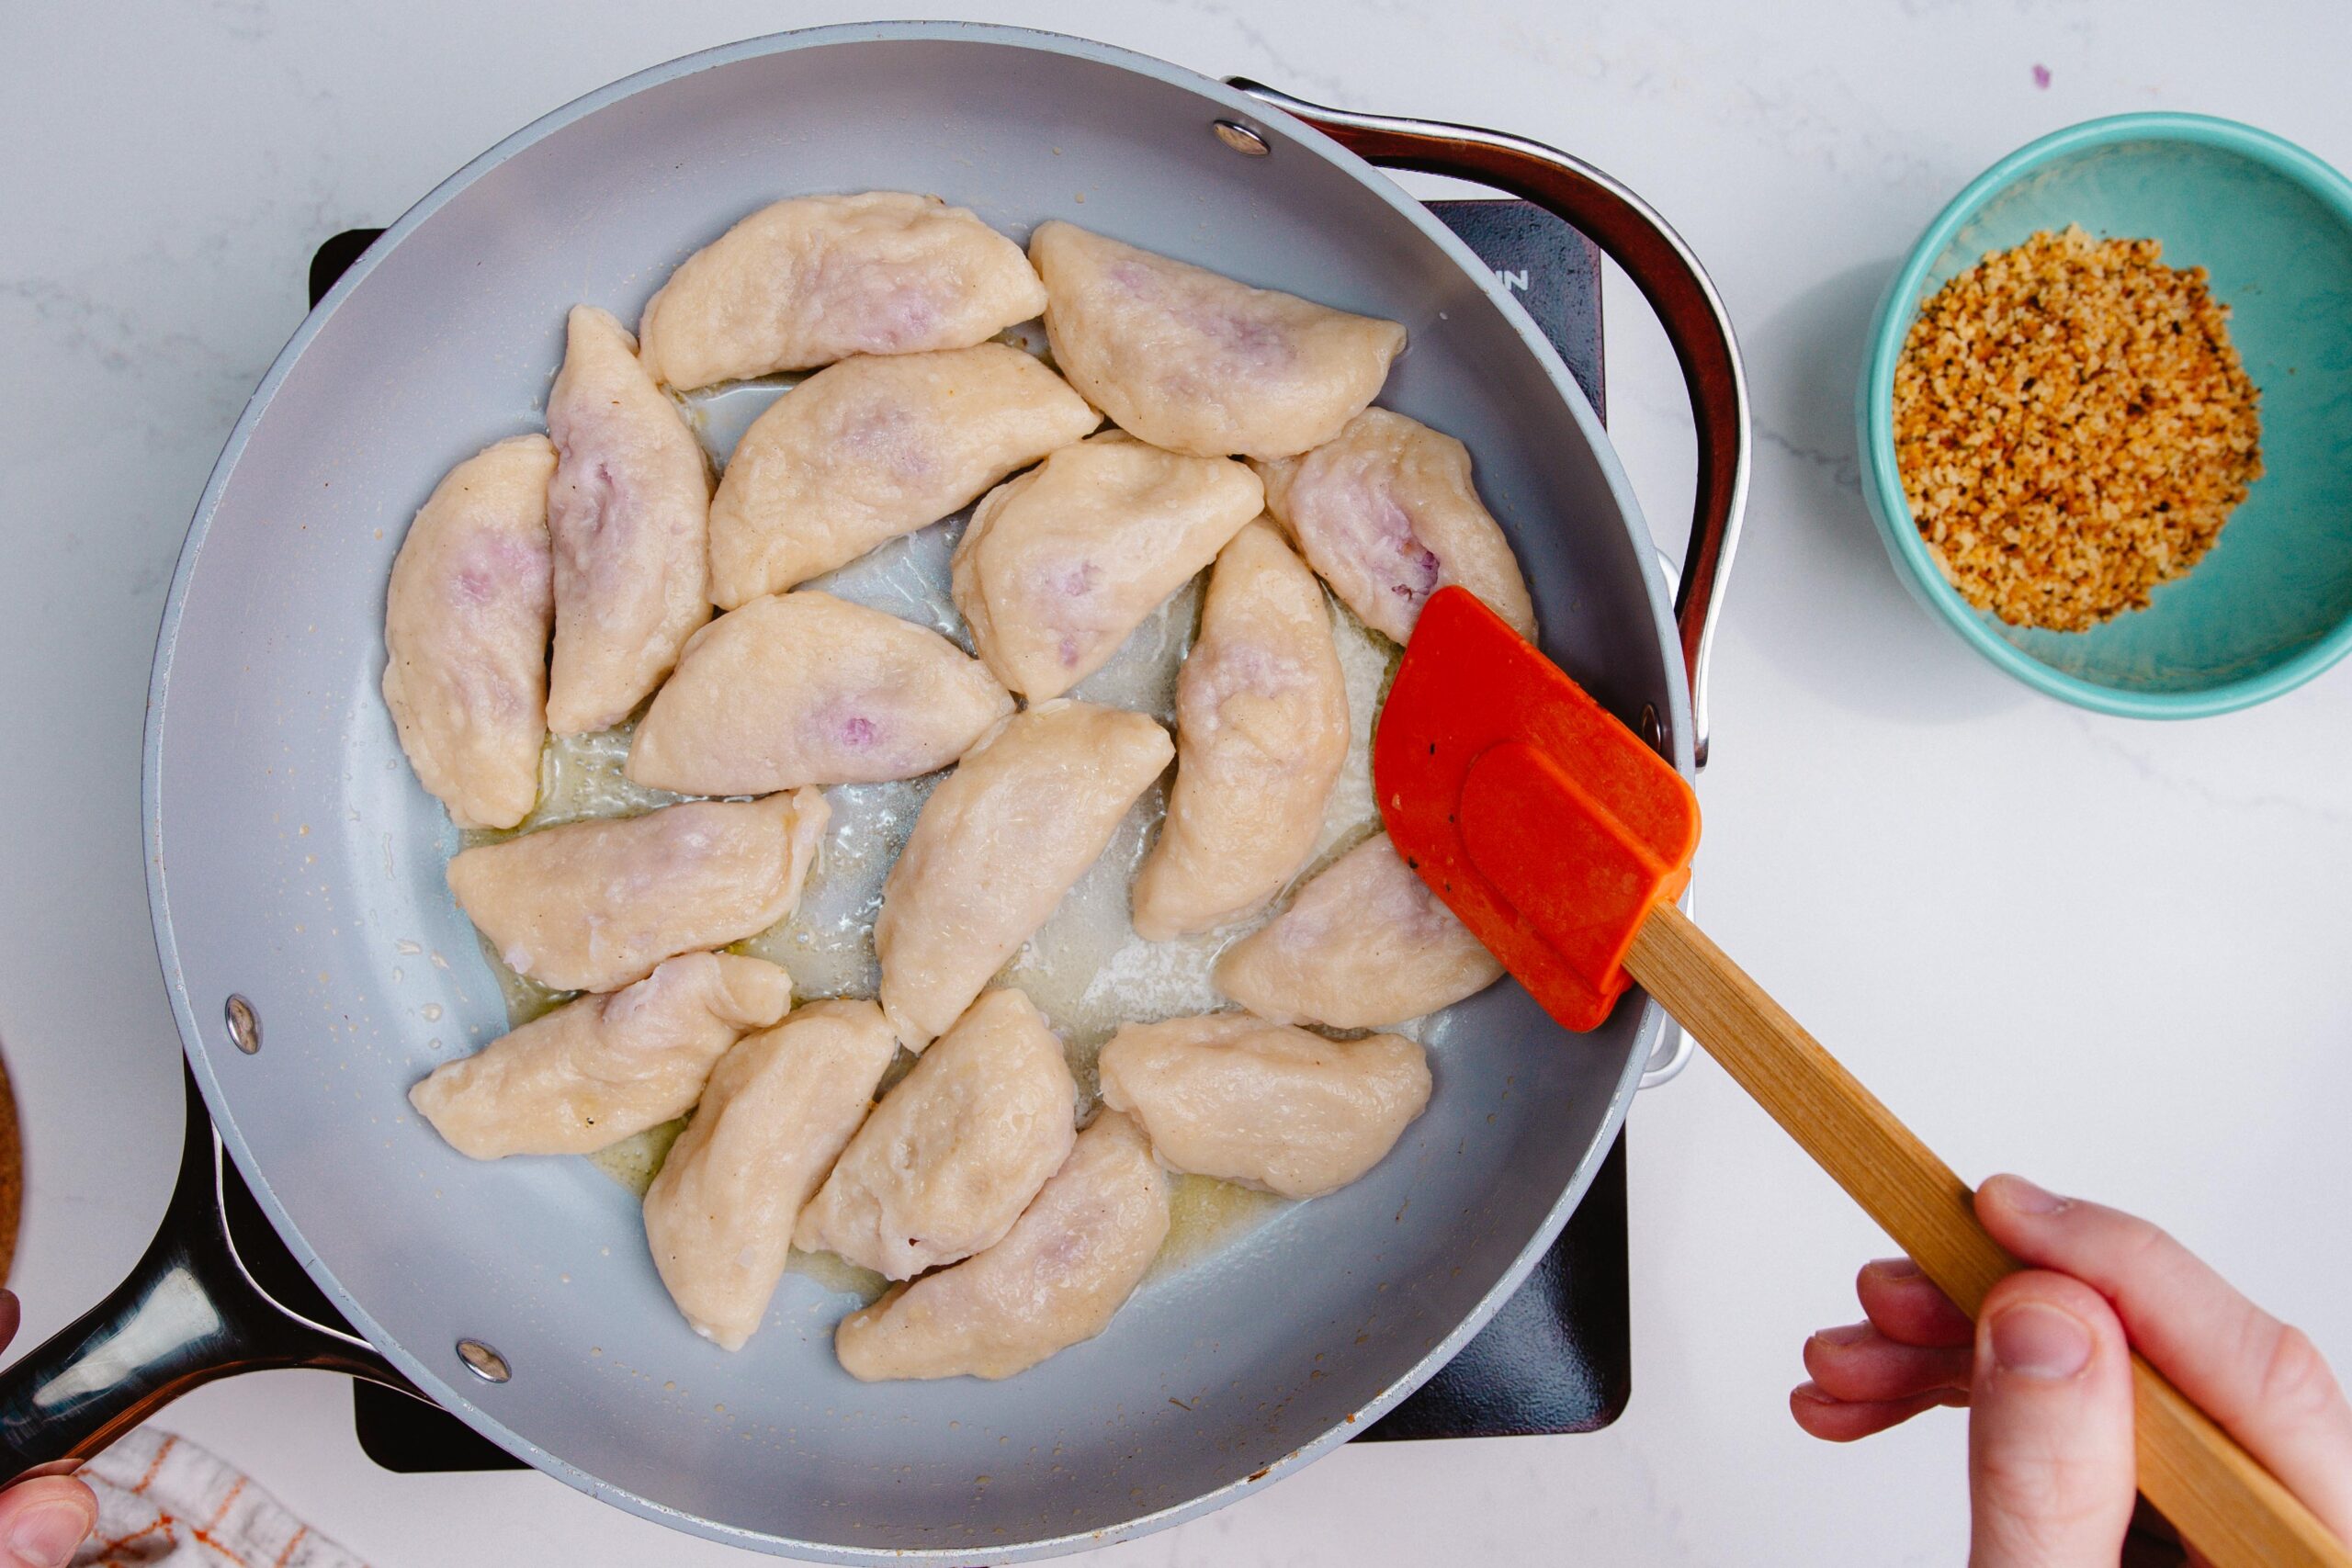
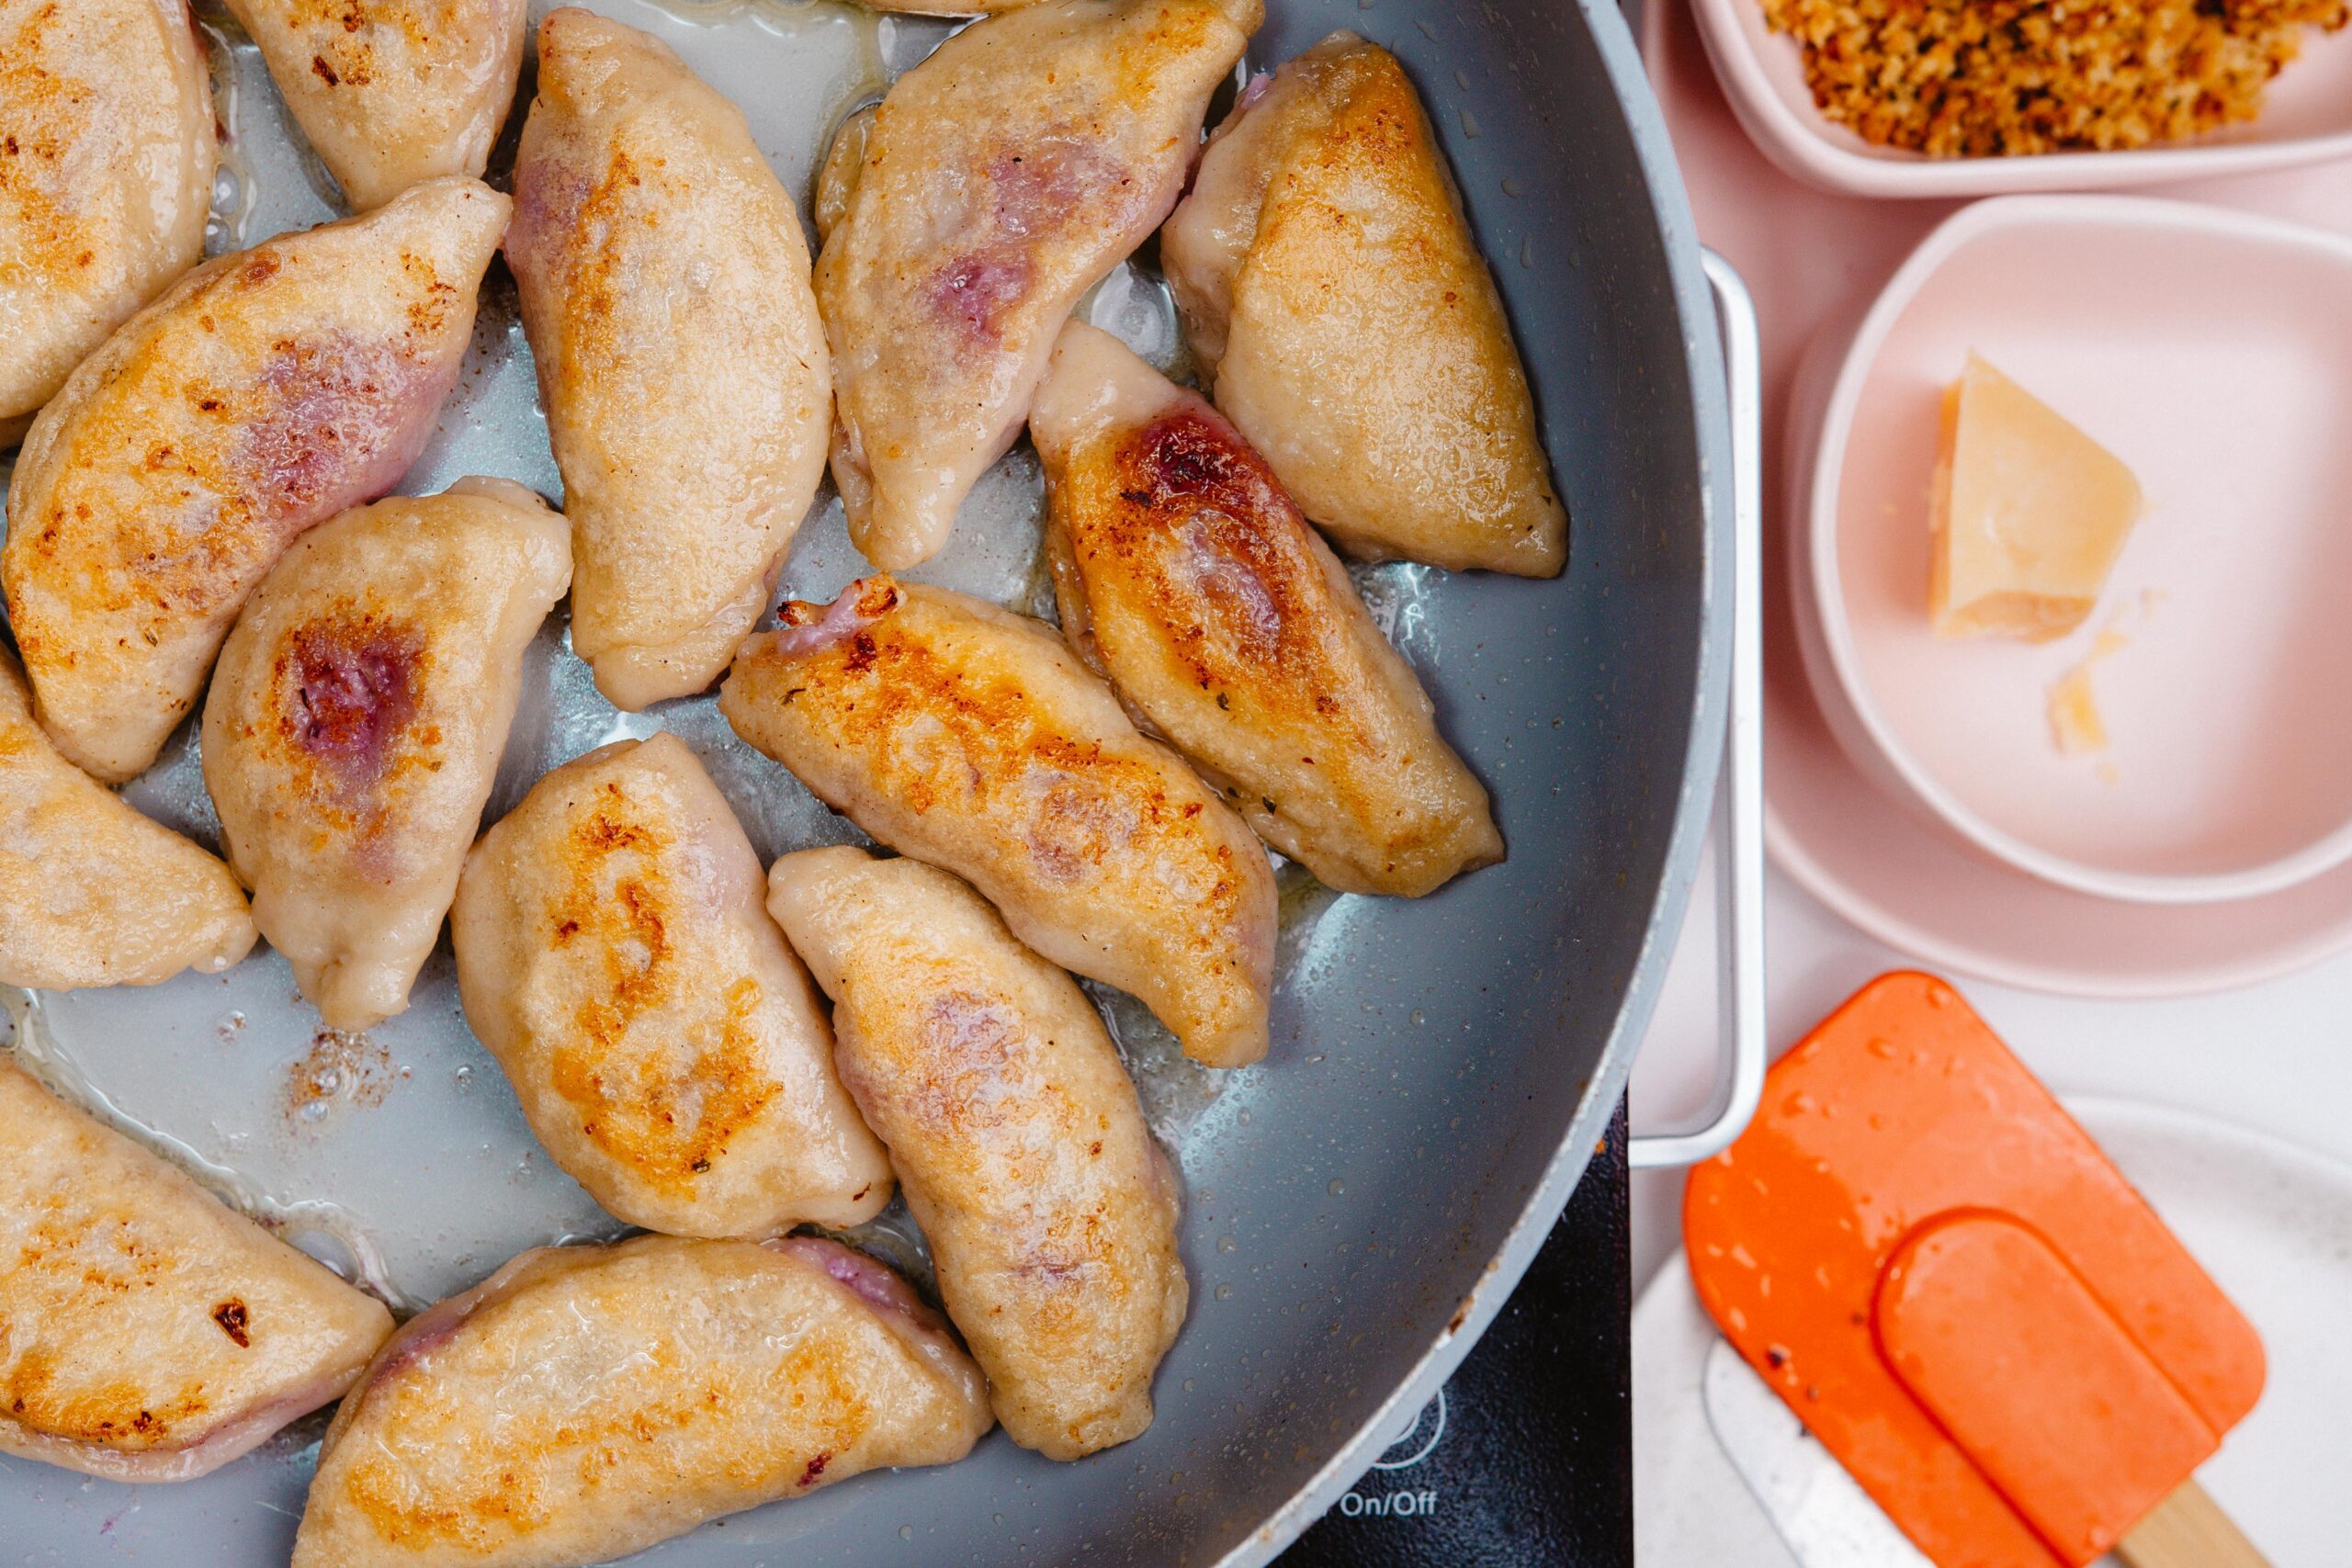
Once they’re floating (about 4-6 minutes) you can remove them with a colander and pan fry them with some oil and butter over medium heat until they’re crispy and browned. The best trick to ensure a beautifully golden pierogi is to either dry them on a towel first or allow them to gently cook, undisturbed, until the water has mostly evaporated. Periodically check your dumplings before flipping them and remember that generally the center of the pan will cook faster than the outside, so rotate your pierogis halfway.
And voila! You have made one of the most delicious dishes I could ever recommend! Feel free to substitute the filling for almost anything you’d like! Experiment with sweet pierogis and so much more!
NOTES:
- You can prepare the pierogis weeks in advance and freezing them.
- These take time to make, so prepare a solid 2 hours and maybe get some family members to help! It’s fun!
- Get creative and think about flavor, rather than following the exact recipe.
- I served this with some toasted breadcrumbs and dill sour cream, but you can serve these with anything that sounds good!


Other Recipes You Might Like

